
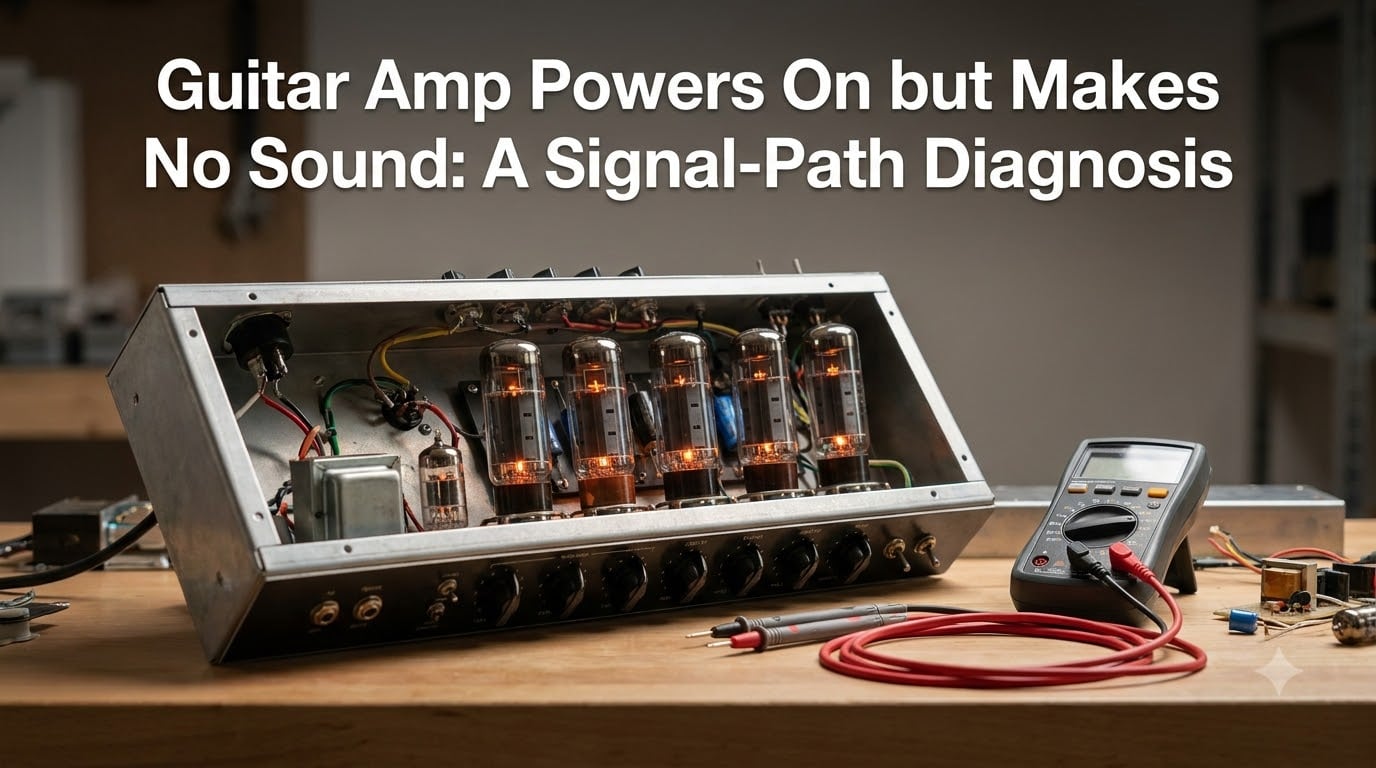
You plug in, flip the power switch, and the pilot light glows. The tubes warm up, the front panel looks alive, but when you hit a chord, there is nothing. Total silence. If your guitar amp powers on but no sound comes through the speaker, the problem almost always lies somewhere along the signal path, not the power supply. A working power light tells you mains voltage is reaching the transformer. The real question is whether the audio signal can travel from your guitar’s output jack all the way to the speaker.
I have spent years diagnosing tube and solid-state amplifiers, and the power-on-but-silent symptom is one of the most common issues players encounter. The good news is that you can narrow down the cause methodically without expensive test equipment. The key is following the signal from input to output and isolating where it stops. This guide walks through every stage of that path, from a 5-minute external check to internal tube substitution and effects loop diagnostics.
Whether you are dealing with a Fender Blues Junior, a Marshall DSL, or a solid-state practice amp, the diagnostic logic stays the same. By the end of this walkthrough, you will know exactly where the signal is breaking down and whether you can fix it yourself or need to hand the amp to a technician. Let me start with the critical safety information you need before opening anything up.
Quick answer: A guitar amp that powers on but makes no sound has a break in the signal path between the input jack and the speaker. The most common causes are a faulty preamp tube, a dirty effects loop jack, a blown HT fuse, a failed speaker cable, or an oxidized input jack contact. Start by swapping cables and the first preamp tube, then jump the effects loop to isolate the problem section.
Table of Contents
Safety Warnings Before You Open the Chassis
Tube amplifiers carry lethal voltages even after being unplugged. The large filter capacitors inside the power supply can hold up to 500 volts DC for days after the amp is powered off. Touching the wrong component can deliver a shock powerful enough to stop your heart. I cannot stress this enough: if you are not comfortable working around high voltage, stop here and take the amp to a qualified technician.
Before touching anything inside the chassis, follow these precautions. Unplug the amplifier from the wall outlet completely. Wait at least 30 minutes for the tubes to cool and filter capacitors to begin discharging. If you know how, use a insulated jumper wire with alligator clips to drain the capacitors by connecting the positive terminal of the main filter cap to the chassis ground. Wear rubber-soled shoes, keep one hand behind your back when probing, and never work on a powered amplifier alone.
Solid-state amplifiers also carry dangerous voltages on the primary side of the power transformer, though the rail voltages on the secondary side are typically lower (35 to 80 volts DC). The same unplugging rule applies. Never probe inside a powered amp unless you are a trained technician using proper high-voltage probes and an isolation transformer.
Warning: Never power on a tube amplifier without a speaker cabinet connected. Running a tube amp with no speaker load, or with the impedance selector set to the wrong position, can destroy the output transformer in seconds. Output transformer replacement costs more than most repairs. Always verify the speaker cable is plugged in and the impedance matches before flipping the standby switch.
Quick Diagnostic Checklist: 5 Checks in Under 5 Minutes
Before pulling a single screw or ordering replacement tubes, run through this checklist. I have seen at least 40 percent of no-sound cases resolved right here. These are the external, easy-to-check items that players overlook when panic sets in.
Swap the instrument cable. Cables fail internally more often than any other component in your signal chain. Try a known-good cable from guitar to amp input.
Plug the guitar into a different amp or an audio interface. If it produces sound elsewhere, the guitar is not the problem.
Check every volume, gain, and master control. Make sure none are at zero and that no channel-switching footswitch is stuck on a blank channel.
Verify the speaker cable is connected at both the amp’s speaker output and the cabinet. Use a speaker cable, not an instrument cable, for this connection.
Jiggle the input jack with a cable plugged in. If you hear crackling or momentary sound, the jack contacts need cleaning.
If none of these resolve the issue, the problem is inside the amplifier. The sections below walk through the internal signal path from input to output, checking each stage in order of likelihood and ease of testing.
Basic External Checks: Cables, Input Jack, and Controls
Instrument Cable Failure
The instrument cable is the single most common cause of a silent amp. Inside that rubber jacket are a center conductor and a shield, both soldered to connectors that flex every time you plug or unplug. A broken center conductor produces exactly the symptom you are seeing: the amp powers on, the pilot light is bright, but no signal reaches the preamp. Swap in a cable you know works. I keep a spare in my gig bag specifically for this diagnostic.
Input Jack Contact Oxidation
The input jack on your amplifier has spring contacts that touch the tip and sleeve of your guitar cable when you plug in. Over time, these contacts oxidize, especially in humid environments or amps that sit unused for months. The oxidation creates a high-resistance barrier that blocks the signal. Spray a small amount of contact cleaner (DeoxIT D5 is the industry standard) onto the contacts, plug a cable in and out a dozen times to scrape the contacts clean, and test again.
Volume, Gain, and Tone Control Positions
This sounds obvious, but I have lost count of how many players have driven to a repair shop because their master volume was at zero or their channel footswitch was stuck on a clean channel set to silence. Check every knob. If your amp has two channels, try the other one. If it has a footswitch, unplug the footswitch and use the front panel switch. Some amps mute output when the footswitch jack is partially inserted or shorted.
Standby Switch Behavior
Many tube amps have a separate standby switch that cuts high voltage to the tubes while keeping the filaments lit. If the standby switch is in the standby position, the amp will appear fully powered (pilot light on, tubes glowing) but produce no sound. Flip the standby switch to the operate position and wait 30 seconds for the tubes to conduct. If the switch itself is faulty, it may need replacement, but that requires chassis access.
Power Supply Inspection: Fuses, Filaments, and the Pilot Light
Pilot Light Verification
The pilot light confirms that mains voltage is reaching the power switch. If the pilot light is on, your wall outlet, power cable, and mains fuse are all functioning. If the pilot light is off but the amp seems to power on (tubes glow), check the pilot lamp bulb itself, which can burn out independently. If neither the pilot light nor the tubes glow, you likely have a blown mains fuse or a dead power transformer.
Mains Fuse vs HT Fuse
Most tube amplifiers have at least two fuses: a mains fuse on the AC primary side and an HT (High Tension) fuse on the high-voltage DC secondary side. The mains fuse protects against power transformer failures and short circuits on the primary. The HT fuse protects the high-voltage supply that feeds the tubes. If the mains fuse blows, the amp will be completely dead (no pilot light, no tube glow). If only the HT fuse blows, the amp will power on and tubes will glow, but there will be no high voltage to amplify signal. This is a classic power-on-but-no-sound scenario.
Locate the HT fuse holder, usually marked HT, B+, or HV on the chassis or rear panel. Remove the fuse and inspect the wire inside. If the wire is broken or the glass is darkened, the fuse has blown. Replace it with the exact same rating and type (never substitute a higher-rated fuse). If the replacement HT fuse blows immediately, you have a short circuit in the high-voltage supply, likely a failed output tube, a shorted filter capacitor, or a damaged output transformer. This requires professional diagnosis.
Filament Voltage and Tube Glow
Tube filaments operate on a low-voltage AC supply (typically 6.3 volts) that is separate from the high-voltage B+ supply. Tubes can glow orange from the filament heater even when the high-voltage supply has failed. This is why a glowing tube does not confirm that the amplifier is functional. Filament glow only tells you the heater circuit is alive. The actual audio amplification happens when high-voltage DC flows through the plate circuit, and that requires the HT supply to be intact.
Tube Inspection Guide: Filaments, Substitution, and Red Plates
Identifying Preamp vs Power Tubes
In a typical tube amp, the signal passes through preamp tubes first (usually 12AX7 or 12AT7 types, the smaller ones) and then through power tubes (6L6, EL34, 6V6, EL84, depending on the amp). The preamp tubes shape the tone and provide initial voltage gain. The power tubes deliver the current needed to drive the speaker. Knowing which tubes do what helps you diagnose efficiently.
The Substitution Method
The fastest way to isolate a bad tube is substitution. Keep a known-good 12AX7 on hand for this purpose. Power down the amp, let it cool, and swap the known-good tube into the V1 position (the first preamp tube, closest to the input jack). Power up and test. If sound returns, the original V1 tube was the culprit. If still no sound, move the known-good tube to V2, V3, and so on through the preamp section. I have fixed more no-sound issues with a single spare 12AX7 than with any other tool.
Preamp Tube Priority Order
If you do not have a spare tube, you can still check the preamp section using the tubes already in the amp. Pull the tube from V1 and move it to V2, then move V2 to V3, shifting each tube one position. Power up and test after each move. If the symptom changes (you get partial sound, or the amp starts working), you have identified the bad tube by the position it vacated. Label each tube as you remove it so you do not lose track.
Red Plating Warning
Red plating occurs when a power tube’s plate glows cherry red, visible through the glass. This means the tube is drawing excessive current and will self-destruct within minutes if not shut down. Red plating is not a no-sound symptom per se, but it can lead to one. If you see a power tube glowing red, power off immediately. The tube is likely shorted internally, and continuing to run the amp will blow the HT fuse or damage the output transformer. Replace the offending tube before powering on again.
White Residue and Loose Tube Bases
Inspect each tube for a white, chalky residue around the base or a silvery mirror coating inside the glass that has turned milky white. This indicates the tube has lost its vacuum and is dead. A tube with a loose base (the plastic or ceramic base wiggles relative to the glass) can develop intermittent internal connections that cause signal dropouts. Gently wiggle each tube while the amp is on (use a glove, tubes get hot) and listen for crackling. Any tube that crackles when moved should be replaced.
Effects Loop Diagnostics: The Jump Test
What the Effects Loop Does
The effects loop sits between the preamp and the power amp sections. It uses two jacks on the rear panel: a send jack (which taps the signal after the preamp) and a return jack (which feeds the signal into the power amp). When no cables are plugged into these jacks, internal switching contacts pass the signal directly from preamp to power amp. When the contacts become dirty or oxidized, the signal path breaks and the amp goes silent.
The Jump Test
This is one of the most useful diagnostic tricks in amp troubleshooting. Take a short instrument cable (a patch cable works well) and plug one end into the effects loop send jack and the other into the return jack. This bypasses the internal switching contacts and forces the signal through the cable directly. If sound returns when you do this, the problem is oxidized contacts in either the send or return jack.
If the jump test restores sound, spray contact cleaner into both jacks and insert a cable plug a dozen times to clean the contacts. In some cases, the switching contact inside the jack has lost its spring tension and will need replacement, which is a soldering job. But cleaning solves the problem the vast majority of the time. I recommend plugging and unplugging a cable into the effects loop jacks every few months as preventive maintenance, especially if you do not normally use the loop.
Effects Loop as a Diagnostic Divider
The effects loop also tells you which half of the amp has the problem. If you plug your guitar directly into the effects loop return jack and you hear sound (typically a clean, loud tone), then your power amp section, output transformer, and speaker are all working. The problem is in the preamp section. If plugging into the return jack produces no sound, the problem is in the power amp, output transformer, or speaker chain. This single test narrows your search area dramatically.
Speaker Connection Check: Cables, Cabinets, and Jacks
Speaker Cable vs Instrument Cable
One of the most common and easily overlooked causes of no sound is using an instrument cable instead of a speaker cable to connect the head to the cabinet. Instrument cables have a shielded center conductor designed for high-impedance, low-current signals. Speaker cables have two unshielded conductors designed for high-current, low-impedance signals. An instrument cable used as a speaker cable can fail under current load, creating an open circuit that produces no sound. Check the cable labeling: speaker cables usually say “speaker” and have thicker, more flexible jackets.
Resistance Testing with a Multimeter
If you have a multimeter, set it to the ohms (resistance) setting. Unplug the speaker cable from the amplifier’s speaker output jack and measure the resistance across the tip and sleeve of the free end. You should read roughly the impedance rating of your cabinet: approximately 4 ohms for a 4-ohm cabinet, 8 ohms for an 8-ohm cabinet, and 16 ohms for a 16-ohm cabinet. The reading will be slightly lower than the nominal rating, which is normal. If you read infinite resistance (open circuit), either the cable, the speaker, or the cabinet wiring has failed.
Headphone Jack Switch Contacts
If your amp has a headphone jack, it likely has a switching contact that disconnects the main speaker when headphones are plugged in. Over time, this contact can become oxidized or mechanically stuck in the disconnected position. The result is an amp that powers on and produces signal at the headphone jack but sends nothing to the main speaker. Plug and unplug a headphone connector a dozen times with the amp off to clean the switch contact, or spray contact cleaner into the jack.
Signal Path Walkthrough: Tracing from Input to Output
Understanding the complete signal path lets you diagnose any no-sound issue systematically. The audio signal in a guitar amplifier follows a specific chain, and each link in that chain can break. Here is the full path, stage by stage, with what can go wrong at each point.
Stage 1: Input Jack to V1 Preamp Tube
The signal enters through the input jack, passes through a coupling capacitor and a grid resistor, and reaches the grid of the first preamp tube (V1). The input jack’s switching contact is a common failure point. If it does not make contact with the cable tip, the signal never reaches V1. The coupling capacitor, if leaky or shorted, can shift the grid voltage and cut off the tube. V1 itself is the most heavily worked tube in the amp and the most likely to fail. Always test V1 first.
Stage 2: Tone Stack and Volume Controls
After V1, the signal passes through the tone stack (bass, mid, treble controls) and the volume or gain control. These are passive circuits using potentiometers and capacitors. A failed volume potentiometer with an open wiper contact will block all signal. If the signal passes through V1 but dies at the volume control, rotating the knob may produce scratching noises or momentary audio bursts. This indicates a dirty or worn potentiometer. Spray contact cleaner into the pot through the small gap in the housing and rotate the knob fully several times.
Stage 3: Second and Third Preamp Stages
In multi-channel amps, the signal continues through V2 and possibly V3, which handle additional gain stages, channel switching, and reverb or effects recovery. Each of these tubes can fail independently. A dead V2 may kill one channel while the other works fine. If one channel produces sound and the other does not, suspect the tube and switching components unique to the silent channel.
Stage 4: Effects Loop Send and Return
The signal reaches the effects loop send jack, passes through the switching contact, and enters the return jack on its way to the phase inverter. As covered above, dirty switching contacts here are a leading cause of complete signal loss. The jump test isolates this stage instantly.
Stage 5: Phase Inverter Tube
The phase inverter (usually a 12AX7 in push-pull amps) splits the signal into two opposite-phase halves to drive the power tubes in push-pull configuration. If the phase inverter tube fails, the power tubes receive no drive signal and the amp is silent. The phase inverter is often the last 12AX7 in the preamp tube row. Substitute a known-good tube here if all earlier stages check out. Many players overlook the phase inverter because it is less obvious than V1, but it is just as critical.
Stage 6: Power Tubes
The power tubes (6L6, EL34, 6V6, EL84, KT88, etc.) amplify the signal to the level needed to drive the speaker. If both power tubes fail simultaneously, the amp is silent. This is less common than a single bad preamp tube, but it does happen, especially in amps that have been run hard or stored for long periods. Power tubes usually fail in pairs if they are biased together, so if one goes, test both. Red plating, as described earlier, is the visible warning sign.
Stage 7: Output Transformer and Speaker Jack
The output transformer converts the high-voltage, low-current signal from the power tubes into the low-voltage, high-current signal the speaker needs. Output transformer failure is relatively rare but catastrophic. If the primary winding opens, the power tubes see no load and the amp is silent (and the tubes may red plate if the amp is still on). A shorted secondary winding can also cause no sound. Testing the output transformer requires specialized equipment or careful resistance measurements across the primary and secondary windings, comparing to known-good values for that amp model.
The speaker jack itself can have a switching contact that shorts the output to ground when no speaker is plugged in (a protective feature on some amps). If this contact is stuck in the grounded position, no signal reaches the speaker even with a cable plugged in. Inspect the jack for mechanical damage and test by plugging and unplugging the speaker cable while monitoring for sound.
Solid-State vs Tube Amp Diagnosis: Key Differences
Solid-state amplifiers use transistors and op-amps instead of vacuum tubes, and their failure modes differ in important ways. There are no tubes to swap, no filaments to inspect, and no output transformer in most designs. However, the signal-path logic still applies: the signal travels from input through preamp stages, through tone controls, to the power amplifier section, and out to the speaker.
Relay Mute and Protection Circuits
Most solid-state amps include a relay-based speaker protection circuit that disconnects the speaker at power-up to prevent thumps, and during fault conditions to protect the output transistors. If this relay fails to close after the startup delay (typically 2 to 5 seconds), the amp appears to power on but produces no sound. You may hear a faint click from the relay at startup. If you do not hear the click, the relay or its driver circuit has failed. This is a common solid-state no-sound cause and usually requires soldering work to fix.
DC Offset and Protection Triggering
If a solid-state amp develops DC voltage at the speaker output (from a failed output transistor or driver stage), the protection circuit detects it and keeps the relay open permanently. The amp will power on, the protection indicator LED may light up, but no sound reaches the speaker. Measuring DC voltage at the speaker terminals with a multimeter confirms this. Any reading above approximately 0.5 volts DC at the speaker output indicates a fault in the output stage.
Op-Amp and Transistor Failures
Solid-state preamps use op-amp ICs that can fail silently. Unlike tubes, there is no visual indication of failure. Signal tracing with an audio probe (a capacitor in series with a test lead connected to a small speaker or headphones) is the standard method for locating the dead stage in a solid-state amp. Touch the probe to the output pin of each op-amp in the signal path, working from input toward the power amp. The point where the signal disappears identifies the failed component.
When to Seek Professional Help
DIY troubleshooting has clear limits. If you have checked all external components, swapped tubes, jumped the effects loop, and tested speaker continuity without finding the problem, the issue is likely inside the circuit board and requires tools and expertise most players do not have. Here is where I draw the line between home diagnosis and professional repair.
Output Transformer Replacement
Output transformer failure requires specialized testing (impedance measurements, inductance checks) and replacement with a component matched to your amp’s specifications. Installing the wrong transformer will change the amp’s tone and may damage the power tubes. This is strictly a job for a qualified technician.
Plate Voltage Measurement
Measuring plate voltages inside a powered tube amp involves probing points that carry 300 to 500 volts DC. A slip of the probe can short a high-voltage point to ground, destroying components or causing injury. If diagnosis requires live voltage measurements inside the chassis, take the amp to a tech. The risk is not worth the repair savings.
Capacitor Replacement
Filter capacitors and coupling capacitors degrade over time. Electrolytic filter capacitors have a typical lifespan of 10 to 20 years. When they fail, they can cause hum, reduced output, or complete silence. Replacing them requires discharging the old capacitors safely, soldering new ones with correct polarity and voltage ratings, and reforming the new capacitors on initial power-up using a variac. This is standard work for any amp technician but dangerous for an untrained player.
PCB-Level Component Work
Modern amps often use printed circuit boards instead of point-to-point wiring. Replacing surface-mount components, repairing lifted traces, or accessing components buried under other parts requires soldering experience and specialized tools. If the problem requires removing the circuit board from the chassis, it is time to consult a professional.
Frequently Asked Questions
Why does my guitar amp turn on but produce no sound?
A guitar amp that powers on but produces no sound has a break in the signal path between the input jack and the speaker. The most common causes are a faulty preamp tube (especially V1), a dirty effects loop jack contact, a blown HT fuse, a failed speaker cable, or an oxidized input jack. Start by swapping the instrument cable and the first preamp tube, then jump the effects loop send to return to isolate the problem section.
How to fix an amplifier with no sound?
Follow this sequence: 1) Swap the instrument cable for a known-good one. 2) Check all volume and gain controls. 3) Swap the V1 preamp tube with a known-good 12AX7. 4) Jump the effects loop send to return with a patch cable. 5) Test the speaker cable with a multimeter set to ohms. 6) Check the HT fuse if the amp has one. If none of these steps restore sound, the problem is inside the circuit and requires professional repair.
Why am I getting power to my amp but no sound?
The pilot light confirms mains voltage reaches the power transformer, but audio signal requires a separate chain of components working in sequence. A blown HT fuse cuts the high-voltage supply that tubes need to amplify signal while leaving the filament supply (and pilot light) intact. Similarly, a dead preamp tube, dirty effects loop contact, or failed speaker cable all interrupt signal flow without affecting the power-on indicator.
Why is my amp not getting a signal?
An amp not receiving signal usually has a problem at the input stage. Check the instrument cable first, then clean the input jack contacts with contact cleaner. If the guitar produces sound through another amp, the cable and jack are fine. Inside the amp, the signal enters through the input jack, passes through a coupling capacitor, and reaches the grid of V1. A failed V1 tube or a leaky coupling capacitor will block signal at this first stage.
Can a blown fuse cause my amp to power on but have no sound?
Yes. The HT (High Tension) fuse supplies high-voltage DC to the tube plates. If this fuse blows, the amp will still power on and the tubes will glow from the filament heater supply, but there is no high voltage to amplify the audio signal. Check the HT fuse (usually labeled HT, B+, or HV on the chassis) and replace it with the exact same rating. If it blows again immediately, you have a short circuit that needs professional diagnosis.
Conclusion: Systematic Diagnosis Beats Guesswork
When your guitar amp powers on but no sound reaches the speaker, resist the urge to start replacing parts randomly. The power-on symptom is actually helpful information: it tells you the mains supply and filament circuit are intact, narrowing the problem to the signal path or the high-voltage supply. Work from the outside in, starting with cables and controls, then tubes, then the effects loop, and finally the speaker chain. Each test eliminates a section of the amplifier and brings you closer to the fault.
The most common fixes I see are a cable swap, a preamp tube substitution, contact cleaner on the effects loop jacks, and an HT fuse replacement. These are all things a player can do without opening the chassis. If those steps do not solve it, the problem is at the circuit-board level and the safest path is a qualified amp technician. Keep a spare 12AX7, a patch cable, and a can of contact cleaner in your gig bag, and you will be equipped to handle the majority of no-sound scenarios that come up on stage or in the studio.