
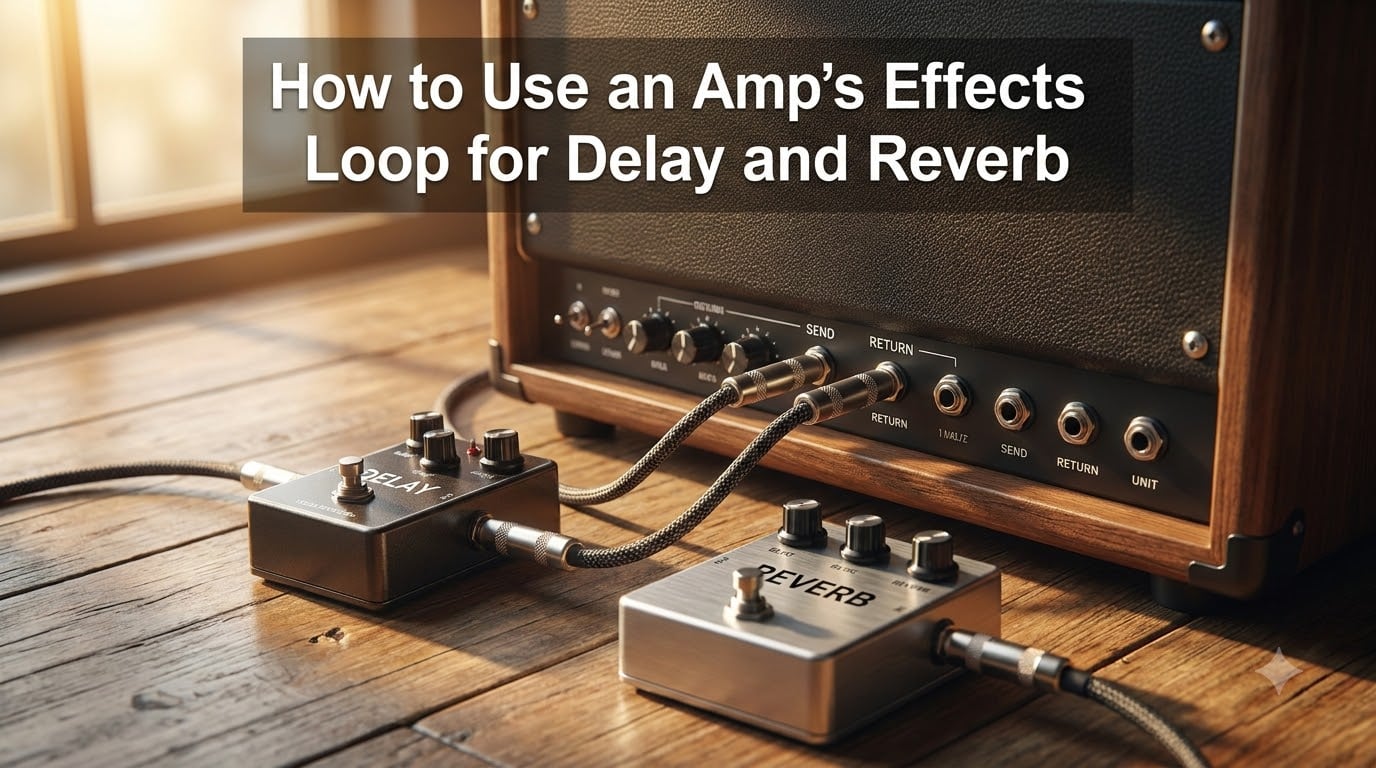
An effects loop is the input/output section on your guitar amp that sits between the preamp and the power amp. It lets you patch time-based pedals like delay and reverb into the signal chain after your amp’s distortion has already been created. I built my first pedalboard around the wrong placement for years, and once I moved delay and reverb into the loop, the clarity jump was obvious within ten seconds of playing.
In this guide, I’ll walk you through what an effects loop actually does, the difference between series and parallel designs, and exactly how to connect your delay and reverb pedals for the cleanest tone. I’ve spent the last decade patching amps in studios and on stage, so the advice below comes from real signal chains, not textbook theory.
Table of Contents
What Is an Effects Loop and Why You Need One?
An effects loop is a pair of jacks labeled send and return on the back or top of your amplifier. The send jack taps into the signal right after the preamp stage, and the return jack feeds that signal back into the power amp. Anything you plug into the loop hears and processes your preamp-distorted tone before it gets amplified.
The reason this matters is simple. When you plug delay or reverb into the front of your amp along with your drive pedals, the time-based effect gets distorted along with your guitar sound. Repeated echoes turn into muffled mush, and reverb tails get shredded by the overdrive. Putting them in the loop means the effect processes the already-shaped tone, so each repeat and tail stays clean and articulate.
Most amps with “drive,” “lead,” or “crunch” channels include an effects loop specifically for this reason. Boutique amps, modeling amps, and high-gain amps like Mesa Boogie, Marshall JVM, and Fender Hot Rod series all offer some form of loop. Clean amps and vintage-style combos often skip it because the original designers never expected players to stack pedals.
If your amp has an effects loop and you’re chasing a polished, modern tone, you need it. Plain and simple.
Series vs Parallel Effects Loops Explained
Series and parallel effects loops handle the wet/dry signal differently, and choosing the right one changes how your delay and reverb behave. The short answer: series loops process 100% of your signal through every pedal, while parallel loops blend a portion of your dry signal with the effect output.
Series Buffered Loops
A series loop routes the entire signal out of the send jack, through your pedals, and back into the return jack. If the loop is buffered, the amp uses a small circuit to keep the signal strong over long cable runs. Every effect you add becomes part of the main signal path.
Series loops are the most common type, especially in tube amps. They are easy to use, sound predictable, and work well for modulation, delay, and reverb in any order. The trade-off is that you cannot blend the effect with your dry tone. The pedal’s own mix knob is your only control over how much wet signal you hear.
Parallel Loops and Blend Control
A parallel loop splits the signal inside the amp, sending one copy through your pedals and keeping the dry copy intact. The amp then mixes the two back together before the power amp stage. This is where the mix percentage or blend knob comes in.
Parallel loops shine for delay and reverb because you can dial in subtle ambience without losing the punch of your dry guitar. You can run a heavy, long reverb while your picking stays tight and defined. I run a parallel loop on my Vox AC15 with the mix set around 30% for ambient passages and drop it to 15% for lead lines where I want every note to speak clearly.
Parallel loops occasionally have a “series insert” mode that defeats the dry path for true-bypass pedals that benefit from full series routing. Check your amp’s manual for the specific behavior.
How Delay and Reverb Work in the Signal Chain?
Time-based effects like delay and reverb are designed to process an already-shaped tone, which is exactly what an amp’s preamp section gives you. When the effect runs after distortion, each echo or reflection carries the exact harmonic content your amp produced. When you put the same pedal in front of the amp, the pedal adds echoes to a clean guitar signal, then your distortion squashes them into a less-defined wash of noise.
Modulation effects (chorus, flanger, phaser) follow the same logic. They sound clearer after distortion because the modulation oscillates around the harmonics of your gain tone rather than getting eaten by it. Boost, overdrive, fuzz, and wah belong at the front of the amp because they shape the signal before it ever reaches the preamp.
The signal chain rule of thumb I teach every guitarist I work with: dynamics and gain first, time-based and modulation effects last. Your amp’s loop is where “last” lives.
Step-by-Step: Connecting Effects to Your Effects Loop
Connecting your delay and reverb pedals to an effects loop takes about five minutes once you have the right cables on hand. Here is the exact process I use every time I patch a new amp.
Turn off the amp and any pedals in the chain. Power cycling with cables connected can pop speakers.
Locate the send and return jacks on the amp. On most amps, send is on the left and return is on the right.
Take a short patch cable and connect the amp’s send jack to the input of your first pedal in the loop. I usually start with delay because it tends to come before reverb in most rigs.
Connect the output of that pedal to the input of the next pedal in the chain, working left to right in physical pedal order.
Take the output of your last pedal and run it into the amp’s return jack.
Set every pedal in the loop to “off” or “bypass,” then turn the amp back on at low volume to verify signal passes through cleanly.
Slowly engage each pedal one at a time, listening for hum, volume drop, or crackle as you do.
If your amp has a series/parallel switch or a mix knob for the loop, set it to series for your first test. Once everything works, experiment with parallel if your amp supports it.
Level Matching Tips
The single biggest mistake I see with effects loops is mismatched signal levels. Most loops run at line level, which is hotter than the instrument-level signal your guitar produces. Pedals designed for instrument level (like classic MXR or early Boss units) will work, but pedals designed for rack gear or studio use may overload the loop.
If your delay or reverb sounds harsh, fizzy, or way louder than your clean guitar signal, the pedal is probably outputting at line level into a loop expecting instrument level. Run that pedal through a re-amp box or a level-attenuating pedal to fix the issue. Conversely, if the effect sounds weak and noisy, the loop may be expecting a hotter signal than the pedal provides, and a clean boost or buffer in front of the return jack solves it.
Best Practices: Pedal Order in the Effects Loop
Once your pedals are patched into the loop, the order you chain them together shapes the character of your ambient tone. The rule I follow is straightforward: delays before reverbs, modulation either before or after delay depending on the vibe.
Delay Before Reverb vs Reverb Before Delay
Delay into reverb is the classic choice and the one I default to 90% of the time. The delay creates distinct repeats, then reverb washes over them with a smooth tail. This produces separated echoes with atmosphere around them, which is the sound of most modern ambient and indie records.
Reverb into delay is a less common choice, but it gives you a smeared, washy tone where each delay repeat carries a snapshot of the reverb tail. It works beautifully for shoegaze and ambient players who want textures rather than clear echoes. The trade-off is that your delay repeats can blur into each other and lose definition.
For modulation inside the loop, chorus or phaser before delay gives a shimmering, layered tone. Modulation after delay keeps each echo cleaner and more distinct. Try both and pick what fits the song.
If you use a volume pedal in the loop, place it last so it controls both the delay and reverb tails at once. Placing it before effects creates unnatural swells that some players love but most find tricky to control live.
Common Mistakes to Avoid With Your Effects Loop
Most effects loop problems come from a handful of repeated mistakes. Avoiding them upfront saves hours of troubleshooting later.
Putting overdrive, distortion, or fuzz into the loop. These belong at the front of the amp where they shape the preamp input.
Running true-bypass pedals without a buffer in long cable chains. The loop’s own buffer usually handles this, but daisy-chaining five true-bypass pedals can starve high frequencies.
Engaging the loop with nothing plugged into the return. Many amps go silent when the loop is active and no return cable is connected. Leave a patch cable in the loop or use its bypass switch.
Ignoring the wet/dry mix on the pedal. A reverb set to 100% wet in a parallel loop can disappear entirely if the amp’s blend is also set low.
Using a long coiled cable for the send and return. Keep those cables under 6 feet when possible to avoid signal loss.
If you only remember one thing from this section: put drive pedals at the front of the amp, not in the loop. The forum threads I’ve read for the last fifteen years are filled with confused players chasing muddy distortion that disappears the moment they swap cables.
Troubleshooting Your Effects Loop
This is the section I wish someone had written when I was starting out. Most articles about effects loops leave you stranded the moment something goes wrong. Here is the playbook I use to diagnose loop issues on stage, in studios, and on my own bench.
No signal at all when the loop is engaged: Confirm a cable is patched from send to return, with nothing in between, and the loop is switched on. If the amp still goes silent, the loop’s relay or switch may be stuck. Try the amp’s “loop bypass” button if it has one.
Hum or buzz only when the loop is active: This usually means a ground loop between two power supplies. Run all your pedals in the loop off a single isolated power supply, or lift the ground on one supply’s adapter. A ground-loop isolator between send and return is also a clean fix.
Effect is much louder or quieter than the dry signal: Mismatched levels. See the level-matching tips above. A volume pedal or EQ at the end of the loop gives you fine control over the return level.
Delay repeats sound smeared or muddy with distortion on the amp: Your delay is in front of the amp, not in the loop. Move it.
Tone loses high end or feels dull through the loop: You are probably daisy-chaining too many true-bypass pedals in series without a buffer. Add a buffered pedal or a buffered loop pedal at the front of the loop to restore the top end.
Popping or clicking when engaging the loop: The send jack sees a slight impedance change when nothing is plugged in. A dummy plug or a low-value resistor adapter solves the click. Most modern amps mute the send silently, but older designs can pop.
For a quick diagnostic, run a single patch cable from send to return with the loop engaged and listen for clean tone. If it sounds identical to the loop bypassed, the loop itself is healthy. The problem then lives in your pedal chain.
FAQ: Effects Loop Questions Answered
What is the effects loop on an amp?
An effects loop is the pair of jacks on your amp between the preamp and the power amp. The send jack outputs the preamp-shaped signal, and the return jack feeds it back into the power amp. You patch time-based pedals like delay and reverb into these jacks so they process your amp’s distorted tone instead of being distorted themselves.
How do I use the effects loop send and return?
Connect a patch cable from the amp’s send jack to the input of your first pedal, chain your pedals together, then connect the output of the last pedal to the return jack. The exact order matters: gain pedals stay at the front of the amp, while delay, reverb, and modulation go in the loop.
What pedals generally go in the effects loop of an amp?
Time-based and modulation pedals go in the effects loop. This includes delay, reverb, chorus, flanger, phaser, and tremolo. Boost, overdrive, distortion, fuzz, wah, and compressor stay at the front of the amp where they shape the signal before it hits the preamp.
Should I use overdrive or distortion in the effects loop?
No. Overdrive and distortion pedals belong at the front of the amp, in line with your guitar. Putting them in the loop distorts your power amp section, which sounds harsh and lifeless. Drive the preamp with pedals, then process the result with delay and reverb in the loop.
Should I put delay or reverb first in the effects loop?
Delay first, reverb second is the most common order. Delay into reverb produces clear echoes with a smooth wash of ambience around them. Reverb into delay sounds washy and smeared, which some ambient players prefer but most guitarists find muddy.
What is a series vs parallel effects loop?
A series loop routes 100% of your signal through every pedal in the loop, and the pedal’s mix knob controls wet versus dry. A parallel loop keeps a copy of your dry signal inside the amp while sending another copy to your pedals, and the amp blends the two back together using its mix knob. Parallel is great for subtle delay and reverb blends.
When should I use the effects loop vs the front of the amp?
Use the front of the amp for anything that shapes your core tone: compression, wah, overdrive, distortion, fuzz. Use the effects loop for pedals that add to an already-shaped tone: delay, reverb, chorus, flanger, phaser, tremolo, and volume swells.
Final Thoughts on Using Your Effects Loop for Delay and Reverb
An effects loop is one of the most useful features on a modern amp, and once you understand how to use it, your delay and reverb tones will sound more polished in an afternoon than they have in the last year. Patch your time-based pedals into the loop, keep gain at the front of the amp, match your levels, and trust your ears over any rule on paper.
I still tweak my loop settings every few weeks because the right blend depends on the room, the guitar, and the song. Treat this 2026 guide as a starting point, then experiment with mix percentages, parallel modes, and pedal order until the rig feels like an extension of your playing. That is the entire point of the effects loop in the first place.