
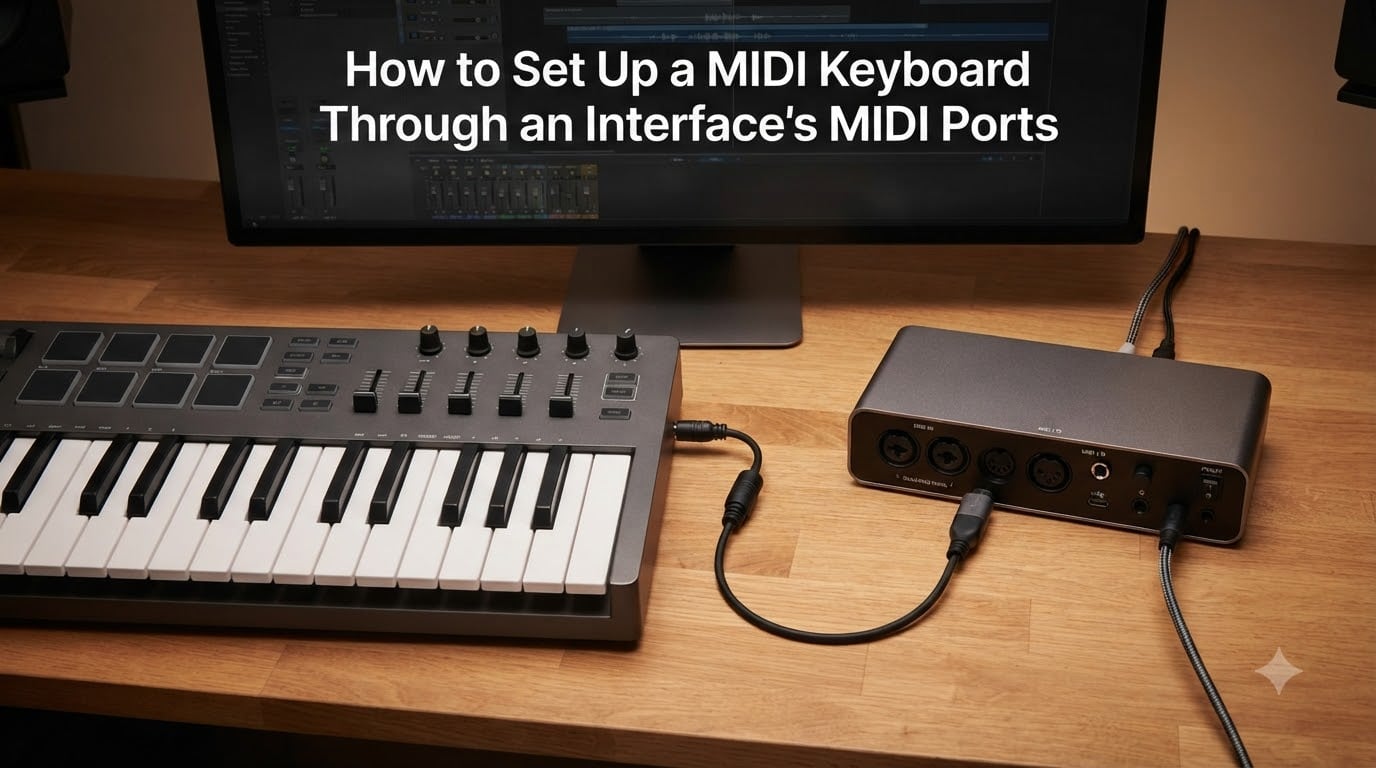
If you have just unboxed a MIDI keyboard and want to know how to set up a MIDI keyboard through an interface’s MIDI ports, you are in the right place. Many producers hit a wall when their keyboard has only the classic round 5-pin DIN connectors and their audio interface seems to have tiny labeled ports that look intimidating.
I have routed MIDI gear in my home studio for over a decade, and the truth is that the process is simple once you understand what each port does. In this guide, I will walk you through the exact cables you need, how to plug everything in, and how to configure your DAW so it actually recognizes your keyboard.
Table of Contents
Understanding MIDI: 5-Pin DIN vs USB Connections
MIDI stands for Musical Instrument Digital Interface, and it is a communication protocol that lets instruments, computers, and controllers talk to each other. When you press a key on your MIDI keyboard, it sends a small data message containing the note number, velocity, and timing, not an actual audio signal.
There are two common ways MIDI travels today. The first is through USB, where the keyboard acts like a plug-and-play audio device and sends MIDI data directly to your computer over a USB cable. The second is through classic 5-pin DIN cables, which have been the MIDI standard since 1983.
A 5-pin DIN MIDI cable carries data only. Unlike USB, it does not deliver power to your keyboard, and it does not carry audio. The data flows in one direction per cable, which is why you see separate MIDI IN and MIDI OUT ports on every device.
You will want to use 5-pin DIN through your audio interface when you have an older MIDI keyboard without USB, when you want to keep your studio cabling centralized through one interface, or when you are connecting multiple hardware synths in a chain.
What You Need Before Connecting Your MIDI Keyboard
Before you plug anything in, gather the right gear. I learned this the hard way after buying a single cable and wondering why nothing worked.
Here is the checklist I use for every MIDI setup:
MIDI keyboard with at least one MIDI OUT port (some have MIDI THRU as well)
Audio interface with dedicated MIDI IN and MIDI OUT ports (most modern interfaces include these, including the Focusrite Scarlett series, MOTU M4, and Universal Audio Volt units)
5-pin DIN MIDI cable (one cable is enough for a basic one-direction setup; get two if you want to send MIDI back to the keyboard)
USB or Thunderbolt cable to connect your interface to your computer
Latest interface drivers downloaded from the manufacturer’s website
DAW software installed and updated (Logic Pro, Ableton Live, FL Studio, Cubase, Pro Tools, Reaper, or similar)
One important note that trips up a lot of beginners: if you have a vintage MIDI keyboard from the 1980s or 1990s, it may need its own power supply plugged into a wall outlet. The 5-pin DIN cable will not power it.
How to Set Up a MIDI Keyboard Through an Interface’s MIDI Ports: Step-by-Step
Now to the actual connection. Follow these steps in order and your keyboard will be talking to your DAW within minutes.
Step 1: Power down everything. Turn off your computer, audio interface, and MIDI keyboard before making any cable connections. Hot-plugging MIDI cables usually works, but powering down prevents accidental shorts and lets your system recognize everything cleanly on startup.
Step 2: Locate the MIDI ports on your audio interface. Look at the back of your interface for a small cluster of round ports labeled MIDI IN and MIDI OUT. Most interfaces group them together and often include a MIDI THRU port as well. These are the only ports you need for this tutorial.
Step 3: Locate the MIDI ports on your keyboard. Flip your keyboard around and find its MIDI OUT port. Some keyboards also have MIDI IN and MIDI THRU. For now, you only need MIDI OUT.
Step 4: Connect the MIDI cable. Take one end of your 5-pin DIN MIDI cable and plug it into your keyboard’s MIDI OUT port. Plug the other end into your audio interface’s MIDI IN port. The cable fits only one way, so do not force it.
Step 5: Connect your interface to your computer. Use the USB or Thunderbolt cable that came with your interface. Plug one end into the interface and the other into your computer.
Step 6: Power everything on. Turn on your keyboard first, then your interface, then your computer. Powering on in this order helps your computer recognize the devices cleanly.
Step 7: Install or update drivers. On Windows, install the latest ASIO driver from your interface manufacturer. On Mac, most modern interfaces are class-compliant, meaning they work without extra drivers. Either way, check the manufacturer’s website for the latest firmware.
Step 8: Open your DAW. Your audio interface should appear as both an audio device and a MIDI device. We will configure the MIDI side next.
Configuring Your DAW to Recognize the MIDI Input
Hardware connections are only half the battle. Your DAW needs to know which MIDI input to listen on. The exact menu names vary by DAW, but the principle is identical.
In your DAW’s Preferences or Settings menu, find the MIDI section. Enable your audio interface as a MIDI input device. In Ableton Live, this is under Preferences > Link Tempo MIDI. In Logic Pro, it is under Settings > MIDI. In FL Studio, look in the MIDI Settings panel.
Once enabled, arm a MIDI track for recording or monitoring. On the track’s input selector, choose your interface’s MIDI input. Press a key on your keyboard. You should see the on-screen MIDI activity light blink or a level meter respond.
If you want sound, add a software instrument on that track. Most DAWs include stock plugins like Ableton’s Operator, Logic’s Alchemy, or FL Studio’s FLEX. Route your MIDI keyboard to that instrument and you are ready to play.
Test the round trip by recording a few notes, then playing them back. If the recorded MIDI plays your software instrument correctly, your setup is working perfectly.
MIDI Channels, THRU, and Multi-Device Setups
Once you have one keyboard working, you may want to expand. MIDI supports 16 channels on a single cable, which lets you control multiple instruments independently.
MIDI channels work like TV channels. Your keyboard sends data on a specific channel (usually channel 1 by default), and each receiving instrument listens to one or more channels. To target a specific instrument, set the keyboard’s transmit channel to match the instrument’s receive channel.
MIDI THRU is a pass-through port that copies whatever data comes into the device’s MIDI IN and sends it out unchanged. This lets you daisy-chain multiple MIDI devices. Connect your keyboard’s MIDI OUT to synth A’s MIDI IN, then a cable from synth A’s MIDI THRU to synth B’s MIDI IN, and so on.
For complex setups with more than three or four devices, consider a MIDI thru box or MIDI hub. These powered devices split one MIDI input into multiple isolated outputs, preventing the signal degradation that happens when you daisy-chain too many devices.
One common mistake I have made myself: do not connect MIDI OUT to MIDI OUT or MIDI IN to MIDI IN. MIDI is unidirectional on each port. OUT always goes to IN, and IN always receives from OUT.
Troubleshooting Common MIDI Connection Issues
Even with the right cables, things can go wrong. Here are the issues I see most often, ranked by frequency.
MIDI keyboard not recognized by computer: First, check that the cable is fully seated at both ends. Then check your DAW’s MIDI preferences and make sure the interface is enabled. On Windows, open Device Manager and confirm the interface shows up under Sound, video and game controllers. On Mac, open Audio MIDI Setup and verify the device appears in the MIDI Studio window.
Keyboard works via USB but not through 5-pin DIN: This usually means the cable is damaged or the interface’s MIDI ports need a driver update. Try a different cable first, since MIDI cables do fail internally without visible damage. Then check the manufacturer’s site for firmware updates.
DAW shows MIDI input but no sound: You have connected the data path successfully but no audio is coming out. Add a software instrument to the MIDI track, or check that the instrument is routed to a track that is armed and monitored.
MIDI notes stuck on or ghost notes appearing: Power cycle everything in the order I listed above. Stuck notes often come from a MIDI loop where OUT feeds back into IN. Check that you have not accidentally created a routing loop in your DAW.
Audio interface MIDI ports not transmitting data: Update the interface firmware. Many older interfaces had buggy MIDI implementations that were fixed in later firmware releases. Also confirm that you are not running conflicting MIDI software like a virtual MIDI loopback tool that is intercepting the signal.
Driver issues after a Windows update: This is incredibly common. Reinstall the interface driver fresh. In Windows, uninstall the driver in Device Manager, restart, and install the latest version from the manufacturer. On Mac, MIDI is part of the operating system, but interface-specific drivers may still need updating.
Latency when playing through software instruments: Increase your audio buffer size to balance responsiveness and stability, or enable low-latency monitoring if your interface supports it. Most modern interfaces offer direct hardware monitoring that bypasses the computer entirely for zero-latency playback.
Frequently Asked Questions
How to connect MIDI keyboard to interface?
Connect a 5-pin DIN MIDI cable from your keyboard’s MIDI OUT port to your audio interface’s MIDI IN port. Make sure your interface is connected to your computer via USB or Thunderbolt, then enable the interface as a MIDI input device in your DAW’s preferences.
Do you need an interface to use a MIDI keyboard?
No, you do not strictly need an audio interface to use a MIDI keyboard. Many modern MIDI keyboards connect directly to your computer via USB and work without an interface. However, an audio interface is required if your keyboard only has 5-pin DIN MIDI ports, or if you also want to record audio with low latency.
How do I get my computer to recognize my MIDI keyboard?
First, ensure your interface drivers are installed and up to date. Then open your DAW’s preferences and enable the interface as a MIDI input device. On Windows, check Device Manager for the device under Sound, video and game controllers. On Mac, open Audio MIDI Setup and look for the device in the MIDI Studio window.
Can I plug my keyboard into my audio interface?
Yes, you can plug your MIDI keyboard into your audio interface using a 5-pin DIN MIDI cable. Connect the keyboard’s MIDI OUT to the interface’s MIDI IN. The interface then passes the MIDI data to your computer through USB or Thunderbolt, where your DAW receives it.
Why is my MIDI keyboard not connecting to my computer?
The most common causes are a loose MIDI cable, outdated interface drivers, or the interface not being enabled as a MIDI input in your DAW. Power cycle all devices, reseat the cable, update drivers, and verify your DAW preferences are set correctly.
What are common problems with MIDI keyboards?
Common problems include the keyboard not being recognized by the computer, MIDI notes getting stuck on, ghost notes appearing randomly, no sound despite MIDI activity, and high latency when playing software instruments. Most of these resolve with cable checks, driver updates, or power cycling the devices.
How to test a MIDI connection?
Open your DAW and arm a MIDI track for input. Select your interface as the input source, then press a key on your MIDI keyboard. If the connection is working, you will see MIDI activity lights blink in the DAW or on the track input meter. Record a few notes and play them back to confirm a full round-trip test.
Final Thoughts
Learning how to set up a MIDI keyboard through an interface’s MIDI ports is one of those foundational studio skills that pays off forever. Once you have done it a few times, the process becomes muscle memory, and you can troubleshoot almost any setup you encounter.
To recap the essentials: use a 5-pin DIN MIDI cable from your keyboard’s MIDI OUT to your interface’s MIDI IN, ensure your interface drivers are current, enable the interface as a MIDI input in your DAW, and remember that 5-pin DIN cables do not carry power or audio, only data.
From here, explore MIDI channels to control multiple instruments, add a MIDI thru box when you scale up to several devices, and keep your interface firmware updated whenever your manufacturer releases a new version. Your setup will stay reliable for years to come.