
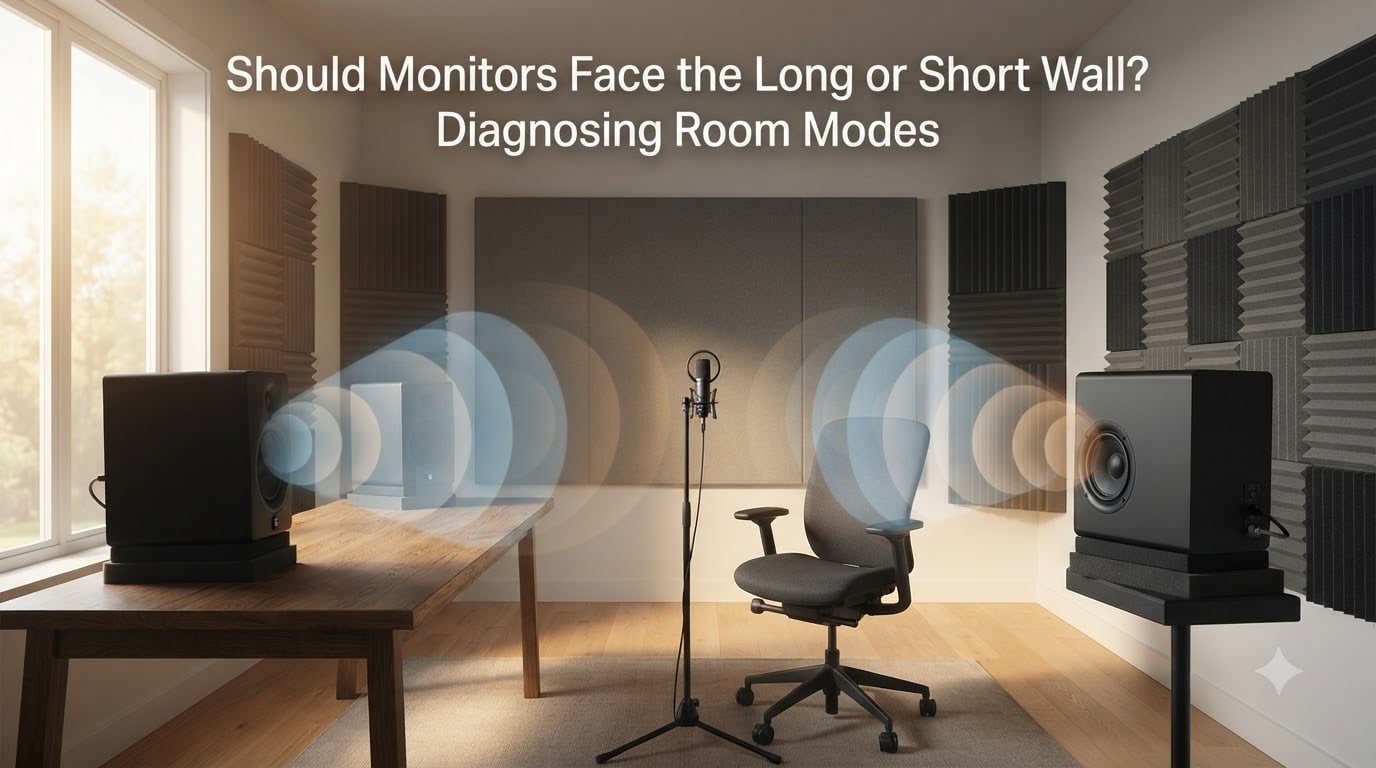
For most home and project studios, your monitors should face the short wall. This orientation gives sound waves the longest possible path behind your listening position, which smooths out bass response and reduces the standing waves that wreck your mixes. If you have been mixing in a small room and your bass sounds muddy, inconsistent, or completely different when you move your head a few inches, room modes are likely the culprit.
Should monitors face the long or short wall? This is one of the most debated questions in home studio acoustics, and the answer has real consequences for your music. Getting it wrong means you are mixing in a room that lies to you. Getting it right means your mixes translate to other systems.
In this guide, I will walk you through the physics behind room modes, why the short wall orientation usually wins, and the specific situations where it does not. I will also cover the 38% rule, symmetry requirements, and how to measure your room using free software so you can stop guessing and start trusting what you hear.
Table of Contents
Should Monitors Face the Long or Short Wall? The Short Answer
Face the short wall whenever possible, especially in rooms under roughly 20 feet in length. When your monitors fire down the longer dimension of the room, the sound has farther to travel before hitting the wall behind you. That longer path spreads out the room modes so they overlap less aggressively, giving you a smoother and more honest bass response at your listening position.
Here is what happens physically. Sound waves bounce between parallel walls and create standing waves at specific frequencies determined by the distance between those walls. When you sit closer to one wall than the other, you land in different parts of those standing wave patterns. Facing the short wall puts the maximum distance between your monitors and the wall behind you, which means more modal frequencies are averaged out by the time they reach your ears.
Expert consensus from acousticians and studio builders backs this up. On the Gearspace studio-building forums, the advice is direct: small rooms should always be oriented so the listener faces the short wall. The reason is simple math. A shorter distance between the side walls means higher-frequency modes that are easier to treat with conventional bass traps. A longer distance behind the listener means the lowest and most problematic modes are spread more evenly.
That said, the short wall rule is a strong default, not an absolute law. There are specific scenarios where facing the long wall produces better results. I cover those exceptions in detail later in this article, including wide rooms, rooms with severe asymmetry, and spaces where doors and windows make the short wall unusable.
What Are Room Modes and Why Do They Matter?
Room modes are natural resonant frequencies that build up inside any enclosed space. They happen when sound waves reflect between parallel surfaces and reinforce or cancel each other depending on the wavelength and the distance between those surfaces. Every room has them, and in small studio spaces they are the single biggest factor determining whether your bass response is accurate or a mess.
Think of room modes like the harmonics of a guitar string. When you pluck a string, it vibrates at its fundamental frequency and also at multiples of that frequency. A room does something similar with sound waves bouncing between walls, floor, and ceiling. At certain frequencies, the waves line up and create pressure peaks where the sound is dramatically louder. At other frequencies, they cancel out and create nulls where the sound nearly disappears.
There are three types of room modes, and each one affects your monitoring differently:
Axial modes occur between two parallel surfaces, such as the two side walls or the floor and ceiling. These are the strongest and most problematic modes because sound energy bounces directly back and forth. They are also the easiest to predict and treat.
Tangential modes involve four surfaces, where sound bounces around the room in a path that touches two pairs of parallel walls. They carry about half the energy of axial modes but still create audible problems.
Oblique modes involve all six surfaces of the room. Sound bounces around touching every wall, floor, and ceiling. These are the weakest modes, roughly one-quarter the strength of axial modes, and are usually a lesser concern.
The frequencies of your axial modes depend entirely on your room dimensions. You can calculate them using the formula: frequency equals 565 divided by the room dimension in feet. For example, a room that is 12 feet long has its first axial length mode at about 47 Hz. A room that is 10 feet wide has its first width mode at about 56 Hz. These are the frequencies where bass will boom or disappear.
Axial Modes: The Biggest Problem
Axial modes are the ones you need to worry about most. They are the loudest, the most disruptive, and the most common cause of bass problems in small studios. When an axial mode builds up between the front and back walls of your room, certain low frequencies will be exaggerated or completely cancelled at specific spots along that axis.
If your listening position happens to sit at a peak, you will hear too much bass at that frequency. If you sit at a null, you will hear almost none. Move your chair forward or backward by even a foot, and the bass response can change dramatically. This is why some producers find that their mix sounds great in one spot but terrible everywhere else in the room.
The Bass Null Trap: Why Room Center Sounds Terrible
The worst place to put your listening position is at the exact center of the room. At that spot, the first axial length mode creates a deep null, a frequency where the bass almost completely disappears. This happens because of how sound waves behave at the midpoint between two walls.
When a sound wave bounces off the back wall and travels forward, it meets the direct sound from your monitors. If the round-trip distance causes the reflected wave to arrive 180 degrees out of phase with the direct sound, the two cancel each other out. At the center of the room, this cancellation hits the lowest and most audible axial mode, creating a serious hole in your bass response.
This is why sitting dead center sounds thin and lifeless. You are parked right in the deepest part of the first null. If you have ever wondered why your mixes have no low end when you sit in the middle of the room but sound boomy when you move closer to a wall, this is the physics at work.
The same principle applies at the quarter-wave points. At one-quarter and three-quarters of the room length, you will encounter pressure peaks where bass builds up excessively. The goal is to find a listening position that avoids both the worst nulls and the worst peaks. That is where the 38% rule comes in.
The 38% Rule: Finding Your Listening Position
The 38% rule comes from studio designer Wes Lachot, and it is one of the most widely cited guidelines in home studio acoustics. The rule states that your listening position should be 38% of the room length, measured from the front wall behind your monitors. This position was derived mathematically to minimize the combined effect of the first three axial modes along the length of the room.
To apply it, measure the total length of your room from the front wall to the back wall. Multiply that number by 0.38. The result is how far from the front wall your ears should be. For a 12-foot room, that is about 4 feet 7 inches. For a 15-foot room, it is about 5 feet 8 inches.
Why 38% specifically? At this position, you avoid sitting at the first null (50% of room length), and you also minimize the peaks and dips from the second and third axial modes. It is not a magic spot where all room modes disappear, but it is the single position where the fewest modes create serious problems simultaneously.
On forums like Gearspace and Reddit, some users report getting better results at 39.6% rather than 38%. The difference is small and both positions are in the same acoustically favorable zone. The takeaway is that somewhere between 38% and 40% of your room length is the sweet spot. Exact precision matters less than being in the right neighborhood and then fine-tuning with measurements.
It is worth noting that the 38% rule only addresses the length axis. You still need to manage width modes (symmetry) and height modes (ceiling treatment) separately. But getting your listening position right along the length is the single biggest improvement you can make before adding any acoustic treatment.
Short Wall vs Long Wall: Breaking Down the Physics
The choice between short wall and long wall orientation comes down to how each option interacts with room modes and boundary interference. Both orientations produce modal problems. The question is which set of problems is easier to live with and easier to treat.
Short wall orientation means your monitors are against or near one of the shorter walls, firing down the length of the room. The listener faces the short wall, with the long dimension of the room extending behind them. This gives the sound waves maximum travel distance before reflecting off the back wall, which pushes the lowest axial mode to a lower frequency and spreads the modes out more evenly across the bass range.
The side walls are closer together in this orientation, which means the width modes occur at higher frequencies. Higher-frequency modes are easier to absorb with standard acoustic panels and bass traps. You also have more room behind the listening position, which helps the bass response smooth out before it reaches your ears.
Long wall orientation means your monitors fire across the shorter dimension of the room. The listener faces the long wall, with the shorter dimension behind them. This orientation puts the side walls farther apart, which lowers the frequency of width modes and can make them harder to treat. It also means the wall behind the listener is closer, creating stronger reflections and more boundary interference at the listening position.
However, long wall orientation does give you a wider speaker spread for the same room footprint. In some rooms this can help with stereo imaging width. The tradeoff is usually worse bass response, which is why most acousticians recommend against it for small rooms.
There is also the issue of speaker boundary interference response, or SBIR. When your monitors are a certain distance from the front wall, the reflection from that wall combines with the direct sound and creates a cancellation dip at a specific frequency. The closer the monitor is to the wall, the higher the cancellation frequency. Short wall orientation typically gives you more flexibility to position monitors at the right distance from the front wall without creating SBIR problems in the critical bass range.
When the Short Wall Rule Breaks Down?
The short wall rule is a starting point, not a universal law. There are real situations where facing the long wall produces better results. Knowing when to break the rule is just as important as knowing the rule itself.
If your room is unusually wide for its length, long wall orientation might give you better left-right symmetry and a more balanced speaker triangle. A room that is 16 feet wide and 14 feet long is a candidate. In this case, facing the long wall gives you 16 feet of depth behind the listener, and the 14-foot width might still produce manageable side-wall modes.
Windows and doors can also force your hand. If the short wall has a large window or a door that cannot be blocked, the acoustic properties of that wall are compromised. Glass reflects mid and high frequencies but absorbs low frequencies differently than drywall. A doorway creates a gap in the wall surface that changes how modes form. In these cases, facing the solid long wall might give you a more predictable acoustic environment even if the orientation is theoretically less ideal.
Very long, narrow rooms present another challenge. In a room that is 20 feet long and only 9 feet wide, short wall orientation puts the side walls very close to the monitors. This can create strong first reflections and comb filtering that degrade the midrange. Long wall orientation in this scenario might spread the speakers wider and reduce side-wall reflection problems.
The decision framework is straightforward. Start with the short wall. If you have a specific reason it will not work, such as severe asymmetry, an unavoidable window, or an extremely narrow room, test the long wall. Always verify with measurements before committing. Your ears alone are not reliable enough in an untreated room.
Symmetry: The Non-Negotiable Requirement
Regardless of which wall you face, left-right symmetry at your listening position is essential. If one side of your room has a solid wall and the other has a window or an open door, your stereo image will be skewed. Reflections from each side arrive at different times and with different intensities, which smears the stereo field and makes it impossible to judge panning accurately.
This is one of the most common pain points expressed on audio engineering forums. Producers with asymmetric rooms often ask whether symmetry or short wall orientation matters more. The answer from experienced engineers is consistent: if you have to choose between perfect short wall placement with terrible asymmetry versus long wall placement with good symmetry, go with symmetry.
Asymmetry is also harder to treat than modal problems. You can add bass traps to tame room modes. You cannot easily fix a room where one side is a glass window and the other is a bookshelf. Acoustic treatment can help balance reflections, but the fundamental geometry problem remains.
If your room is asymmetric, do what you can to even things out. Heavy curtains over windows, bookshelves filled with books on the opposite wall, or broadband absorber panels placed to mirror the reflective surfaces can all help. The goal is not perfect physical symmetry but acoustical symmetry, where reflections from both sides arrive at your ears with similar timing and level.
Step-by-Step: How to Place Your Monitors
Here is a practical, step-by-step process for finding the right monitor placement in your room. Follow these steps in order and you will avoid the most common mistakes that ruin small-room monitoring.
Step 1: Measure your room. Get the exact length, width, and ceiling height. Note the position of doors, windows, and any permanent fixtures. These numbers will determine your room modes and your available placement options.
Step 2: Calculate your listening position. Multiply room length by 0.38 to find your ideal distance from the front wall. This is your starting point. If that position is not practical due to furniture or room layout, get as close to it as you can.
Step 3: Choose your wall orientation. Default to the short wall. Switch to the long wall only if you have a compelling reason like severe asymmetry, an immovable window on the short wall, or an extremely narrow room.
Step 4: Set up an equilateral triangle. Your two monitors and your listening position should form an equilateral triangle. The distance between the monitors equals the distance from each monitor to your ears. For most nearfield setups, this means the monitors are 3 to 5 feet apart and the same distance from your head.
Step 5: Position for symmetry. Measure from each monitor to the nearest side wall. Both distances should be identical. Even a few inches of difference can shift your stereo image off-center.
Step 6: Set monitor height. The tweeters should be at ear level when you are seated in your normal mixing position. If the monitors are above or below ear level, tilt them so the drivers point directly at your ears.
Step 7: Apply toe-in. Angle each monitor inward so it points at your listening position. A roughly 30-degree toe-in (15 degrees off-axis from straight ahead for each speaker) is a standard starting point. Adjust by ear and by measurement.
Step 8: Test with measurement software. Download Room EQ Wizard (free), take a frequency response measurement at your listening position, and look for major peaks and dips. Move your position or monitor placement in small increments and re-measure until you find the smoothest response.
How to Measure Room Modes with Room EQ Wizard?
Room EQ Wizard, usually called REW, is a free acoustic measurement application that lets you see exactly what your room is doing to your sound. It is the same tool recommended on studio-building forums for validating placement decisions. Using it removes the guesswork from monitor positioning.
To get started, you need a measurement microphone (an affordable calibrated USB mic like a miniDSP UMIK-1 works well), a pair of monitors, and a computer. REW generates a test sweep signal that plays through your monitors and is captured by the microphone at your listening position. The software then displays a frequency response graph showing exactly which frequencies are boosted or attenuated.
When you look at the graph, watch for sharp peaks (narrow boosts of 10 dB or more) and deep nulls (sharp dips where the level drops dramatically). Peaks indicate frequencies where room modes are building up pressure. Nulls indicate cancellation points. Both are problems that affect your ability to judge bass accurately.
The most useful approach is to take measurements at several positions within a small range around your intended listening spot. Move the microphone 6 inches forward, backward, left, right, up, and down from the center position. If the frequency response changes dramatically across these positions, your room has strong modal activity and you may need to adjust placement or add treatment.
Once you have a baseline measurement, make one change at a time. Move your listening position forward by 6 inches and re-measure. Then move the monitors 2 inches farther from the front wall and re-measure. Keep the changes small and document what each one does. This systematic approach will get you to the best possible placement much faster than random adjustments.
Monitor Height, Tilt, and Toe-In
Getting height and angle right is just as important as choosing the correct wall. The goal is for the sound from your monitors to arrive at your ears as directly and cleanly as possible.
Your monitor tweeters should sit at ear level. When you are in your normal mixing position, an imaginary line from the tweeter to your ear should be perfectly horizontal. If your monitors are on stands that put the tweeters above your head, tilt them down slightly so they aim at your ears. If the monitors are below ear level, tilt them up.
Toe-in refers to the horizontal angle of the monitors. Each monitor should be aimed at the listening position, not straight ahead. A starting point is 30 degrees of total toe-in, meaning each monitor is angled about 15 degrees inward from facing straight forward. Adjust from there based on how the stereo image sounds. More toe-in typically narrows the sweet spot but sharpens the center image. Less toe-in widens the sweet spot but can make the center image less focused.
If you are using monitors with rear ports, make sure the ports are not blocked by a wall. Rear-ported monitors need clearance behind them to function properly. As a general rule, keep at least 6 to 12 inches between the back of a rear-ported monitor and the nearest wall.
Speaker-to-Wall Distance Guidelines
The distance between your monitors and the nearest wall directly affects bass response through speaker boundary interference. Get this wrong and you will have a cancellation dip in the bass that no amount of EQ can fix.
SBIR cancellation happens when the sound from your monitor combines with the reflection from the wall behind it. If the monitor is a certain distance from the wall, the reflected sound arrives slightly later than the direct sound. At the frequency where that delay equals half a wavelength, the two signals cancel each other out.
You can estimate the SBIR cancellation frequency with a simple formula: frequency equals 565 divided by twice the distance from the monitor to the wall (in feet). For example, if your monitors are 2 feet from the front wall, the cancellation frequency is about 141 Hz. That is right in the bass range and will create a noticeable hole in your low end.
The practical recommendation is to keep monitors as close to the front wall as possible (under 1 foot) or far enough away that the cancellation drops below the monitor’s useful low-frequency range. The worst position is usually between 2 and 4 feet from the wall, which puts the cancellation frequency squarely in the critical bass region. If you cannot avoid this distance, you will need broadband absorption behind the monitors to reduce the strength of the wall reflection.
Frequently Asked Questions
What is the 38 rule for studio monitors?
The 38% rule, developed by studio designer Wes Lachot, states that your listening position should be 38% of the room length from the front wall behind your monitors. This position minimizes the combined impact of the first three axial room modes along the length of the room. To apply it, measure your room length and multiply by 0.38. For a 12-foot room, your ears should be about 4 feet 7 inches from the front wall.
What is the 83% rule for speakers?
The 83% rule is a less common guideline related to rear wall placement in listening rooms. It suggests that your listening position should be approximately 83% of the room length from the front wall, which places it about 17% from the rear wall. This is sometimes used as an alternative to the 38% rule in rooms where the front position is not practical. However, the 38% rule is far more widely accepted in the studio monitoring community.
How far from the wall should monitors be?
Monitors should either be placed very close to the front wall (under 1 foot) or far enough away that speaker boundary interference cancellation falls below the monitor’s low-frequency range. The worst position is typically 2 to 4 feet from the wall, which creates a cancellation dip in the 70 to 140 Hz range. You can estimate the cancellation frequency as 565 divided by twice the distance to the wall in feet. Adding broadband absorption behind the monitors helps reduce SBIR problems at any distance.
Should my monitor face up or down?
Studio monitors should face directly at your ears, not up or down. The tweeters should be at ear level when you are seated in your mixing position. If your monitors are mounted above or below ear level and cannot be repositioned, tilt them so the drivers aim at your head. An upward or downward angle of more than 15 degrees will alter the frequency response at your listening position and compromise your ability to judge tonal balance accurately.
Conclusion
Should monitors face the long or short wall? For the majority of home and project studios, the answer is the short wall. Facing the short wall gives sound waves the longest path behind your listening position, which spreads room modes more evenly and delivers a smoother, more trustworthy bass response. Combined with the 38% rule for listening position, a proper equilateral triangle, and careful attention to symmetry, this orientation gives you the best starting point for accurate monitoring.
Remember that rules have limits. If your room has unavoidable asymmetry, blocking windows, or unusual proportions, you may need to adapt. Always confirm your placement with measurement software like Room EQ Wizard rather than relying on rules alone. The goal is not to follow a formula perfectly but to achieve a listening environment where you can trust what you hear and make mixing decisions that translate to the real world.