
Wet cleaning brings out the best sound from your vinyl, but what you do right after the bath determines whether your records end up pristine or packed with hidden problems. Learning how to dry records after wet cleaning without leaving residue is the step most collectors skip, and it is the reason many “clean” records still crackle and pop on the first play.
In this guide, I will walk you through the exact drying workflow I use on my own collection of more than 1,200 records, including the vertical rack setup, the microfiber technique, and the timing rules that keep residue out of your grooves. By the end, you will know how to dry a record without residue every single time, no matter what cleaning method you used.
Table of Contents
Why Proper Drying Matters?
Moisture trapped in vinyl grooves is not just a sound-quality issue. It is a slow damage problem that builds up over weeks and months. I learned this the hard way when I cleaned 40 records, dried them with a regular towel, and stored them in inner sleeves overnight. Two weeks later, every label smelled musty and three records had visible mildew rings.
Here is what improper drying actually causes on your records:
Cleaning residue buildup: Surfactants from cleaning solutions settle back into the grooves as water evaporates, leaving a faint film that mutes detail.
Mold and mildew: Moisture sealed inside a sleeve creates perfect conditions for mold growth on labels and jackets within 48 hours.
Static attraction: Fast or uneven drying creates static charges that pull dust straight back into the grooves you just cleaned.
Warping risk: Heat-based drying shortcuts can soften vinyl enough to leave permanent warps, especially on thinner pressings.
Sleeve sticking: Records that go into paper sleeves while damp bond to the paper, tearing the sleeve when removed.
The good news: every one of these problems is preventable with a 2-4 hour air-drying window and the right setup.
What You Need to Dry Records Safely?
You do not need expensive gear to dry records the right way. Most of what I use came from around the house or cost under $30 total. Here is the kit I keep on my cleaning bench.
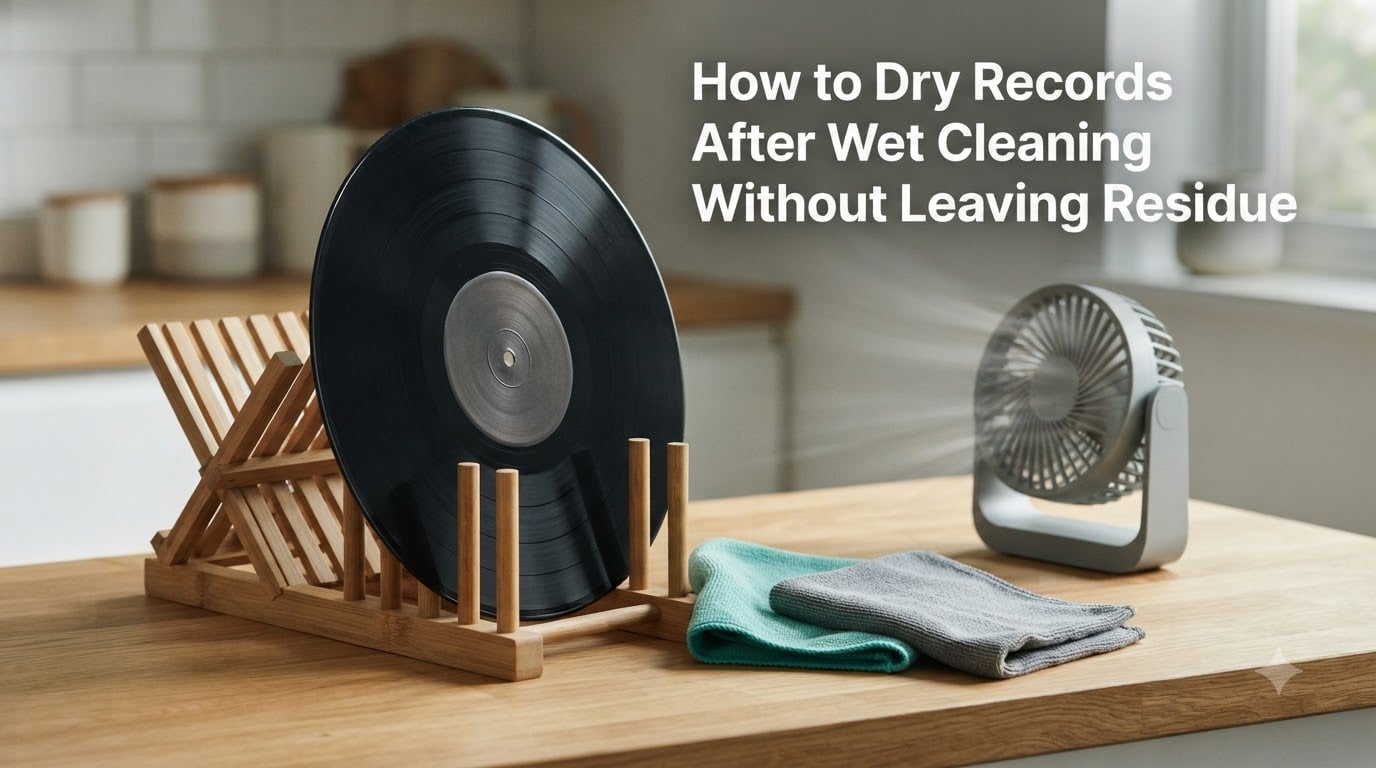
A wooden dish drying rack: The Reddit vinyl community swears by this, and so do I. The slats let air circulate on both sides of the record, and the wood does not shed fibers.
Lint-free microfiber cloths: Two per record at minimum. Reserve them only for drying, never for general cleaning.
Distilled water: If your cleaning method uses a final rinse, the rinse water must be distilled. Tap water leaves mineral deposits that show up as residue.
A small fan or gentle air flow: Optional, but cuts drying time in half in humid rooms.
Anti-static record brush: Used after drying, not during, to remove any dust that settled during the air-dry window.
Clean inner sleeves: Only move records into sleeves once they pass the dryness check below.
Warning: Do not use paper towels, bath towels, cotton t-shirts, or regular dish cloths for drying. They all shed fibers that lodge in grooves and are nearly impossible to remove without another full wet clean.
How to Dry Records After Wet Cleaning: Step-by-Step
This is the core workflow I run after every wet cleaning session. It works for Spin Clean, vacuum machines like the VPI, and hand-washing with a brush and solution. Follow these steps in order and your records will be residue-free.
Shake off excess solution: Hold the record by the edges and give it two gentle shakes over the cleaning basin. Most of the standing liquid will fall away in the first second.
Run a microfiber cloth around the edge: Wipe only the outer rim and label area first. The label is paper and can wick solution back into the grooves if left wet.
Place the record vertically on the drying rack: Slot it into the rack so it stands upright with air space on both sides. Never lay records flat to dry.
Position the rack in a dust-free, room-temperature spot: Avoid kitchens (grease), bathrooms (humidity spikes), and direct sunlight (warping).
Optional gentle airflow: Set a small fan on low two feet away. Do not point it directly at the records.
Wait a minimum of 2 hours: For most indoor conditions, 2-4 hours is the safe window. Cool, humid rooms need 4-6 hours.
Test for dryness: Touch the inner groove near the label with a clean, dry microfiber corner. If it feels cool at all, it is still wet.
Brush off settled dust: Use an anti-static brush with one light pass before sleeving.
Sleeve and store: Only now put the record into a clean inner sleeve, then the outer sleeve.
That is the full method. The rest of this guide goes deeper on each step and the questions that come up around it.
The Vertical Drying Method (Most Recommended)
Vertical drying beats every other approach for one simple reason: gravity. Water runs off the record surface instead of pooling in the grooves, and both faces of the vinyl get equal airflow. Laying a record flat creates puddles in the inner grooves that take 8+ hours to evaporate and often leave water spots.
My setup uses a wooden folding dish drying rack from a kitchen store. It holds 12 records at a time, which matches the capacity of my Spin Clean system. One Reddit user documented drying 25 records at once using a longer rack, and that works too as long as records are not touching each other.
Key spacing rules for vertical drying:
Leave at least half an inch between records so air can move freely.
Tilt the rack slightly backward (about 10 degrees) so water drains toward the back edge instead of running down the face.
Place a microfiber towel behind the rack to catch drips and keep your floor dry.
Keep the rack away from heating vents, open windows, and baseboard heaters.
In our studio at SK Records, this vertical method has been the only one we have used for the last four years. We have not had a single mold complaint or residue issue since we switched from flat-drying on towels.
How to Prevent Residue During Drying?
Residue is the number one complaint from collectors who have just cleaned their records, and it almost always comes from the drying stage, not the cleaning stage. Here is how to make sure your grooves are spotless after drying.
Use distilled water for any rinse step: If your cleaning method involves a final water rinse, that water must be distilled. Tap water contains calcium, magnesium, and chlorine that deposit a chalky film as water evaporates. I keep a gallon jug of distilled water next to my cleaning station for exactly this purpose.
Choose surfactant-free or low-residue cleaning solutions: Some record cleaning fluids leave heavier residues than others. If you see streaks on the record after the bath, the solution is too concentrated or the wrong formula for your water type.
Do not touch the playing surface during drying: Your fingers carry oils that transfer to wet vinyl and lock into grooves. Always handle records by the edge and label only.
Keep the drying area dust-free: A record drying for 3 hours in a dusty room will collect airborne particles the moment static builds. Wipe down the area with a damp cloth before you start.
Skip the heat: Hair dryers, heat guns, and oven-drying tricks all warp vinyl and bake residue into the grooves. There is no shortcut that does not cost you sound quality.
Drying Time Guidelines by Method
How long to let vinyl records dry depends on three things: the cleaning method, your room climate, and how much water the record is holding. These are the benchmarks I have collected from forum posts and our own testing over the past several years.
Spin Clean (no rinse): 2-3 hours in a normal room, 4 hours in humid conditions.
Spin Clean with distilled water rinse: 1-2 hours, because there is less surfactant left behind.
Vacuum record cleaner (VPI, Okki Nokki): 15-30 minutes, since the machine pulls most of the moisture off.
Hand wash with brush and solution: 3-4 hours, because more water stays on the surface.
Hand wash with distilled water final rinse: 2-3 hours.
Room humidity matters more than air temperature. A 70F room at 30% humidity dries faster than a 75F room at 70% humidity. If you live in a humid climate, run a dehumidifier in the drying area or budget an extra hour per batch.
Common Drying Mistakes to Avoid
These are the mistakes I have either made myself or watched other collectors make in our shop. Skip them and you will save yourself a lot of frustration.
Using paper towels or tissues: They feel soft but they shred into the grooves. Even “lint-free” paper towels leave fibers behind on a microscopic level.
Drying in direct sunlight: Sun feels like a quick fix, but the heat warps vinyl and UV degrades the label. Always dry indoors in indirect light.
Sleeving too early: If you put a record into a paper inner sleeve while it is even slightly damp, the paper absorbs moisture and holds it against the vinyl. Give it at least the minimum time for your method above, then test before sleeving.
Laying records flat: Flat drying traps water in the bottom of the grooves and against the surface. Always dry vertically.
Using a vacuum cleaner on the playing surface: Household vacuums create strong static and can pull debris into the grooves instead of removing it. Use a proper record vacuum machine if you want vacuum drying.
Skipping the dryness test: The “looks dry” check fails often. Vinyl can look dry on the surface while still holding moisture in the deeper grooves. Always do the touch test near the label.
Signs Your Record Is Fully Dry
Three quick checks will confirm your record is ready for its sleeve. Run all three, not just one.
Touch test: Touch the inner groove near the label with a clean, dry microfiber corner. It should feel room temperature, not cool. Cool means moisture is still evaporating.
Visual check: Hold the record at an angle to a light source. Water spots show up as faint rings. No rings means no standing water, though it does not guarantee the grooves are dry.
Playback test (optional): If you have a cheap stylus you do not mind risking, play the first 30 seconds. A dry record plays silently on the lead-in. Any soft swishing sound means moisture is still present.
If any check fails, give the record another hour and retest. There is no prize for being first into the sleeve.
Frequently Asked Questions
How long do records take to dry after cleaning?
Most wet-cleaned records need 2-4 hours of vertical air drying in a normal room. Spin Clean records without a rinse sit at the higher end (3 hours), while vacuum-cleaned records can be dry in 15-30 minutes. Humid rooms add 1-2 hours.
Can you air dry vinyl records?
Yes. Air drying vertically on a wooden rack is the safest and most residue-free method. Avoid flat drying, sunlight, and any heat source. Room-temperature air with gentle airflow from a fan is ideal.
Is it safe to play a record that is still damp?
No. Playing a damp record can damage your stylus, drag moisture and residue across the grooves, and push water into your cartridge. Always wait until the record passes the touch and visual dryness tests before playing.
What happens if moisture gets on the record label?
Paper labels absorb moisture and can wick it into the inner grooves. It also raises the risk of mold on the label itself. Wipe the label area with a dry microfiber corner before placing the record on the drying rack to limit this.
Should I use distilled water for the final rinse before drying?
Yes, if your cleaning method includes a rinse step. Distilled water leaves no mineral deposits. Tap water leaves calcium and magnesium residue that shows up as a faint film once the record dries.
Conclusion
Learning how to dry records after wet cleaning without leaving residue comes down to three habits: dry vertically, give it time, and never put a damp record in a sleeve. Add a microfiber-only drying cloth, a dust-free spot, and a final anti-static brush pass, and your records will sound cleaner on every play.
Pick one batch of five records, run them through your usual cleaning method, and dry them vertically for 3 hours using the steps above. Compare the sound and the visual cleanliness against your previous flat-dry results. I am confident you will not go back.