
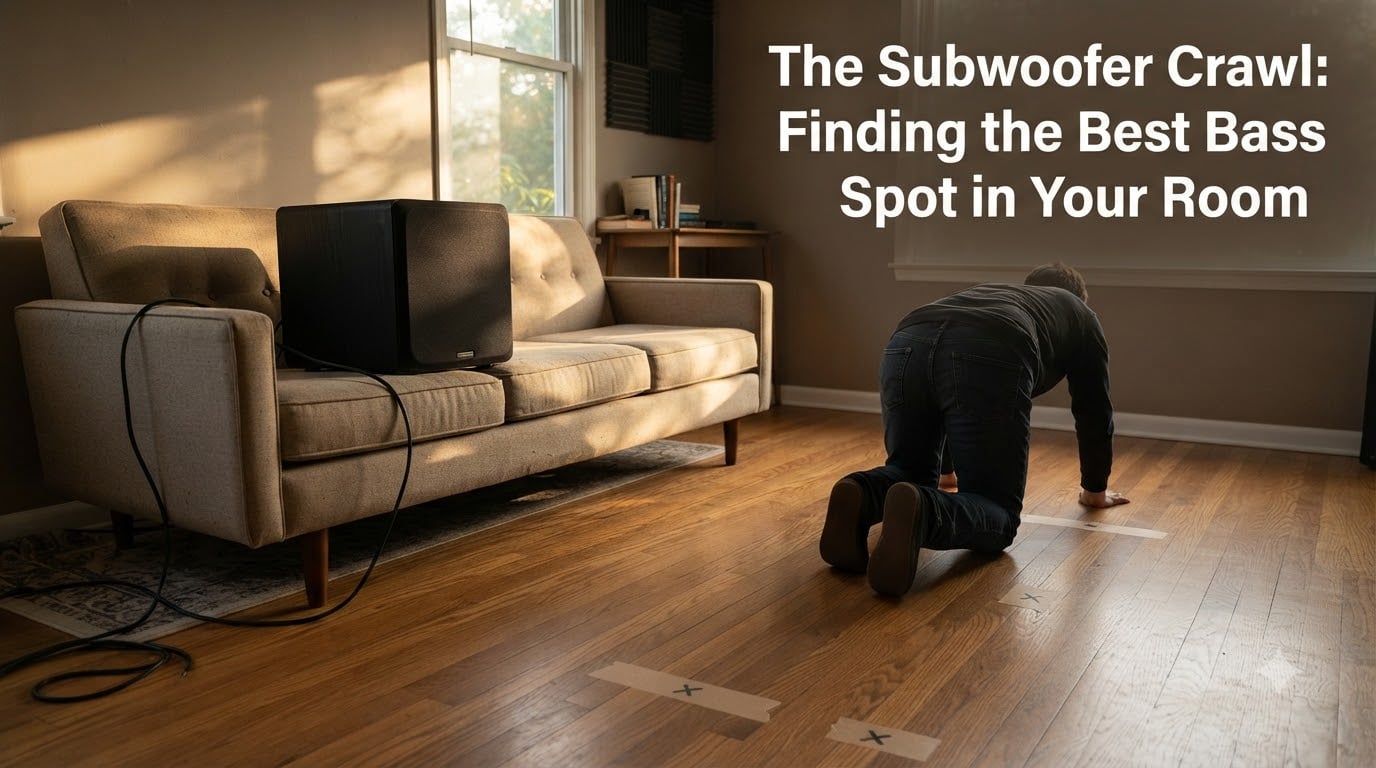
You just unboxed a brand-new subwoofer, plugged it in, and fired up your favorite movie scene. The bass should rattle your chest, but instead it sounds muddy, boomy, or weak. Sound familiar? The problem probably is not your subwoofer at all. It is where you put it.
Every room has a unique acoustic fingerprint that shapes how low frequencies behave. Standing waves bounce between your walls, creating zones where bass is deafeningly loud and dead zones where it practically disappears. The subwoofer crawl is a free, proven technique that helps you find the exact spot in your room where your sub will sound its absolute best.
In this guide, I will walk you through the subwoofer crawl method step by step. You do not need any special equipment, measurement software, or acoustic engineering knowledge. Just your subwoofer, a test tone, and a willingness to get on the floor for about 20 minutes. By the end, you will know exactly where to place your sub for the smoothest, most impactful bass your room can deliver.
Table of Contents
What Is the Subwoofer Crawl?
The subwoofer crawl is a practical placement method that uses acoustic reciprocity to find the best spot for your subwoofer. Instead of moving a heavy sub around your room and sitting back down to test each location, you put the sub in your listening seat and crawl around the room listening from the floor.
The concept relies on a principle called reciprocity. Low-frequency sound waves behave the same way whether they travel from the subwoofer to your ears or from your ears to the subwoofer. The spots on your floor where bass sounds the loudest and smoothest are the same spots where a subwoofer will produce the best bass at your listening position.
This trick saves enormous time and effort. Rather than lugging a 50-pound subwoofer to eight different locations and sitting down each time, you move the sub once and let your ears do the walking. The crawl takes about 20 minutes, costs nothing, and consistently outperforms guesswork placement.
Why You Crawl Instead of Stand
Standing up changes your ear height relative to the subwoofer and room boundaries. Bass wavelengths are long, sometimes longer than your room itself, and their interaction with walls, floor, and ceiling changes dramatically with height. Crawling keeps your ears at roughly the same level as the subwoofer driver will sit when placed in its final position.
When you crawl, your ears trace the same path the sound waves will travel between the sub and your seated position. Standing introduces reflections from your body and misses the subtle bass variations that happen closer to the floor. This is why experienced audiophiles emphasize getting on your hands and knees rather than casually walking around.
Why Room Acoustics Wreck Your Bass?
Low frequencies are lazy travelers. They do not bounce off walls cleanly like midrange or treble. Instead, bass wavelengths wrap around objects, pile into corners, and create pressure zones that can make certain notes thunder while others vanish entirely.
The main culprits are standing waves, also called room modes. These happen when a bass wavelength fits perfectly between two parallel walls so that the wave reinforces itself. At certain spots in your room, the wave peaks and bass sounds bloated and boomy. At other spots a few feet away, the wave cancels itself out and that same frequency disappears.
This is why two people sitting on the same couch can have completely different bass experiences. One seat might rattle your teeth during an explosion while the seat right next to it barely registers the low end. Room modes create these uneven zones, and no amount of subwoofer upgrading fixes them. Only proper placement does.
Boundary gain adds another layer. When a subwoofer sits near a wall or corner, the nearby surfaces reinforce low frequencies, adding output. Corners give you the most bass boost but also the most boominess and unevenness. Finding the right balance between enough boundary reinforcement and smooth frequency response is exactly what the crawl method helps you achieve.
What You Need Before Starting the Crawl?
Before you drop to the floor, gather a few essentials. The preparation takes five minutes and makes the entire process smoother.
Your subwoofer needs to be unplugged from its current location and ready to move to your main listening position. Place it on a sturdy surface at the height where your ears normally sit when you are listening. A chair or the couch seat itself works perfectly.
A bass test tone is the most important tool for the crawl. You want a sustained low-frequency tone that exercises your subwoofer consistently. Swept sine tones from 20 to 80 Hz work well because they cover the full subwoofer range. Pink noise filtered for low frequencies is another good option. Several free test tone playlists exist on YouTube and Spotify.
Masking tape and a marker let you mark spots that sound promising. Trust me, after crawling to six different locations, you will not remember which one sounded best without labels.
A willingness to look silly for about 20 minutes. If anyone asks, you are conducting a serious acoustic calibration. Which you are.
Setting Up Before the Crawl
Disconnect your main speakers or mute them so only the subwoofer plays during the test. Set your subwoofer crossover to its maximum frequency so it reproduces the full range of your test tone. Turn the gain to a moderate level, loud enough to clearly hear the bass but not so loud it shakes the walls.
Place the subwoofer at your main listening position. Face the driver forward toward where you normally face when watching a movie or listening to music. This orientation matters because the subwoofer will end up facing this same direction in its final spot.
How to Do the Subwoofer Crawl: Step by Step
Here is the complete subwoofer crawl procedure. Follow each step in order and resist the temptation to skip ahead.
Step 1: Position the Subwoofer at Your Listening Seat
Place your subwoofer exactly where your head normally sits when you are listening. If you sit in the center of a couch, that center cushion is your target. The driver should face the same direction you face, typically toward the screen or speakers.
This placement is critical. The crawl method works because of acoustic reciprocity, so the subwoofer must occupy the same physical space your ears do during normal listening. Even being a foot off changes the results.
Step 2: Play Your Bass Test Tone
Start your test tone and let it loop continuously. A swept sine wave from 20 to 80 Hz or filtered pink noise works best. Set the volume loud enough that the bass is clearly audible from across the room but not so loud it distorts or bothers neighbors.
Walk around the room briefly while standing to get a rough sense of how the bass varies. You will likely notice immediately that some areas sound much louder or boomier than others. This confirms room modes are at work.
Step 3: Get on Your Hands and Knees
Now the real work begins. Get down on the floor and start at one wall of your room. Your ears should be at roughly the same height as the subwoofer driver, which is typically 8 to 14 inches off the floor for most subwoofers.
Crawl slowly along the perimeter of the room, pausing every two to three feet to listen carefully. Move deliberately because the bass character changes in pockets that can be as small as a foot wide.
Step 4: Listen for Bass Quality, Not Just Loudness
At each stopping point, pay attention to three things. First, how loud is the bass overall? Second, does it sound tight and controlled, or boomy and loose? Third, does the tonal balance change as the sweep moves through different frequencies?
The ideal spot will have strong, even bass across all frequencies without any particular note sticking out. Avoid spots where one frequency dominates overwhelmingly, even if the overall volume sounds impressive. That boominess will translate directly to your listening position.
Step 5: Mark the Promising Spots
When you find a location where the bass sounds particularly smooth, full, and balanced, tear off a piece of masking tape and mark the spot on the floor. Write a quick note about what you heard, such as “smooth and full” or “deep but tight.”
Continue crawling around the entire room. Cover the perimeter and the middle of the room if possible. You should end up with three to five marked spots that each sounded noticeably better than surrounding areas.
Step 6: Compare Your Top Candidates
Once you have your marked spots, crawl back to each one and listen again. Compare them directly in your mind. Which spot has the deepest extension? Which sounds most balanced across the frequency sweep? Which avoids boominess?
Pick your top one or two locations. These are where you will actually place your subwoofer. Rank them in case the first choice does not work aesthetically or practically.
Step 7: Move the Subwoofer and Verify
Move the subwoofer from your listening position to your chosen spot. Face the driver the same direction it faced during the crawl. Sit down in your normal listening position and play the test tone again.
The bass should sound dramatically better than before you started. If it does, play some music and movie scenes you know well to confirm the improvement across different content types. If the results disappoint, try your second-choice spot.
What to Listen For During the Crawl?
Knowing what good bass sounds like is half the battle. Many people mistake loud, boomy bass for quality bass. Here is exactly what to listen for as you crawl around your room.
Even frequency response: As the test tone sweeps from low to high frequencies, the volume should stay relatively consistent. No single frequency should jump out or disappear. Think of it as a smooth road rather than a series of speed bumps.
Tightness and control: Good bass sounds punchy and defined. Bad bass sounds loose, slow, and bloated. If a kick drum or low note lingers too long, you are hearing room-induced boom, not subwoofer quality.
Deep extension: Some spots will give you more audible output in the deepest frequencies, below 30 Hz. These are valuable because they let you feel those movie soundtrack rumbles that cheaper setups miss entirely.
Consistent level: The overall loudness should feel full and present but not overwhelming. A spot that is dramatically louder than everywhere else usually means a room mode peak, which will translate to boominess at your listening position.
Smoothness during the sweep: Listen for any notes that suddenly spike or dip. Those peaks and nulls indicate standing wave problems. The best spots minimize these fluctuations.
Subwoofer Crawl vs Measurement Software
The subwoofer crawl is the grassroots method for finding good subwoofer placement, but measurement software like Room EQ Wizard (REW) takes things further. Both approaches have their place, and understanding the tradeoffs helps you choose the right tool.
The crawl method costs nothing, requires no equipment beyond your ears and a test tone, and gives you a genuinely useful starting point. It catches the major room mode problems and helps you avoid the worst placement mistakes. For most home theater and stereo setups, the crawl alone produces a noticeable improvement.
Measurement software like REW uses a calibrated microphone and your computer to map your room’s frequency response with precision. It shows you exactly which frequencies peak and dip at your listening position, lets you compare multiple subwoofer locations with hard data, and helps you dial in equalizer settings to smooth out remaining issues.
The tradeoff is complexity. REW requires a measurement microphone, a laptop, an audio interface, and the patience to learn the software. The crawl takes 20 minutes with zero gear. If you want the best possible results and enjoy the technical side of audio, REW is worth learning. If you just want better bass without a deep dive, the crawl gets you 80 percent of the way there.
Many enthusiasts use both. They start with the crawl to find the best general area, then use REW to fine-tune and verify. This combination gives you the speed of the crawl with the precision of measurement.
Common Mistakes to Avoid
After browsing countless forum threads on r/hometheater, r/audiophile, and Audio Science Review, the same mistakes come up repeatedly. Here are the pitfalls to watch for.
Standing instead of crawling: This is the most common error. Standing changes your ear height and completely changes the bass you hear. The method is called a crawl for a reason. Get on the floor.
Using music instead of test tones: Music has constantly changing bass content, making it impossible to compare spots fairly. A sustained test tone or sweep gives you a consistent reference point.
Cranking the volume too high: Excessive volume excites more room modes and makes everything sound loud, masking the differences between spots. Moderate volume reveals subtleties.
Skipping the room center: Many people only crawl the perimeter because it is easier. Some of the best spots are closer to the room center, where boundary gain is lower and frequency response tends to be smoother.
Forgetting post-crawl calibration: Finding the right spot is only step one. Crossover settings, phase alignment, and gain still need attention. A perfectly placed subwoofer with wrong settings still sounds bad.
Ignoring your partner’s input on aesthetics: The crawl might tell you the ideal spot is the middle of your living room. That is a real tension in shared spaces. Finding a practical compromise between acoustic ideal and domestic harmony is part of the process.
Multiple Subwoofer Placement Strategy
Adding a second subwoofer is one of the most effective upgrades you can make for bass quality. Two subwoofers smooth out room modes by averaging the response across multiple locations, reducing the peaks and nulls that a single sub cannot avoid.
The crawl method adapts well to dual-sub setups. After performing the standard crawl and identifying your best single location, look for a second spot that complements it. A common approach is to place the second sub diagonally opposite the first, or in the front center if the first sub is in a side position.
Alternatively, perform the crawl twice. Find the two best non-adjacent spots and place one sub in each. This tends to produce the smoothest overall response because the two subs fill in each other’s nulls.
When running two subs, set them to the same gain level and check that their phase is aligned. If the bass gets quieter when you turn on the second sub, one is out of phase. Flip the phase switch on one sub and listen for improvement.
Post-Crawl Calibration Tips
Once your subwoofer sits in its new home, a few calibration steps lock in the gains from your crawl work.
Set the crossover: Your crossover frequency determines where your main speakers hand off to the subwoofer. A typical starting point is 80 Hz for most home theater setups. If you have small satellite speakers, you might need 100 Hz or higher. Set main speakers to “small” on your receiver so bass management routes low frequencies correctly.
Adjust the gain: Play a familiar scene or track and set the subwoofer gain so the bass blends naturally with the rest of your system. The sub should add weight and impact without drawing attention to itself. If you notice the sub before you notice the movie, turn it down.
Check phase alignment: The phase control on your subwoofer aligns its output with your main speakers. Play a bass-heavy track with strong midbass content and have a friend flip the phase switch while you listen. Whichever setting produces fuller, more coherent bass is correct.
Run room correction if available: If your receiver has Audyssey, Dirac, or another room correction system, run it after placement. These systems can further smooth the response at your listening position.
Frequently Asked Questions
Where is a subwoofer best placed in a room?
The best subwoofer placement varies by room because standing waves create different bass responses at every location. The subwoofer crawl method helps you find the optimal spot by placing the sub at your listening position, playing bass test tones, and crawling around the floor to identify where bass sounds smoothest and most balanced.
How can I use the subwoofer crawl to optimize my bass?
Place your subwoofer at your main listening position and play a sustained bass test tone. Get on your hands and knees and crawl slowly around the room perimeter, pausing every few feet to listen. Mark spots where the bass sounds smooth, full, and even across frequencies. Move the sub to your top-ranked spot and verify the improvement from your seat.
How to maximize bass in a room?
To maximize bass quality, use the subwoofer crawl to find the best placement, avoid corners if they create boominess, consider adding a second subwoofer to smooth room modes, set your crossover to 80 Hz, adjust gain so bass blends naturally, and run room correction software if your receiver supports it.
What is the subwoofer crawl method?
The subwoofer crawl is a free acoustic placement technique that uses the principle of reciprocity. You place the subwoofer at your listening position, play a bass test tone, and crawl around the room floor to find where bass sounds best. The spots that sound best from the floor are the same spots where the subwoofer will produce the best bass at your seated position.
Conclusion
The subwoofer crawl proves you do not need expensive measurement gear to dramatically improve your bass. Twenty minutes on the floor with a test tone can transform muddy, uneven low end into tight, deep, satisfying bass that does justice to your movies and music.
The method works because it respects the physics of how low frequencies interact with your room. By leveraging acoustic reciprocity, the crawl lets your ears do the heavy lifting that a calibrated microphone would otherwise handle. The result is placement that minimizes room mode problems without any software or special equipment.
Your next step is simple. Grab your subwoofer, queue up a bass test tone on YouTube, and start crawling. Mark the spots that sound best, move your sub, and sit back to enjoy the difference. The subwoofer crawl is the highest-impact, zero-cost upgrade you can make to your system tonight.