
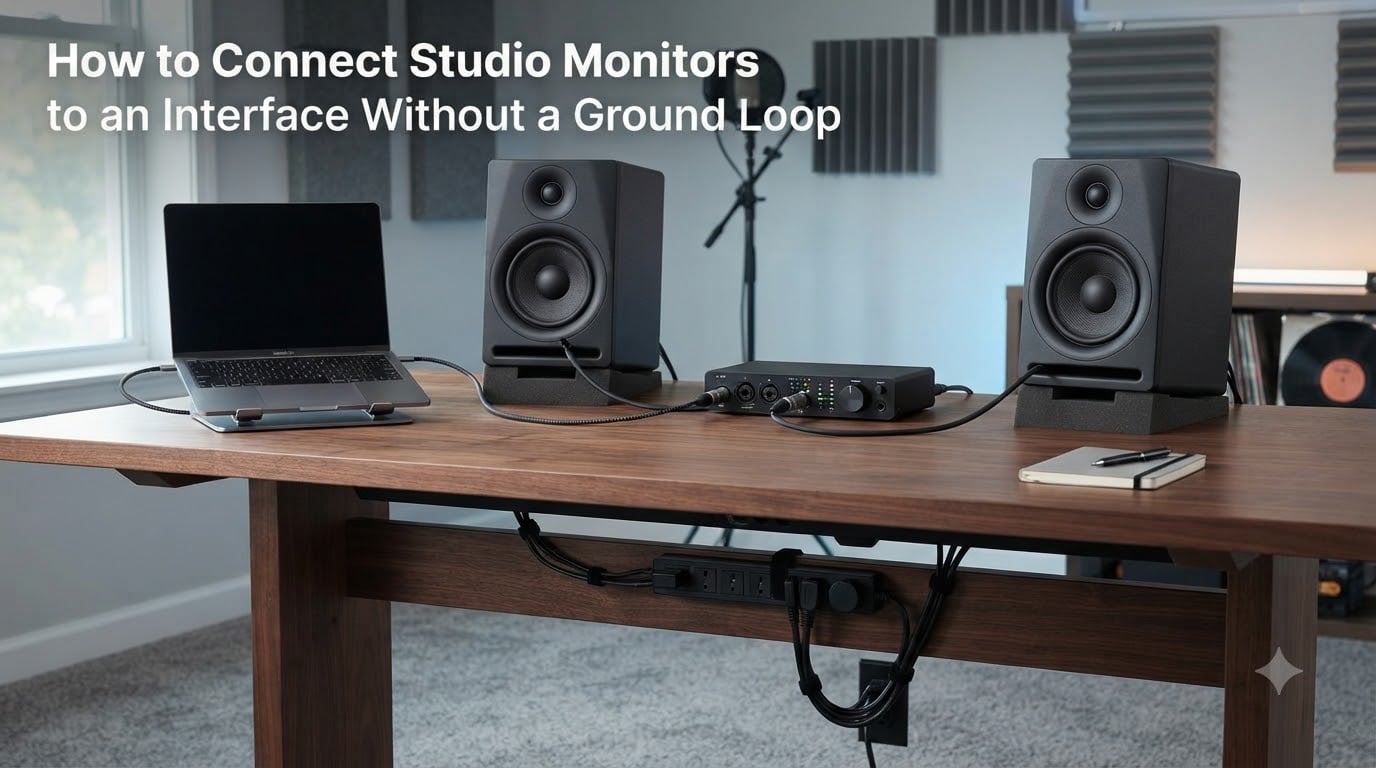
So you have set up your audio interface, plugged in your studio monitors, and the moment you power everything on you hear it. That low, stubborn 50 or 60 Hz hum sitting under everything you play. I have been there, and after years of building home studios and helping others troubleshoot theirs, the cause is almost always the same: a ground loop.
This guide walks through exactly how to connect studio monitors to an interface without a ground loop, from choosing the right cables to wiring your power and signal paths so the hum never appears in the first place.
You will learn why ground loops form electrically, how to tell a ground loop apart from other noise, and the step-by-step process I use for a clean, silent signal chain. I have pulled the most practical fixes from audio engineering forums, manufacturer guidance, and my own trial and error so you can solve this in an afternoon rather than a week.
Table of Contents
What Is a Ground Loop and Why It Happens?
A ground loop occurs when two or more pieces of audio equipment are connected to electrical ground through more than one path. When those ground paths have slightly different electrical potentials, a small current flows through the ground wire between the devices. That stray current gets induced into your audio signal path and you hear it as hum or buzz through your monitors.
Think of it this way. Your audio interface is grounded through its USB connection to your computer, and your computer is grounded through its power cable to the wall. Your studio monitors are also grounded to the wall through their own power cables. When the interface connects to the monitors via audio cables with a ground shield, you have created a loop: wall to computer to interface to monitors and back to the wall. Any difference in ground voltage between the outlets turns that loop into a tiny antenna that picks up mains hum.
This is why ground loops are so common in computer-based studios. The USB cable linking your interface to the PC adds a second ground connection that a purely analog rig would not have. Forum users on Reddit and Gearspace consistently report the same thing: the noise shows up the moment they connect the interface to the computer, and gets worse when a laptop charger is plugged in.
How to Identify a Ground Loop?
Before you fix anything, confirm that a ground loop is actually your problem. Ground loop hum has a few reliable signatures that distinguish it from other noise sources.
Ground loop noise is a steady low-pitched hum at the mains frequency (50 Hz in Europe, 60 Hz in North America) and sometimes a brighter buzz on top of it. It does not change with volume, it continues even when no music is playing, and it is present the moment both devices are powered on.
Here is the diagnostic method forum users recommend most often. Unplug everything from your interface and monitors except power. Turn the monitors on. If they are silent, the speakers are fine. Now connect just the interface. If the hum appears, your loop involves the interface-to-monitor connection. Connect the USB cable to the computer. If the hum gets louder or appears for the first time, the computer ground is involved. Unplug the laptop charger. If the hum vanishes, you have a classic USB ground loop through the charger.
This piece-by-piece teardown is the single most effective way to isolate the loop. It takes ten minutes and saves hours of guessing.
Balanced vs Unbalanced Cables: Why It Matters
Cable choice is the first and most effective line of defense against ground loops. The difference between balanced and unbalanced cables determines whether your signal path is naturally resistant to ground loops or vulnerable to them.
Unbalanced cables, like RCA and TS (quarter-inch tip-sleeve) cables, use two conductors: one carries the signal and the other is the ground shield. Because the shield is shared between signal return and ground, any difference in ground potential between two devices flows directly through your audio. This is exactly how a ground loop enters the signal.
Balanced cables, like TRS (tip-ring-sleeve) and XLR, use three conductors. Two carry the signal (one normal, one phase-inverted) and the third is a separate ground. The receiving device compares the two signal lines and rejects anything common to both, including induced noise and ground differences. This common-mode rejection is why balanced connections are the standard for professional audio.
For studio monitors, I always recommend balanced TRS or XLR cables if your interface and monitors support them. Most entry-level interfaces like the Focusrite Scarlett and most monitors from JBL, KRK, Yamaha, and Adam offer both balanced inputs. Balanced cables significantly reduce ground loop noise, though as forum users note, they do not always eliminate it on their own if the power side of the loop is severe.
How to Connect Studio Monitors to an Interface Without a Ground Loop?
Follow these steps in order. Each one builds on the previous, and doing them in sequence is what prevents the loop from forming.
Step 1: Power everything off. Turn off your monitors, interface, and computer. Working with powered equipment risks speaker damage from connection pops and makes it impossible to verify a clean signal path.
Step 2: Plug all equipment into the same outlet or power strip. This is the single biggest ground loop prevention step. When your interface, computer, and monitors share the same ground reference at the same electrical point, there is no voltage difference to drive a loop. Use a single quality power strip or power conditioner plugged into one wall outlet, and connect every piece of gear to it. This is called star grounding and it works.
Step 3: Choose balanced cables. Connect the line outputs of your interface to the inputs of your monitors using TRS-to-TRS or XLR-to-XLR cables. Match what your equipment offers. If your interface has TRS outputs and your monitors have XLR inputs, use a TRS-to-XLR balanced cable. Avoid RCA cables unless your monitors have no other option, because RCA is unbalanced and invites ground noise.
Step 4: Connect the interface to the computer last. After your audio cables are in place and your monitors are connected to the same power source as the interface, connect the USB or Thunderbolt cable to the computer. Because the computer shares the same outlet as the interface and monitors, the ground potential is already equalized, and the USB ground connection should not create a loop.
Step 5: Power on in the right order. Turn on the computer first, then the interface, then the monitors. Powering the monitors on last protects your speakers from power-on thumps and confirms the interface is sending a clean signal before the speakers are live. Reverse the order when shutting down: monitors off first, then interface, then computer.
Step 6: Test for silence. With everything on and no music playing, put your ear near the monitors. You should hear dead silence or at most a faint hiss from the tweeters at very close range. If you hear hum, return to the diagnostic steps earlier and identify which connection is reintroducing the loop.
Eliminating USB Ground Loop Noise
If you have followed the steps above and still hear hum, the USB connection between your interface and computer is the likely culprit. This is the most common ground loop source in home studios, and it happens because the USB cable carries its own ground in addition to the ground your devices share through the wall outlet.
Laptop users hit this constantly. When a laptop is charging, the charger connects the laptop to mains ground. The USB cable connects the laptop ground to the interface ground, and the interface is also grounded through the wall. You now have two ground paths, and any voltage difference between the charger ground and the outlet ground drives current through the USB shield and into your audio.
The fix is a USB ground loop isolator. This is a small inline device that passes the USB data lines but breaks the ground connection, stopping the loop while keeping the interface fully functional. Forum users on Reddit and Gearspace report that a quality USB isolator eliminates laptop-charger hum in the majority of cases. Plug the isolator between the computer and the interface, and the noise should disappear without any change to your audio quality.
A quick free test before you buy anything: unplug your laptop charger and run on battery. If the hum vanishes, the charger ground is your loop and a USB isolator will fix it permanently.
Power Conditioning and Star Grounding
Power distribution is where most ground loops are created or destroyed. The goal is simple: every piece of gear in your studio should reference the same ground point.
I recommend a single power strip or power conditioner for your entire signal chain: computer, interface, monitors, and any external gear in the audio path. A power conditioner also filters out electromagnetic interference from the mains, which can reduce high-frequency buzz that rides on top of ground loop hum.
Forum users frequently suggest that separating gear across different wall outlets helps. It can, but only if those outlets are on different circuits. If they are on the same circuit, you are still sharing ground and the loop remains. The safest approach is one outlet, one power strip, all gear connected to it.
Avoid plugging your audio gear into the same circuit as high-draw appliances like refrigerators, air conditioners, or dimmer-controlled lights. These introduce noise and voltage fluctuations that can sound like a ground loop but are actually interference.
The Truth About Ground Lifts and Cheater Plugs
When the hum will not go away, the temptation is to break the ground connection on your monitor power cables using a cheater plug (a three-prong to two-prong adapter). I have seen forum users admit that two cheater plugs on both monitors completely eliminated their hum. It works, but it is not safe and I cannot recommend it.
A cheater plug removes the safety ground from a device that was designed to use it. If a fault develops inside the monitor and the chassis becomes live, that ground wire is what protects you from a serious electric shock. Without it, the fault current has nowhere safe to go. Cheater plugs also violate electrical code in many areas and can void equipment warranties.
The proper alternative is an audio ground lift, which breaks the ground connection on the signal cable (pin 1 on an XLR) rather than the power cable. This removes the audio ground loop while keeping the safety ground intact. Some monitors and interfaces have a ground lift switch built in. If yours do not, you can buy an XLR pin-1 lift adapter for a few dollars that does the same thing safely.
The community consensus on forums is clear: proper grounding and balanced cables are always preferable to lifting the safety ground. Exhaust every other option first.
Troubleshooting Checklist for Hum-Free Monitors
If you still have noise after following the connection steps, run through this checklist in order. Each item addresses a specific ground loop cause I have encountered or seen reported.
All gear is on the same power strip or outlet.
Cables are balanced TRS or XLR, not RCA or TS.
Laptop charger is unplugged during testing to isolate USB ground.
USB ground loop isolator is in place if charger ground is the cause.
No dimmer switches, fluorescent lights, or appliances on the same circuit.
Audio cables are not running parallel to power cables.
Monitor volume knobs are not maxed out (gain staging amplifies noise).
Interface output level matches monitor input sensitivity.
Ground lift switch on monitors or interface is engaged if available.
All cable connections are tight and free of corrosion.
Work through the list one item at a time, testing after each change. Changing multiple things at once makes it impossible to know which fix actually worked.
Frequently Asked Questions
Can you connect studio monitors to an audio interface?
Yes. Studio monitors connect to the line outputs of an audio interface using balanced TRS or XLR cables. The interface converts digital audio from your computer to analog line-level signals that the monitors amplify and play back.
How to eliminate ground loop?
Plug all gear into the same outlet, use balanced TRS or XLR cables, connect the USB cable last after power and audio are wired, and add a USB ground loop isolator if the hum comes from a laptop charger. Power on the computer first, interface second, monitors last.
Should I use XLR or TRS for studio monitors?
Both XLR and TRS are balanced connections that reject ground loop noise equally well. Choose whichever matches the outputs on your interface and inputs on your monitors. If one device has XLR and the other has TRS, use a balanced XLR-to-TRS cable. Avoid RCA cables unless no balanced option exists.
Why avoid ground loops?
Ground loops cause audible 50 or 60 Hz hum and buzz that degrades audio quality, masks detail in your mixes, and makes critical listening impossible. In extreme cases, circulating ground currents can also introduce noise into recordings and damage sensitive input stages over time.
Conclusion
Connecting studio monitors to an interface without a ground loop comes down to three principles: share one ground reference for all gear, use balanced cables, and add a USB isolator if the computer ground is involved. The full process to connect studio monitors to an interface without a ground loop takes about an hour the first time and five minutes every time after.
Start with the single-outlet power setup and balanced cables. Those two steps solve the majority of cases. If hum persists, isolate the USB connection and work through the troubleshooting checklist one item at a time. A clean, silent signal chain is absolutely achievable in any home studio, and once you have it, you will never want to go back.