
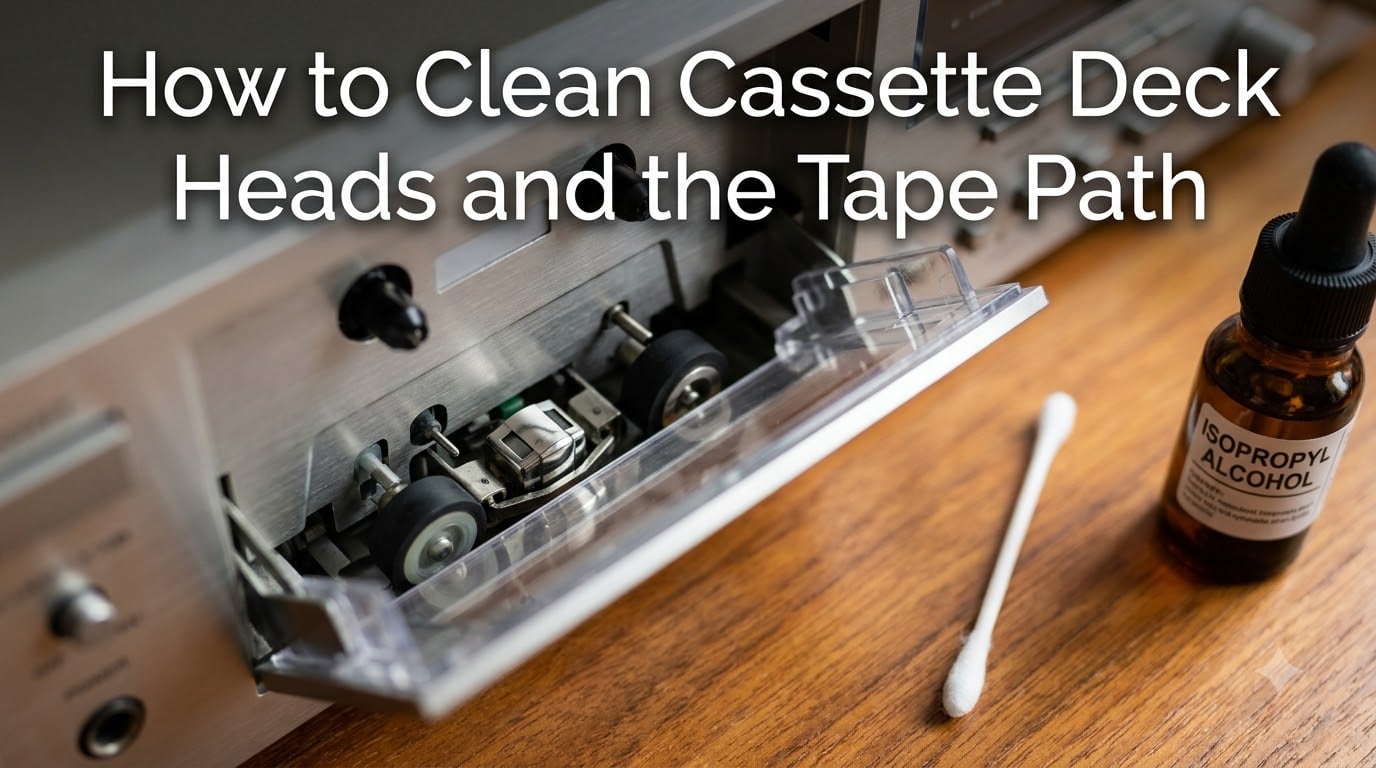
If your tapes are starting to sound dull, muffled, or are dropping out mid-playback, there is a good chance your tape heads are overdue for a clean. Every time a cassette runs through your deck, microscopic particles of magnetic oxide shed off the tape and stick to the heads, capstan, and pinch roller. Over hours of play, that brownish buildup forms a layer that physically separates the tape from the head surface, killing your high frequencies and degrading everything you hear.
I have been cleaning and maintaining cassette decks for over 15 years, and the difference between a clean deck and a dirty one is night and day. The same tape played before and after a proper cleaning can sound like two entirely different recordings. In this guide, I will walk you through exactly how to clean cassette deck heads and the full tape path using tools you probably already have at home.
Learning how to clean cassette deck heads properly is the single most impactful maintenance skill you can develop as a tape enthusiast. Whether you are restoring a vintage deck, maintaining a daily-listener Walkman, or prepping for a recording session, the process I outline here will keep your equipment sounding its best and protect your tape collection from unnecessary wear.
Table of Contents
Why Cassette Deck Cleaning Matters?
When magnetic tape passes across your deck’s heads at a precise speed, it leaves behind a thin film of oxide particles. This is completely normal and happens with every brand and type of tape. The problem is that this oxide is magnetically conductive, and when it accumulates on the head gap, it disrupts the electromagnetic field that reads and writes the audio signal.
The first thing you will notice with dirty heads is a loss of high-frequency detail. Cymbals sound dull, vocals lose their clarity, and the whole mix feels veiled or muffled. As the buildup thickens, you start hearing dropouts, where the signal briefly cuts in and out. In severe cases, the tape can sound wobbly or distorted because the oxide layer is physically preventing proper tape-to-head contact.
Beyond audio quality, a dirty tape path actively damages your tapes. When oxide coats the capstan and pinch roller, the grip between them weakens, causing speed inconsistencies known as wow and flutter. The tape can slip, stretch, or even tangle inside the mechanism. Cleaning the tape path regularly prevents this mechanical wear and extends the life of both your deck and your cassette collection.
Forum users on Tapeheads.net and Reddit’s r/cassetteculture consistently report that decks which sat in storage for years often just need a thorough cleaning to sound like new again. In many cases, people assume a deck is broken when it simply has a decade of oxide baked onto the heads. Before spending money on repairs, cleaning should always be your first step.
Tools and Materials Needed
You do not need expensive or specialized equipment to clean cassette deck heads effectively. Here is what I recommend having on hand before you start.
Isopropyl alcohol (91% or higher): This is the single most important item. I use 91% isopropyl alcohol for all metal components in the tape path. Some technicians prefer 99% for faster evaporation, but 91% is widely available at pharmacies and works perfectly. Avoid rubbing alcohol that contains perfumes, colorants, or additives, as these leave residues behind. Denatured alcohol is an acceptable alternative for metal parts.
Cotton swabs (Q-tips): Use wooden-stemmed cotton swabs if possible, as they give you more control and pressure than plastic or paper stems. Brand matters here too. Cheaper swabs tend to leave lint behind on the heads, which defeats the purpose of cleaning. Many experienced users on cassette culture forums specifically recommend Johnson’s cotton buds for their tight cotton winding and low lint.
Lint-free cloths: A microfiber or specialty lint-free cloth is useful for wiping down the exterior of the tape well and drying components after cleaning. Never use paper towels or tissues on the heads, as they shed fibers aggressively.
Rubber roller cleaner (optional but recommended): There is ongoing debate about whether isopropyl alcohol is safe for rubber pinch rollers. Some argue it dries out the rubber over time. A dedicated rubber cleaner like Teac’s RC-2 or a rubber restorer provides a safer alternative for the pinch roller specifically.
Head demagnetizer (optional): If your deck has not been demagnetized in a long time, a demagnetizer tool can remove residual magnetism that builds up on the heads. I cover this in detail in a later section.
Distilled water (optional): If you are cautious about using alcohol on rubber components, a mix of distilled water with a small amount of isopropyl alcohol provides a gentler cleaning solution for the pinch roller.
Understanding the Tape Path Components
Before you start cleaning, it helps to know what you are looking at when you open the cassette door. The tape path includes every component the tape physically touches as it travels from one reel to the other.
The erase head is usually the first component the tape encounters. On a three-head deck, it is a dedicated unit. On a two-head deck, it is often a small head positioned before the main record and playback head. Its job is to erase any existing signal before recording, and it collects oxide just like every other surface.
The record and playback head is the most important component to clean. On a two-head deck, this single head handles both recording and playback. On a three-head deck, you will see separate record and playback heads side by side. This is the head with a visible gap running across its face, and it is where oxide buildup has the most dramatic effect on sound quality.
The capstan is a thin metal shaft that spins at a precisely controlled speed, pulling the tape through the mechanism at a constant rate. The pinch roller is the rubber wheel that presses the tape against the capstan, creating the grip that moves the tape forward. Both of these components collect significant oxide and debris because the tape is under pressure between them.
Tape guides are small metal posts with flanges that keep the tape aligned vertically as it passes the heads. They may look clean, but oxide builds up on their surfaces too and should be wiped during every cleaning session.
How to Clean Cassette Deck Heads: Step by Step
This is the core process I use every time I service a cassette deck. Follow these steps in order, and take your time. Rushing leads to incomplete cleaning or accidental damage.
Step 1: Power off and unplug the deck. Always disconnect power before cleaning. This protects you from electrical hazards and protects the deck from short circuits if liquid seeps into the electronics. On battery-powered portables like Walkmans, remove the batteries.
Step 2: Remove any tape and open the cassette door. Take out any cassette currently in the deck. If your deck has a removable cassette door or hatch, take it off for better access. On some decks, you may need to press play or manually engage the mechanism to expose the heads. Never force any mechanism open. If the heads are not accessible, consult your deck’s manual.
Step 3: Dip a cotton swab in isopropyl alcohol. Pour a small amount of 91% isopropyl alcohol into a clean container. Dip just the tip of the cotton swab into the alcohol. You want it damp, not dripping. Excess liquid can run into areas you do not want it, so shake off any surplus before approaching the heads.
Step 4: Gently wipe the playback and record heads. Press the damp swab against the face of the head and move it side to side, following the direction the tape travels. Use light, even pressure. Do not scrub aggressively. The goal is to dissolve and lift the oxide film, not to grind it off. You will likely see a brownish or grayish discoloration on the cotton tip. That is the oxide coming off.
Step 5: Use a fresh swab and repeat. Discard the used swab and repeat the process with a clean one. Keep going with fresh swabs until a new one comes away completely clean after wiping the head. I typically go through two to four swabs per head on a moderately dirty deck. On a deck that has not been cleaned in years, you may need five or six passes.
Step 6: Clean the erase head. Use the same technique on the erase head. It is usually smaller and collects less oxide than the main heads, but it still needs attention. One or two passes with a fresh swab is typically sufficient.
Step 7: Wipe the tape guides. Run a damp swab around each tape guide post. These collect a surprising amount of debris, especially on decks that see heavy use with older tapes.
Step 8: Allow everything to dry completely. Isopropyl alcohol at 91% evaporates quickly, usually within two to three minutes. Wait at least five minutes to be safe before inserting a tape. Playing a tape on a wet head can cause the alcohol to transfer onto the tape surface, which can damage the magnetic coating.
Step 9: Inspect the head surface. After drying, shine a flashlight into the cassette well and examine the head face. A clean head should look uniform and shiny, with no brown streaks or cloudy patches. If you still see discoloration, repeat the cleaning process.
How to Clean the Capstan and Pinch Roller?
The capstan and pinch roller work together as a pair, and they require slightly different cleaning approaches because one is metal and one is rubber.
Capstan cleaning: The capstan shaft is metal, so isopropyl alcohol is perfectly safe here. Dip a cotton swab in alcohol and wipe the shaft from top to bottom, rotating it by hand if possible. The capstan often has a ring of oxide buildup near the base where the tape rides. Pay extra attention to this area. Use fresh swabs until they come away clean.
One important caution: never spin the capstan by grabbing it with a swab and pulling. Apply gentle wiping pressure only. Aggressive spinning can damage the motor or the drive belt connected to the capstan flywheel.
Pinch roller cleaning: This is where opinions diverge in the cassette community. The pinch roller is made of rubber, and there is a legitimate concern that repeated exposure to isopropyl alcohol can dry out and harden the rubber over time. However, many experienced technicians use isopropyl alcohol on pinch rollers regularly without issue, as long as they do not soak the roller and they allow it to dry fully.
My approach is a middle ground. For routine cleaning, I use isopropyl alcohol on the pinch roller but apply it sparingly and wipe the roller dry immediately after cleaning. If I am servicing a deck that will see heavy use or one with an already aging pinch roller, I switch to a dedicated rubber roller cleaner. These products are formulated to remove oxide and tape residue without degrading the rubber compound.
To clean the pinch roller, hold a damp swab against the roller surface while gently rotating it by hand. Cover the entire circumference. You will see significant brown residue on the swab because the pinch roller collects more oxide than almost any other component in the tape path. This is normal. Keep going with fresh swabs until the cotton comes away clean.
If the pinch roller has visible glazing, where the surface has become shiny and hard instead of matte and grippy, cleaning alone may not be enough. You can try a rubber restorer product, but severely glazed rollers need to be replaced. A glazed roller will cause tape slippage and wow and flutter that no amount of cleaning will fix.
Safety Precautions and Chemical Handling
Cleaning a cassette deck is generally safe, but there are a few precautions worth taking seriously, especially if you are working inside a vintage or valuable piece of equipment.
Electrostatic discharge (ESD): The record and playback heads are sensitive electromagnetic components. A static shock from your body can potentially magnetize or damage a head. Before reaching inside the cassette well, ground yourself by touching a metal surface. Avoid working in carpeted areas with low humidity, where static buildup is most common. If you want to be extra cautious, wear an anti-static wrist strap.
Alcohol handling: Isopropyl alcohol is flammable and its vapors can irritate the respiratory system. Work in a well-ventilated area. Keep alcohol away from heat sources, open flames, and cigarettes. If you are cleaning a large number of decks in one session, take breaks to get fresh air.
Avoiding liquid intrusion: The most common mistake I see is using too much alcohol and letting it pool inside the mechanism. Liquid can seep into bearings, electronics, and belt assemblies, causing corrosion or electrical failures. Always shake excess alcohol off the swab before bringing it near the deck. If you accidentally spill alcohol inside, let it evaporate fully before powering on the deck.
Drying time: Patience is critical here. Even though 91% isopropyl alcohol evaporates in minutes, residual moisture can linger in microscopic gaps between components. I recommend waiting at least five minutes after cleaning before inserting a tape. If you used a rubber cleaner on the pinch roller, follow the product’s recommended drying time, which is often longer.
Never use cotton swabs with loose fibers: A single cotton strand wrapped around a capstan shaft or caught in the head gap can cause tracking errors and audio issues. If you notice a swab shedding, switch to a higher-quality brand immediately.
Do not use abrasive materials: Never use scouring pads, rough cloths, or abrasive cleaners on any part of the tape path. The head surface is precision-lapped to an extremely fine tolerance, and even microscopic scratches will degrade performance. Alcohol and gentle cotton pressure is all you need.
Demagnetizing Tape Heads Explained
Over time, the record and playback heads can develop residual magnetism from the constant electromagnetic activity of reading and writing tape signals. A magnetized head can partially erase high frequencies from your tapes during playback, causing the same symptoms as dirty heads but for a different reason.
Not everyone agrees on how often demagnetizing is necessary. Some technicians recommend it every few months. Others argue that modern heads are less prone to residual magnetism and that the risk of demagnetizing incorrectly outweighs the benefits. My recommendation is to demagnetize once or twice a year for decks that see regular use, and any time you notice a persistent loss of high-frequency detail that cleaning does not resolve.
To demagnetize, you use a dedicated head demagnetizer tool. These are small, wand-like devices that generate an alternating magnetic field. The process is simple but requires care.
Power on the demagnetizer while it is at least three feet away from the deck. Slowly bring the tip toward the record and playback heads, moving it in a gentle circular motion over each head for about five seconds. Then slowly withdraw the demagnetizer, maintaining the circular motion, until you are at least three feet away before powering it off.
The key rule is to never power the demagnetizer on or off while it is close to the heads. Doing so creates a sudden magnetic pulse that can permanently magnetize the head rather than demagnetize it. The slow approach and withdrawal are what make the process safe and effective.
Demagnetize only the record and playback heads. Do not use a demagnetizer on the erase head, as the erase head is designed to be electromagnetic and demagnetizing it can reduce its effectiveness.
Cleaning Frequency Recommendations
How often you need to clean cassette deck heads depends entirely on how much you use the deck and what kind of tapes you play.
For a deck in regular daily use, I recommend cleaning the heads every 10 to 15 hours of playback. That translates to roughly once a week for someone who listens for an hour or two each day. If you are recording, clean before every recording session to ensure the cleanest possible signal transfer.
For occasional listeners who play tapes a few times a month, a monthly cleaning schedule is sufficient. Mark it on your calendar so it becomes a habit rather than something you remember only when the sound degrades.
Certain situations call for more frequent cleaning. Older tapes, especially budget brands from the 1980s and 1990s, shed oxide much faster than high-quality tapes. If you play a lot of thrift store finds or tapes in unknown condition, clean after every session. Chrome and metal position tapes (Type II and Type IV) tend to shed less than ferric (Type I) tapes, but they still leave residue over time.
If your deck has been in storage for a year or more, do a thorough cleaning before playing any tapes. Dust and humidity can cause oxidation on the head surfaces and the capstan, and the rubber pinch roller may have developed a set or flat spot from sitting in one position.
Here are the signs that tell you cleaning is overdue: dull or muffled high frequencies, intermittent dropouts, audible wow or flutter, visible brown discoloration on the head face, and tapes that come out of the deck with a brown streak on the magnetic side. If you notice any of these, stop playing tapes and clean immediately.
Troubleshooting Post-Cleaning Issues
Sometimes you clean the heads thoroughly and the deck still does not sound right. Here are the most common post-cleaning problems I encounter and how to address each one.
The sound is still muffled after cleaning. If you have cleaned the heads multiple times with fresh swabs and the high frequencies still sound dull, the heads may need demagnetizing. Residual magnetism produces the same audio symptoms as oxide buildup. Run through the demagnetizing process described above and test again.
If demagnetizing does not help, the issue may be head alignment. Over years of use, the azimuth angle of the head can drift, causing a mismatch between the head gap and the recorded signal. Head alignment requires specialized test tapes and small screwdriver adjustments. If you suspect misalignment and are not comfortable adjusting it yourself, this is a job for a qualified technician.
The tape sounds worse after cleaning. This is rare but it happens. The most common cause is residual moisture on the heads. Even a tiny amount of alcohol left on the head gap can interfere with playback. Wait an additional five to ten minutes and try again. If the problem persists, re-clean the heads with a dry cotton swab to remove any lingering residue.
Excessive wow and flutter after cleaning. If you notice speed fluctuations that were not present before, check the pinch roller. If you used alcohol on the roller and it has not fully dried, or if the rubber has become glazed, the tape may be slipping. Clean the pinch roller again with a dedicated rubber cleaner and allow extra drying time.
Lint or fibers visible on the head. If your cotton swabs left fibers behind, remove them carefully with tweezers. Going forward, switch to a higher-quality cotton swab brand. Fibers caught in the head gap can mimic the symptoms of a dirty head and are easy to overlook.
A persistent buzzing or hum. If you hear a new hum after cleaning, you may have accidentally disturbed a ground connection or introduced static. Check that all internal connections are secure and that nothing was dislodged during cleaning. If the hum persists, have a technician inspect the deck.
Cleaning cassettes versus manual cleaning. Many people try head cleaning cassettes, the type with a small felt pad embedded in a cassette shell. While convenient, I and most experienced users on cassette forums do not recommend them as a primary cleaning method. The felt pads apply less pressure than manual swabbing and cannot reach the pinch roller effectively. They are acceptable as a quick touch-up between deep cleans, but they are no substitute for the manual process described in this guide.
Frequently Asked Questions
What do you clean tape heads with?
Clean tape heads with 91% or higher isopropyl alcohol applied to a wooden-stemmed cotton swab. Gently wipe the head face side to side and repeat with fresh swabs until no brown oxide residue appears. Denatured alcohol is an acceptable alternative for metal components.
Is it safe to clean tape recording heads with isopropyl alcohol?
Yes, isopropyl alcohol at 91% or higher is completely safe for cleaning metal tape heads, capstans, and tape guides. It evaporates quickly and leaves no residue. Avoid rubbing alcohol with added perfumes or colorants, as these leave contaminants behind. For rubber pinch rollers, use alcohol sparingly or switch to a dedicated rubber roller cleaner.
How often should you clean cassette tape heads?
Clean cassette tape heads every 10 to 15 hours of playback for decks in regular use, or approximately once a week for daily listeners. For occasional use, a monthly cleaning is sufficient. Always clean before a recording session and after playing older or budget tapes that shed oxide heavily.
What does a dirty tape head look like?
A dirty tape head has a visible brown or grayish streak across its face where the tape makes contact. In good lighting, you can see this discoloration running along the head gap. A clean head looks uniform and shiny with no cloudy patches. If you wipe a cotton swab across a dirty head, brown oxide residue will transfer to the cotton.
Can you use rubbing alcohol on cassette pinch rollers?
You can use isopropyl alcohol on rubber pinch rollers for routine cleaning, but apply it sparingly and wipe the roller dry immediately after. Repeated heavy alcohol use may dry out rubber over time. For decks with aging rollers or heavy use, a dedicated rubber roller cleaner is the safer long-term choice.
Why does my cassette sound muddy after cleaning?
If your cassette still sounds muddy after cleaning, the heads may have residual magnetism that needs demagnetizing, or the head azimuth alignment may have drifted. Wait at least five minutes after cleaning to rule out residual moisture, then try demagnetizing the heads. If that does not help, a technician may need to check head alignment.
Conclusion
Knowing how to clean cassette deck heads and the tape path is the foundation of cassette deck maintenance. With nothing more than 91% isopropyl alcohol, quality cotton swabs, and about ten minutes of your time, you can restore lost audio quality, protect your tape collection, and keep your deck running smoothly for years.
The process is straightforward: power down, clean every component the tape touches, use fresh swabs until they come away clean, let everything dry, and demagnetize occasionally. Build cleaning into your regular routine, and your tapes will reward you with the full, rich sound they were designed to deliver.