
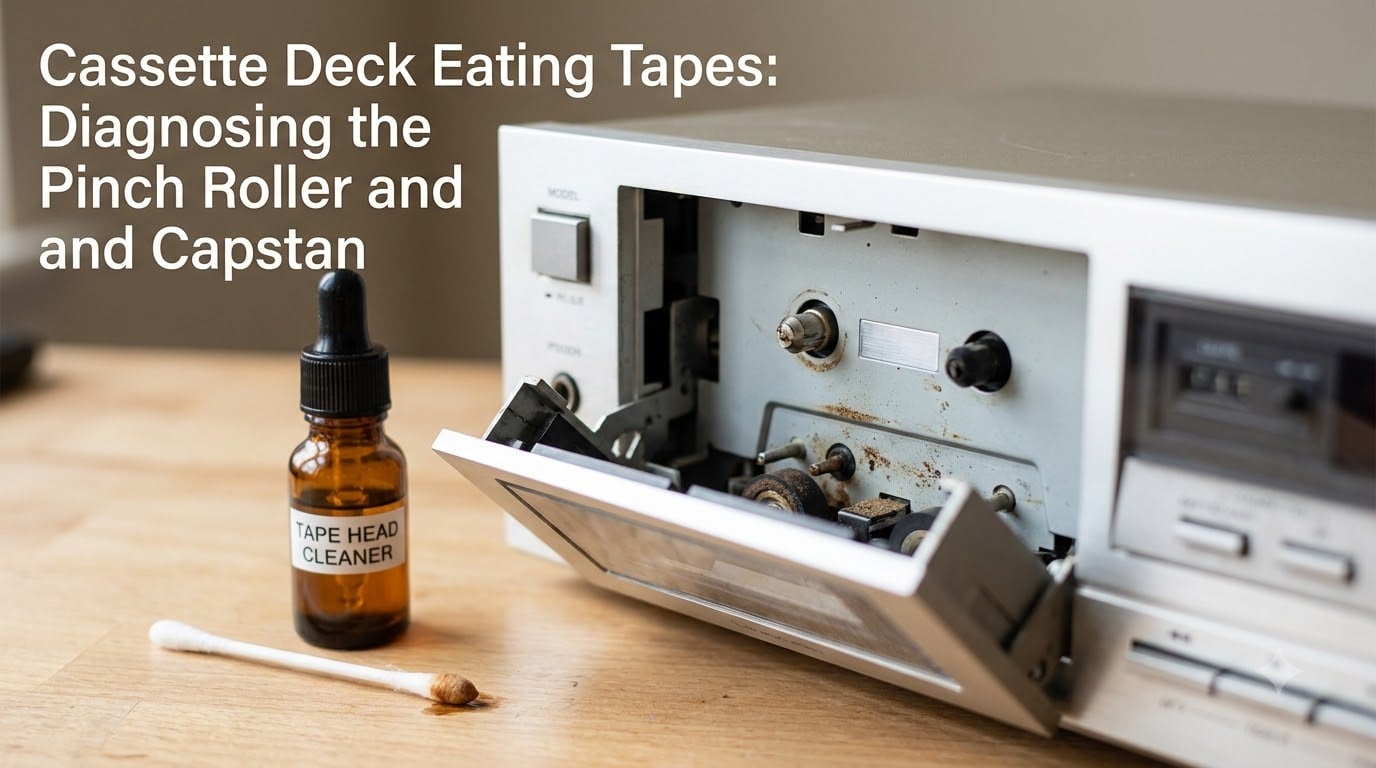
Nothing kills the mood faster than watching your Walkman or home deck chew up a mixtape you spent hours compiling. I have pulled countless tangled ribbons out of cassette mechanisms over the years, and almost every case of a cassette deck eating tapes traces back to two parts: the pinch roller and the capstan. Understanding what these parts do, why they fail, and how to diagnose them is the difference between a 10-minute fix and a $200 service bill.
This guide walks you through the exact diagnostic process I use on my own deck repairs. We will cover the function of each component, the most common failure modes, a step-by-step inspection routine, a unique diagnostic flowchart, and a detailed cleaning procedure. By the end, you should know whether your deck needs a simple cleaning, a part replacement, or professional service.
Table of Contents
What Is a Cassette Deck Pinch Roller and Capstan?
A cassette deck’s capstan is a precisely machined metal spindle that rotates at a fixed speed to pull the tape through the transport. The pinch roller is a small rubber wheel mounted on a spring-loaded arm that presses the tape firmly against the capstan. Together they form a friction drive: the capstan pulls, the pinch roller grips, and the tape moves past the heads at exactly 1.875 inches per second.
When this partnership works correctly, you get stable playback with accurate pitch and consistent level. When it fails, the tape slips, stalls, or wraps itself around the wrong cylinder. The pinch roller supplies the friction, while the capstan supplies the motion. If either one is dirty, worn, or misaligned, the tape path breaks down.
The Capstan and Pinch Roller Relationship Explained
The capstan and pinch roller are mechanically linked, but they wear differently. The capstan is hard metal and rarely wears out, but it collects oxide residue, oil, and grime from the tape. The pinch roller is soft rubber and degrades over time, losing grip and developing flat spots. Most tape eating problems start with the rubber, not the metal.
Why Cassette Decks Eat Tapes: The Main Causes
Cassette decks eat tapes when the tape transport cannot maintain proper grip on the ribbon. I have seen seven root causes account for nearly every case I have worked on. Here they are in order of frequency.
- Sticky or glazed pinch roller. Aged rubber collects oxide and loses grip, causing the tape to slip and bunch up around the capstan.
- Dirty capstan shaft. Oxide buildup on the metal spindle creates micro-slips that drag tape out of the cassette shell.
- Worn or hardened pinch roller rubber. Rubber that has lost its elasticity cannot press firmly against the capstan.
- Weak pressure pad inside the cassette. A failing felt pad inside the cassette shell reduces head contact, though this rarely causes eating.
- Misaligned tape path. Guides, head height, or roller arm angle out of spec can pull tape off the capstan.
- Failed take-up torque or idler tire. If the take-up reel cannot pull tape at the same rate the capstan feeds it, slack develops and the tape spills.
- Stuck cam gear or mode mechanism. On auto-reverse decks, a jammed cam can leave the roller engaged while the motor is off.
Of these, the first three are responsible for the vast majority of tape eating problems. The remaining four are real but usually appear after a cleaning has already failed to fix the issue.
Diagnosing Pinch Roller Problems Step by Step
The pinch roller is the part you should check first. It is the most common culprit, and it is also the easiest to inspect without taking the deck apart. Here is the diagnostic sequence I run on every deck that comes into my workshop.
- Open the cassette door and press play with no tape loaded. Watch the pinch roller arm swing into place and confirm it presses firmly against the capstan.
- Look at the roller surface under good light. A healthy pinch roller has a matte, slightly textured surface. A bad one looks shiny, glazed, or has visible cracks.
- Press your fingertip against the roller while it spins. It should feel tacky and grippy. If it feels smooth, slick, or hard like plastic, the rubber has hardened.
- Check for flat spots or dents. Stop the deck and rotate the roller by hand. Any flat area indicates the bearing is failing or the arm pressure is uneven.
- Inspect the arm spring tension. With a tape playing, try to pull the roller away from the capstan. It should resist firmly. A weak spring reduces grip.
- Look for oxide dust on surrounding parts. Heavy black dust on the head and capstan means the roller has been shedding or polishing oxide onto everything.
- Smell the roller. A strong solvent or chemical smell means previous cleaning products have damaged the rubber.
If your roller shows any of these symptoms, cleaning may restore it. If the rubber is hardened or cracked, replacement is the only real fix.
Signs of Worn Pinch Roller Rubber
The clearest sign of a worn pinch roller is tape speed drift. If your recordings sound pitched up or your playback sounds sluggish, the roller has lost grip. Another giveaway is visible oxide on every tape you play after the deck has been serviced. A bad roller actually polishes the tape rather than moving it cleanly.
Diagnosing Capstan Shaft Problems Step by Step
The capstan is harder to inspect because the damage is usually invisible at first glance. You will need a magnifier, a clean swab, and a little patience. Run through these checks in order.
- Inspect the capstan shaft for visible residue. Look at the part of the shaft the roller contacts. Dark oxide, oil, or tape adhesive all create slip.
- Rotate the capstan by hand with the power off. It should spin freely without grinding or wobble. Any roughness points to a failing bearing.
- Check for vertical play. Try to wiggle the capstan up and down. Even a tiny amount of play means the bearing is worn and needs service.
- Look at the capstan tip under magnification. Hairline scratches or a worn flat spot at the tip can damage tape edges.
- Confirm capstan rotation during play. The capstan must turn smoothly. If it stutters or pulses, the motor, belt, or idler is the issue.
- Listen for unusual motor noise. A whining or straining motor under load means the capstan or bearings are dragging.
A clean, smooth capstan with a firm, grippy roller should feed tape flawlessly. When either one slips, the tape path collapses.
Tape Eating Diagnostic Flowchart
This flowchart is the part no other guide gives you. I built it after years of trial and error on my own repairs. Follow the branches from top to bottom until you reach a likely cause.
START — Deck eats tape
        |
        v
Did cleaning the pinch roller fix it?
        |
   YES (stop)   NO
                |
                v
Did cleaning the capstan shaft fix it?
        |
   YES (stop)   NO
                |
                v
Does the pinch roller look shiny/glazed?
        |
   YES ---> Replace pinch roller
   NO
   |
   v
Is the rubber hard or cracked?
        |
   YES ---> Replace pinch roller
   NO
   |
   v
Does the roller have flat spots?
        |
   YES ---> Check arm pressure and bearing
   NO
   |
   v
Does the capstan have vertical play?
        |
   YES ---> Bearing replacement required
   NO
   |
   v
Is the take-up reel spinning during play?
        |
   NO  ---> Check belt, idler tire, motor
   YES
   |
   v
Does tape drift off the capstan to one side?
        |
   YES ---> Check tape guide alignment
   NO
   |
   v
Look for foreign debris in the cassette well
        |
   v
END — Try a different tape brand
If this flowchart points you at a part you do not have on hand, post your deck model in a repair forum like Tapeheads or AudioKarma. The community there can usually confirm the diagnosis and point you to a supplier.
How to Clean the Capstan and Pinch Roller
Cleaning is the first repair step for almost every tape eating issue. Done correctly, it fixes the majority of cases and protects your tapes from further damage. Done wrong, it can make things worse. Follow the steps below exactly.
Materials You Will Need
- 99% isopropyl alcohol or denatured alcohol (both work, denatured cuts oxide faster)
- Cotton swabs, lint-free, wooden stick preferred
- Soft lint-free wipes (microfiber works)
- A wooden chopstick or popsicle stick for scraping
- A small flashlight or magnifier
- Rubber-safe cleaning solution if your roller is heavily glazed
Cleaning Steps
- Unplug the deck and open the cassette well. Never clean while power is applied.
- Engage play mode by hand if possible. Some decks let you manually rotate the capstan to access all sides.
- Wet a swab with alcohol and rub the capstan shaft. Spin the shaft as you clean. Repeat until the swab comes away clean.
- Clean the pinch roller surface with a fresh alcohol-dampened swab. Rotate the roller by hand and clean all sides. Do not soak it; a damp swab is enough.
- For heavy oxide on the roller, use a rubber-safe cleaner. Apply per the product directions, then wipe clean.
- Dry both parts thoroughly. Alcohol evaporates fast, but give it a full minute before powering up.
- Reassemble and test with a tape you do not care about. Confirm smooth play, fast forward, and rewind.
Forum experts on Tapeheads and AudioKarma both recommend denatured alcohol for capstan cleaning because it dissolves oxide faster and leaves no residue. Isopropyl works too, but expect to use more swabs.
Cleaning Solutions Compared: Isopropyl vs Denatured Alcohol
Both solvents work, but they behave differently. Denatured alcohol cuts through oxide residue quickly and evaporates fast, which makes it ideal for capstan shafts. Isopropyl alcohol is gentler on rubber, so it is safer for pinch rollers. Many technicians keep both on the bench: denatured for the metal, isopropyl for the rubber. Avoid anything with additives, lotions, or fragrances.
When to Replace vs Clean the Pinch Roller
Cleaning extends pinch roller life, but it cannot reverse physical degradation. Replace the roller when you see any of these signs. Cleaning will not help if the rubber has gone hard, cracked, or developed flat spots.
- Visible cracks, peeling, or chunks missing from the rubber surface
- Roller feels hard or smooth to the touch, not tacky
- Tape speed drifts after cleaning even with correct tension
- Roller has flat spots or out-of-round shape
- Heavy oxide shedding onto every tape you play
Replacement pinch rollers are available for most popular decks from specialty suppliers. Match the part number to your exact model. Installing the wrong diameter roller will ruin your tape speed.
DIY Pinch Roller Restoration: A Temporary Fix
Some hobbyists report temporary success using rubber renovation products designed for typewriter platens. These products soften old rubber and restore grip for a few weeks or months. I have tried this on a vintage deck and the improvement was real but short-lived. Treat it as a stopgap, not a permanent fix.
Frequently Asked Questions
Why does my cassette deck keep eating tapes?
A cassette deck eating tapes almost always traces to a sticky or worn pinch roller, a dirty capstan shaft, or both. When the rubber on the pinch roller loses grip, the tape slips and wraps around the capstan. Cleaning both parts usually solves the issue. If cleaning fails, the pinch roller rubber has likely hardened and needs replacement.
What is the difference between pinch roller and capstan?
The capstan is the rotating metal spindle that pulls tape through the deck at a fixed speed. The pinch roller is the rubber wheel pressed against the capstan that grips the tape and pushes it along. The capstan supplies motion; the pinch roller supplies friction. Both must be clean and in good condition for the tape path to work.
What causes cassette tapes to be eaten?
The most common causes are sticky pinch roller rubber, dirty capstan shaft, hardened pinch roller, weak take-up torque, misaligned tape guides, and failed idler tires. Of these, the pinch roller accounts for the majority of tape eating problems. Cleaning the roller and capstan fixes most cases.
How do I clean the capstan and pinch roller?
Unplug the deck, then use a cotton swab dampened with 99% isopropyl alcohol or denatured alcohol. Rub the capstan shaft while spinning it by hand until the swab comes away clean. Clean the pinch roller surface the same way, rotating it as you wipe. Allow both parts to dry fully before powering up.
Final Thoughts on Cassette Deck Tape Eating Diagnosis
Cassette deck eating tapes is one of the most common analog audio frustrations, and almost every case points back to the pinch roller and capstan. Start with a careful visual and tactile inspection of both parts, then clean thoroughly with the right solvent. If symptoms persist, work through the diagnostic flowchart above to identify whether the roller needs replacement or another part of the transport has failed.
If your deck is a vintage unit you want to keep running for years, build a habit of cleaning the capstan and pinch roller every 20 to 30 hours of playback. That single habit prevents most tape eating problems before they start. For more repair walkthroughs and analog audio tips, browse the rest of our guides at SK Records.