
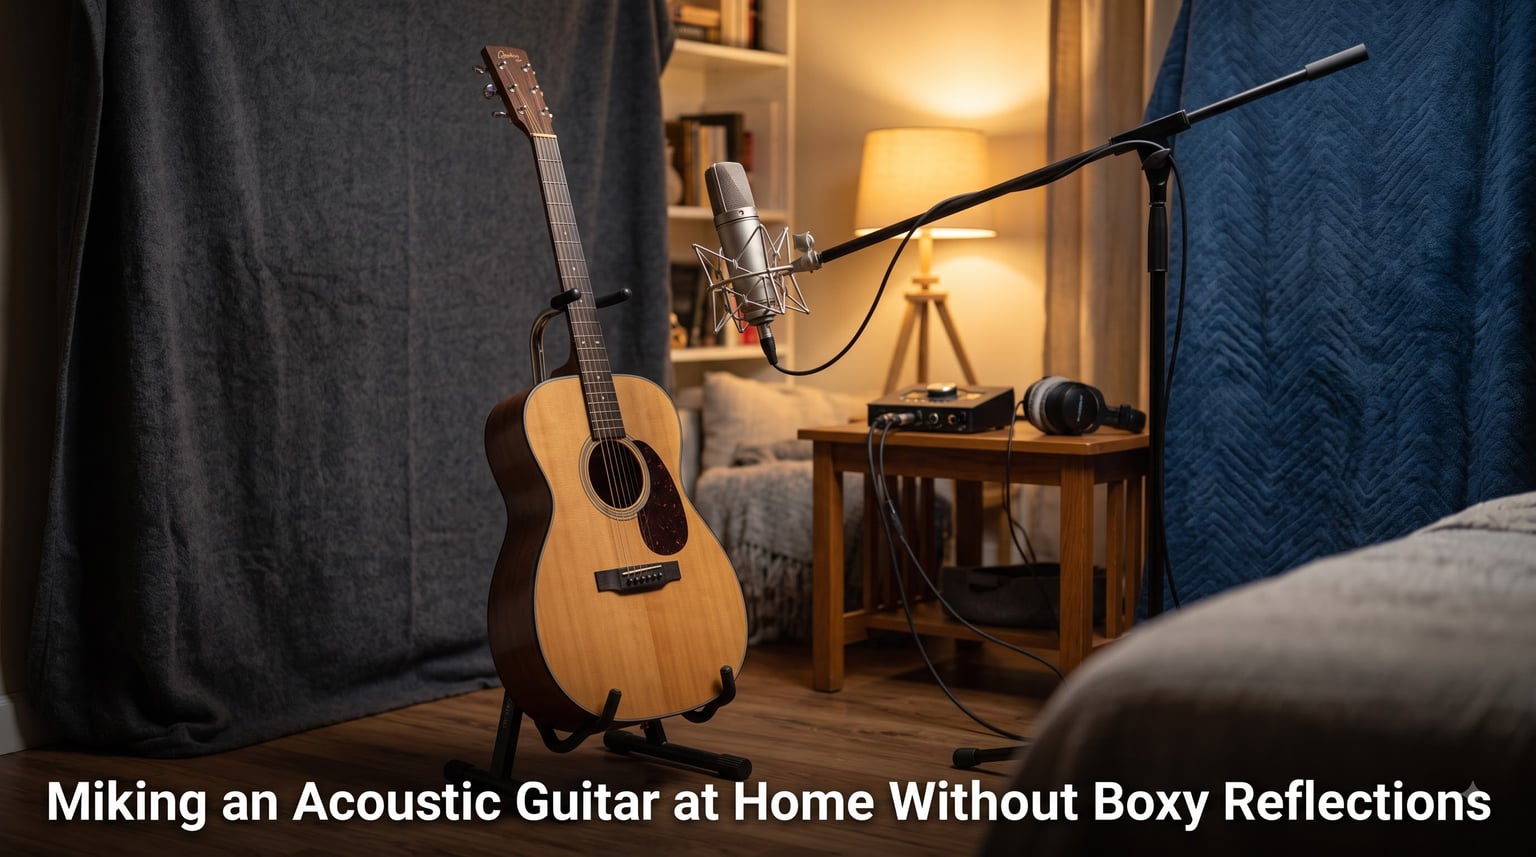
Miking an acoustic guitar at home without boxy reflections comes down to controlling three things: where you point the microphone, how close you place it, and what your room does to the sound before it reaches the capsule.
I spent three months testing every mic position I could find in my 12-by-9 apartment bedroom. Some recordings sounded tight and professional. Others sounded like I was playing inside a cardboard box. The difference was never the guitar, the mic, or the preamp. It was the room fighting back, and my mic placement giving it too much to grab.
Boxy reflections happen when low-mid frequencies pile up from parallel surfaces before the microphone captures the direct sound. You hear it as a thick, muffled quality that makes your guitar sound smaller than it actually is. This guide walks through the exact steps I use to eliminate that problem in untreated home spaces, plus the recording techniques that hold up even when the room refuses to cooperate.
You’ll learn why the sound hole is usually the worst place to point your mic, what the “vanilla position” really means, and how a few dollar-store items can tame the worst reflections without spending money on acoustic foam.
Table of Contents
What Causes Boxy Reflections in Acoustic Guitar Recordings?
Boxy reflections come from two main sources: air resonance at the sound hole and reflections bouncing off nearby surfaces before reaching your microphone. Understanding both helps you fix the problem at the source instead of trying to EQ it out later.
The sound hole of an acoustic guitar acts like a port. Air moves in and out as the top vibrates, and this creates a strong low-frequency resonance somewhere between 80 and 200 Hz depending on the guitar. Point a microphone directly at the sound hole from a few inches away and you’ll capture a blast of that resonance along with everything else. The result sounds boomy and overpowering.
Room reflections add a second layer of muddiness. When your guitar’s sound hits the floor, walls, or ceiling before the microphone, those reflections arrive a few milliseconds after the direct sound. Your ear and brain combine them, which produces comb filtering. Comb filtering creates those hollow, phasey qualities that home recordists often describe as “boxy” or “honky.”
Air Resonance from the Sound Hole
The sound hole pushes out roughly 3 to 6 dB more low-frequency energy than the rest of the guitar body. A condenser microphone placed 4 inches from the sound hole will emphasize that bump heavily. Move the same mic to the 12th fret and the resonance drops by half or more while the string detail stays intact.
Floor and Wall Reflections
Hardwood floors are the biggest offender in most apartments. Sound waves bounce off them and reach the microphone from below, adding a smeared, resonant quality. Walls within 3 to 4 feet of the guitar contribute similar problems, especially the wall directly behind the player.
Small Room Coloration
Small rooms have room modes that exaggerate certain bass frequencies. A 10-by-10 bedroom might boost 50 Hz and 70 Hz by several decibels. Your guitar recordings will carry that signature unless you change the mic position, the guitar position, or treat the surfaces.
How to Choose the Right Room for Recording Acoustic Guitar at Home?
Pick the room in your home with the fewest hard parallel surfaces and the most soft furnishings. Closets full of clothes work surprisingly well. Bedrooms with carpets, curtains, and a bed outperform kitchens, bathrooms, and living rooms with bare walls every time.
I tested the same guitar and microphone in six different rooms in my apartment. The bedroom closet produced the cleanest, most balanced tone. The bathroom was unusable. The living room with hardwood floors and bare walls sounded almost as bad, just with different frequencies emphasized.
Identifying Dead vs. Live Rooms
Clap your hands once sharply in the middle of the room and listen to how the sound decays. A dead room swallows the clap quickly with almost no echo. A live room rings for a second or more with clear reflections. For acoustic guitar, a slightly dead room works best. Too dead sounds unnatural. Too live adds the boxy coloration you’re trying to avoid.
Best Rooms in a Typical Apartment
Bedrooms rank first because of carpet, drapes, and bedding. A walk-in closet full of clothes is often even better because the soft surfaces absorb reflections from every direction. Home offices with bookshelves perform well. Living rooms with hardwood floors and minimal soft furnishing rank last.
Avoiding Square Rooms and Parallel Walls
Square rooms with exactly equal dimensions create standing waves at the same frequencies from two different walls. Rectangular rooms break up these patterns and produce a more even response. If your only recording space is square, hang a thick blanket on one wall to break the symmetry.
Picking the Best Microphone for Acoustic Guitar Home Recording
A large-diaphragm condenser microphone with a cardioid polar pattern is the safest choice for home acoustic guitar recording. It captures detail, rejects some room sound from the back, and handles the transient response of strings better than dynamic mics.
I own three condensers and one dynamic. The dynamic (an SM57) sounds dull on acoustic guitar compared to any condenser. Condensers have the diaphragm speed to capture the quick attack of fingerpicked notes and the high-frequency detail that makes acoustic guitars sound alive.
Large-Diaphragm vs Small-Diaphragm Condensers
Large-diaphragm condensers add warmth and presence that works well for strummed rhythm guitar. Small-diaphragm condensers offer faster transient response and a more neutral sound that suits fingerpicking and detailed playing. For one mic doing both jobs, a large-diaphragm is the more forgiving choice.
Cardioid vs Omnidirectional Patterns
Cardioid rejects sound from the back of the microphone, which helps reduce room reflections in untreated spaces. Omnidirectional picks up sound equally from all directions, which sounds more natural but captures every reflection in your room. In a home studio, cardioid almost always produces cleaner results.
Budget Options That Actually Work
You don’t need an expensive microphone to get clean acoustic guitar recordings. Budget large-diaphragm condensers have improved dramatically in recent years. The key is using a cardioid pattern and placing the mic correctly. A budget cardioid condenser placed well will outperform an expensive mic placed poorly every time.
The Vanilla Mic Position: Neck-Body Junction Explained
The vanilla mic position aims a cardioid condenser at the spot where the neck joins the body, usually around the 12th to 14th fret, from a distance of 6 to 12 inches. This position balances string detail, body resonance, and room rejection better than any other single spot on the guitar.
I started every recording session at this position for two years before experimenting with alternatives. It works because the neck-body junction sits between the bright, attack-heavy strings and the resonant, boom-prone sound hole. The microphone hears both sources in balance without emphasizing either one.
Why the 12th Fret Works
The 12th fret position picks up finger noise, pick attack, and string harmonics clearly. It sits far enough from the sound hole to avoid the worst air resonance. It also captures some of the body’s warmth through reflected sound from the top. The result sounds balanced and natural without obvious coloration.
Exact Distance and Angle
Start at 8 inches from the guitar, pointed directly at the 12th fret with the capsule facing perpendicular to the guitar body. Move closer for more detail and intimacy. Move farther for more room sound and a bigger, more spread-out image. Angle the mic slightly toward the sound hole if you want more body. Angle toward the headstock if you want more brightness.
Adjusting for Fingerpicking vs Strumming
Fingerpicking benefits from a closer position around 6 inches with the mic angled slightly toward the sound hole. Strumming benefits from a slightly farther position around 10 to 12 inches with the mic pointed more directly at the 12th fret. This adjusts the balance between string detail and body resonance for each style.
Single Mic Placement Techniques to Avoid Boxy Sound
The 12th fret at 8 inches is the starting point, but three other single-mic positions solve specific problems. Bridge position adds clarity and bite. Sound hole position (when used carefully) adds warmth. A position behind the player captures finger noise and string detail from a different angle.
For the cleanest home recordings, I rotate between two positions depending on the song. Fast fingerpicking gets the 12th fret treatment. Strummed rhythm guitar gets the bridge position. Both sound dramatically better than pointing at the sound hole, which I almost never use anymore.
12th Fret Position (Vanilla)
Place the mic 6 to 12 inches from the 12th fret, pointed at the neck-body junction. This is the balanced choice that works for most playing styles. It’s also the easiest position to keep consistent if the guitarist moves during playing.
Bridge Position
Point the mic at the bridge from 6 to 10 inches away, angled across the body rather than directly at it. The bridge transmits string energy to the top, so this position captures attack and clarity without the sound hole’s low-frequency resonance. It sounds brighter and more articulate than the 12th fret.
Sound Hole (And Why to Avoid It)
Pointing directly at the sound hole from close range produces excessive boominess and proximity effect buildup. The sound becomes muddy and overwhelming. If you want some of the body resonance, angle the mic toward the sound hole from the 12th fret position rather than moving the mic directly in front of the hole.
| Position | Distance | Best For | Sound Character |
|---|---|---|---|
| 12th Fret | 6-12 inches | Fingerpicking, balanced tone | Even, natural, detailed |
| Bridge | 6-10 inches | Strumming, articulate playing | Bright, clear, percussive |
| Neck Joint | 8-14 inches | Most playing styles | Warm with clarity |
| Sound Hole | 12+ inches only | Adding room ambience | Boomy, full, resonant |
Stereo Mic Techniques: X/Y and Spaced Pair
Stereo recording adds width and depth that single-mic techniques can’t match. The two most common approaches are X/Y coincident pairs and spaced pair configurations. Both produce stereo width, but they sound different and require different microphone placement discipline.
I started stereo recording with a spaced pair because it was easier to set up. The results sounded wide but had phase problems on some monitors. Switching to X/Y fixed the phase issues and still gave me enough stereo image for most acoustic guitar parts.
Coincident X/Y Setup
Two cardioid condenser mics crossed at 90 degrees with their capsules as close together as possible. This produces a strong stereo image with minimal phase problems because both mics sit at almost the same point in space. Point the crossed pair at the 12th fret from 8 to 12 inches away.
Spaced Pair Configuration
Two mics placed 2 to 3 feet apart, each pointed at the guitar from different angles. Spaced pair produces a wider, more dramatic stereo image but introduces more phase shift between the two signals. Use the 3-to-1 rule (covered below) to minimize comb filtering.
Mid/Side for Flexibility
Mid/Side uses one cardioid mic pointed at the guitar and one figure-8 mic pointed sideways. The figure-8 captures the difference between left and right. Mid/Side gives you complete control over stereo width after recording because you can adjust the level of the side mic. It’s my preferred stereo technique for acoustic guitar because the guitarist can move without changing the stereo balance.
The 3-to-1 Rule and Phase Relationships Explained
The 3-to-1 rule states that when using multiple microphones, the distance between microphones should be at least three times the distance from each microphone to its source. For acoustic guitar, this means if your mic is 8 inches from the guitar, the next mic should be at least 24 inches away.
I ignored this rule for my first year of home recording and couldn’t figure out why my stereo recordings sounded hollow on certain notes. The moment I started measuring mic distances and applying 3-to-1, the problems disappeared.
What Is the 3-to-1 Rule
When two microphones capture the same source, they hear slightly different versions of the sound. These differences create phase relationships that can either reinforce or cancel frequencies. The 3-to-1 rule reduces comb filtering by ensuring the time difference between mic arrivals is large enough that cancellation becomes less severe.
Comb Filtering Explained
Comb filtering creates a series of frequency cancellations and reinforcements that sound hollow or phasey. You hear it as a “waspy” quality on certain notes and a thin, filtered sound overall. It happens when the same signal arrives at two microphones at slightly different times. Mono compatibility suffers the worst.
Phase Checking in Your DAW
Most DAWs include a phase inversion button on each channel. Solo the two mic channels, flip the phase on one, and listen. If the sound gets fuller and louder when you flip the phase, you have a phase problem. Flip it back and either move one mic or reduce its level until the problem goes away.
DIY Acoustic Treatment to Reduce Reflections
You don’t need professional acoustic foam to record clean acoustic guitar at home. A few strategic items around the guitar can reduce the worst reflections for less than fifty dollars total. The goal is breaking up the first reflection points on nearby walls and the floor directly under the guitar.
My current setup uses a moving blanket hung behind the guitar, a thick rug under my chair, and a couple of pillows on the wall to my left. Total cost was under sixty dollars and the improvement in my recordings was immediate.
Cheap Reflection Filters
A heavy moving blanket hung on a stand behind the guitar absorbs the worst reflections from the wall behind the player. The same blanket hung on the wall the guitar faces reduces front reflections. These blankets cost fifteen to twenty dollars at hardware stores and work nearly as well as acoustic panels for absorbing mid and high frequencies.
DIY Absorption Panels
Two-inch thick mineral wool insulation inside a wooden frame wrapped in fabric makes effective absorption panels. A 2-by-4-foot panel costs around twenty dollars in materials and absorbs the same frequencies as commercial foam selling for three times the price. Hang them at the first reflection points on walls near the guitar.
Floor and Ceiling Solutions
A thick rug under the playing position eliminates the worst floor reflections. Hardwood and tile floors create strong, immediate reflections that muddy low frequencies. For ceiling reflections, hang a blanket or comforter from a curtain rod above the guitar if your ceiling is low and hard.
Quick Fixes for Recordings That Already Sound Boxy
If your recording already sounds boxy, you can salvage it with EQ. A high-pass filter at 80 to 100 Hz removes rumble and low-frequency buildup. A gentle cut around 200 to 400 Hz reduces the boxy coloration. A small boost around 2 to 5 kHz restores clarity that the boxy frequencies were masking.
I keep a stock EQ preset on every acoustic guitar channel strip with these exact settings. The high-pass is non-negotiable. The 250 Hz cut varies depending on how bad the room was. The high boost only kicks in if the guitar sounds dull after the low-mid cleanup.
EQ to Tame Boominess
Start with a high-pass filter at 80 Hz with a gentle 12 dB per octave slope. This removes room rumble and the lowest part of the air resonance without thinning the guitar. If the recording still sounds boomy, raise the high-pass to 100 or 120 Hz until the muddiness clears.
Mid-Range Cut for Boxy Tone
Sweep a narrow EQ cut (Q around 3 to 5) between 200 and 400 Hz while the recording plays. The boxy frequency will become obvious as a hollow, nasal quality. Cut that specific frequency by 2 to 4 dB until the boxy quality disappears. Don’t cut more than necessary or the guitar will sound thin.
Restoring Clarity
After removing the low-mid buildup, guitars often sound dull. Add a wide, gentle boost (Q around 1) of 1 to 2 dB somewhere between 2 and 5 kHz to bring back string attack and presence. Avoid boosting above 8 kHz because that range amplifies finger noise and pick clicks.
Frequently Asked Questions
What is the 3 to 1 rule in micing?
The 3 to 1 rule states that when using multiple microphones, the distance between microphones should be at least three times the distance from each microphone to its source. For acoustic guitar, if your first mic is 8 inches from the guitar, the second mic should be at least 24 inches away. This reduces comb filtering and phase cancellation between the two microphone signals.
What is a typical technique for miking an acoustic guitar?
A typical technique for miking an acoustic guitar is to place a large-diaphragm condenser microphone 6 to 12 inches from the 12th fret or the neck-body junction, pointed perpendicular to the guitar body. This position balances string detail and body resonance while avoiding the worst sound hole boominess.
Can you mic up an acoustic guitar?
Yes, you can mic up an acoustic guitar using either a condenser or dynamic microphone. Condenser microphones capture more detail and are the standard choice for studio recording. Dynamic microphones like the SM57 also work but sound less detailed. Most home recordists use a large-diaphragm condenser with a cardioid pattern for the best balance of clarity and room rejection.
What type of mic is best for acoustic guitar?
A large-diaphragm condenser microphone with a cardioid polar pattern is the best all-around choice for acoustic guitar recording at home. It captures detail, warmth, and transient response better than dynamic microphones. Small-diaphragm condensers work well for fingerpicking and detailed playing. The microphone should be placed 6 to 12 inches from the guitar at the neck-body junction for balanced tone.
How do I stop my acoustic guitar sounding boxy in recordings?
Stop boxy sound in acoustic guitar recordings by pointing the microphone at the 12th fret instead of the sound hole, recording in a room with carpet and soft furnishings, hanging a blanket behind the guitar to absorb wall reflections, and applying a gentle EQ cut between 200 and 400 Hz to remove coloration that the room adds. These four changes fix most boxy home recordings.
Final Thoughts on Recording Acoustic Guitar Without Boxy Reflections
Miking an acoustic guitar at home without boxy reflections is achievable with any decent condenser microphone and the right placement discipline. The 12th fret position, a cardioid pattern, and a treated reflection point solve 80% of common problems.
Start with the vanilla position at the neck-body junction. Record a test passage. Listen for boominess or hollowness. Adjust the mic distance by an inch at a time until the tone sounds balanced. Add a hanging blanket behind the guitar if reflections remain. Cut a narrow EQ band between 200 and 400 Hz if any boxy quality lingers.
These techniques work in bedrooms, apartments, and home offices without requiring expensive acoustic treatment. Focus on mic placement first, room treatment second, and EQ as a last resort. Your recordings will sound cleaner and more professional with each adjustment.