
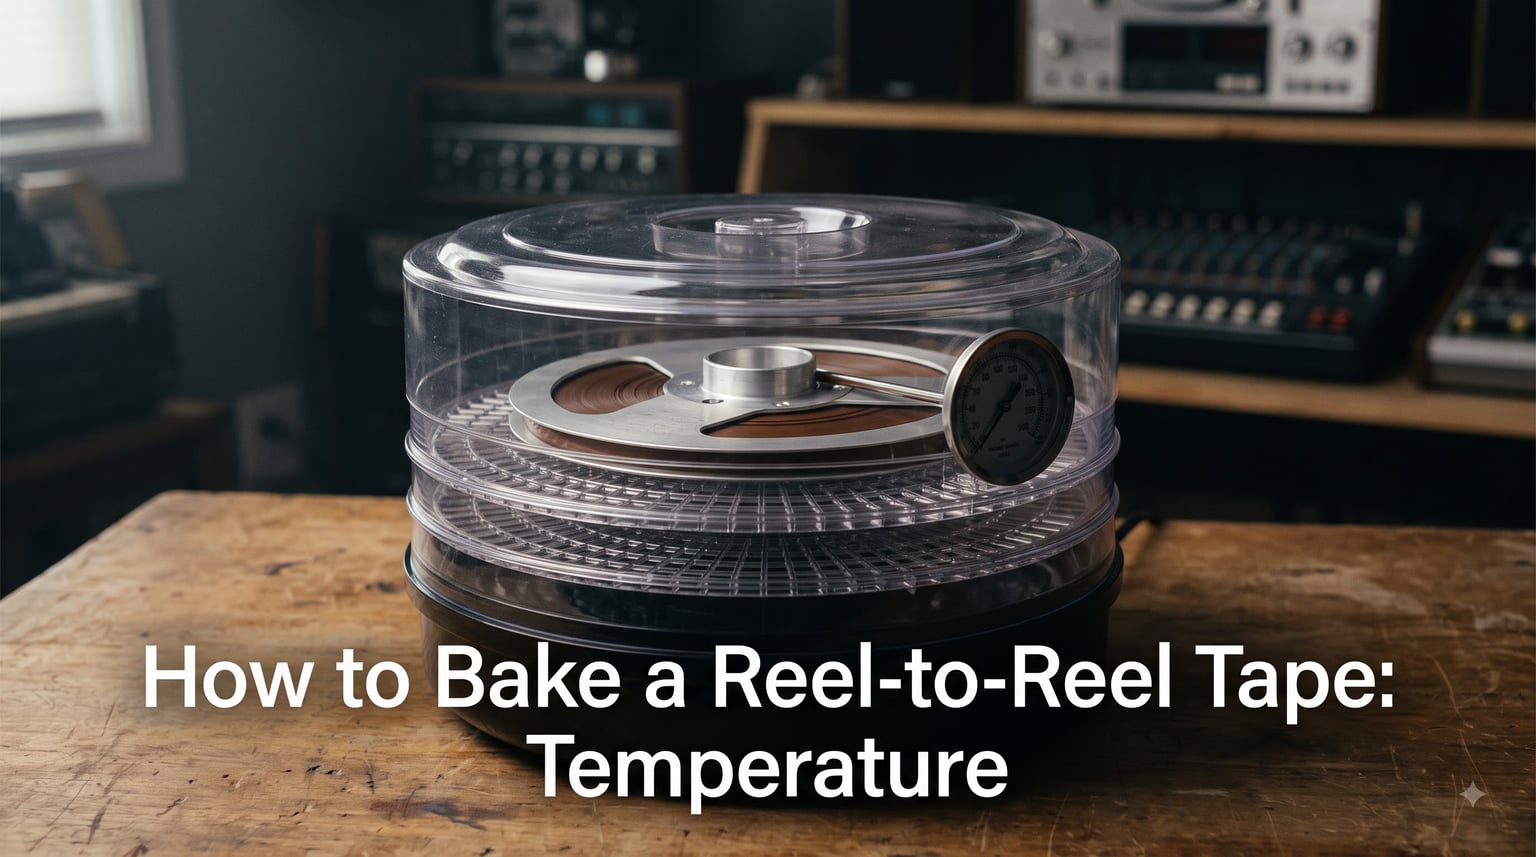
If you have a reel-to-reel tape from the 1970s or 1980s that squeals, leaves gummy residue on your tape heads, or simply refuses to play, you are almost certainly dealing with sticky shed syndrome. Learning how to bake a reel to reel tape is the single most effective way to recover those recordings before they are lost forever. The process sounds strange at first, but it is a well-established preservation technique used by audio archivists, recording studios, and collectors worldwide.
I have spent years working with analog tape, and I can tell you that baking is not optional when sticky shed sets in. Without treatment, the tape will destroy itself on the next play. The oxide coating will shed onto your heads, the tape will grind to a halt, and the recording on that reel may be gone for good.
In this guide, I will walk you through the exact temperature, baking times by tape width, equipment options, and a step-by-step process so you can safely restore your tapes. I will also cover the warnings that most guides skip, including why you should never bake a plastic reel.
Table of Contents
What Is Sticky Shed Syndrome and Why Tapes Need Baking?
Sticky shed syndrome is a chemical breakdown that affects magnetic tapes manufactured primarily between the mid-1970s and mid-1990s. During this period, tape manufacturers switched to polyurethane-based binders in their magnetic coating formulas. These binders absorb moisture from the air over time, and once that moisture penetrates the binder layer, the tape becomes gummy and soft.
When you try to play an affected tape, the sticky binder grabs onto every surface it touches. The tape squeals as it passes over heads and guides. A dark, waxy residue builds up on your tape path within seconds. In severe cases, the oxide coating literally peels off the polyester base, taking your audio with it.
Baking the tape drives that trapped moisture out of the binder. The heat causes the absorbed water to evaporate, which temporarily restores the binder to a stable, playable state. The tape runs clean across your heads again, and you get a window of time to transfer the recording before moisture re-accumulates.
Not every tape needs baking. Tapes from the 1950s and 1960s used different binder formulas and are generally safe. The problem is most common with tapes from brands like Ampex, Scotch, and Agfa from the affected era. Ampex 456 is one of the most notorious offenders, though it responds very well to baking.
How to Tell If Your Tape Needs Baking?
You do not need to guess whether your tape has sticky shed. The symptoms are loud, messy, and unmistakable once you know what to look for.
The first sign is usually a squealing or chirping sound during playback. That noise comes from the sticky binder dragging against the tape heads and guide pins. If you hear it, stop the tape immediately. Every second of continued playback is shedding oxide you cannot recover.
Next, check your tape heads and guides. If you see a brown or black waxy buildup after just a few seconds of playback, that is oxide and binder coming off the tape. A healthy tape leaves almost no residue. A tape with sticky shed will coat your heads in gunk within one pass.
You may also notice the tape physically slowing down or jerking as it moves through the transport. The capstan cannot maintain consistent speed when the tape is grabbing at every surface. Some tapes even stop completely mid-playback.
Here is the critical warning: do not play the tape repeatedly to test it. Every pass across your heads removes more oxide. If you suspect sticky shed, stop, clean your tape path thoroughly, and move straight to baking before attempting playback again.
Optimal Baking Temperature for Reel-to-Reel Tape
The ideal baking temperature for reel-to-reel tape is 130 to 140 degrees Fahrenheit, with 130 degrees F being the target most professionals recommend. At this temperature range, moisture is driven out of the polyurethane binder without risking damage to the tape itself.
Think of it this way: you are warming the tape enough to evaporate trapped water, but not so hot that you affect the magnetic particles or the polyester base. The window between effective and damaging is narrow, which is why temperature control matters so much.
Going below 125 degrees F makes the process ineffective. The moisture will not fully leave the binder, and the tape will still be sticky after hours in the oven. You will have wasted your time and potentially convinced yourself that baking does not work when the real issue was temperature.
Going above 145 degrees F is where real danger starts. Excessive heat can cause print-through, where signals from one layer of tape bleed into adjacent layers. It can also warp the polyester base, distort the tape pack, and in extreme cases permanently alter the magnetic encoding. There is no benefit to higher temperatures, only risk.
The most important factor is consistency. Forum communities like Tapeheads and the ReelToReel subreddit consistently report that a steady, even temperature produces better results than a higher but fluctuating one. A food dehydrator holding a rock-solid 130 degrees F will outperform an oven swinging between 120 and 150 degrees F. Use a reliable thermometer to verify your actual temperature, because appliance thermostats are often inaccurate at these low settings.
How Long to Bake Reel-to-Reel Tape by Width?
Baking time depends on tape width. Thicker, wider tapes hold more moisture and need more time for heat to penetrate the full pack. Here are the standard guidelines that have been refined by audio engineers over decades of practice.
For 1/4 inch tape, the most common format for home and semi-pro recordings, bake for 3 to 8 hours. A standard 1/4 inch master tape at 130 degrees F typically needs about 6 hours. Start with 4 hours and extend if the tape is still sticky after cooling.
For 1/2 inch tape, plan on 6 to 10 hours. The wider format means more tape mass per layer, and the heat takes longer to reach the center of the pack.
For 1 inch tape, allow 8 to 12 hours. These tapes are common in professional multitrack recordings and require patience.
For 2 inch tape, the professional multitrack standard, you will need 10 to 16 hours. Some particularly stubborn 2 inch tapes have been reported to need even longer. Community members on Tapeheads have shared experiences baking difficult tapes for 16 hours or more before achieving clean playback.
The general rule is to start with the minimum time for your tape width, let the tape cool completely, then test a short section. If it still squeals or leaves residue, put it back in for another 2 to 4 hours. It is always better to under-bake and extend than to overshoot on your first attempt.
One more tip from experience: rewind the tape to an even pack before baking. An uneven wind creates gaps where heat circulates differently, which can lead to uneven treatment and edge damage. A smooth, flat pack ensures every layer gets the same exposure.
Equipment Options for Baking Tape
You have three practical options for baking tape, and each has trade-offs in terms of cost, convenience, and temperature stability.
Food Dehydrator (Recommended)
A food dehydrator is the most popular choice among tape enthusiasts and for good reason. Models like the Nesco Gardenmaster can hold a steady 130 degrees F with minimal fluctuation. They have no magnetic components that could affect the tape, and they circulate air evenly around the reel. You can often fit a 10.5 inch reel on the trays with minor modification. This is the method I recommend for most hobbyists.
Convection Oven
A small convection oven with accurate temperature control is the second choice. The fan circulates heat evenly, which is important for consistent results. However, you must verify the temperature with a separate thermometer because oven thermostats are notoriously inaccurate at low settings. A meat thermometer works well for this. Avoid any oven with a magnetic door latch or solenoid, as these can generate magnetic fields near your tape.
DIY Hair Dryer and Cardboard Box Method
If you do not want to buy dedicated equipment, you can build a simple baking chamber using a cardboard box and a hair dryer. Cut a hole for the hair dryer nozzle on one side and a small exhaust vent on the opposite side. The hair dryer blows warm air across the tape reel and out the vent. You will need to monitor the temperature constantly with a thermometer and adjust the hair dryer setting or distance to maintain 130 degrees F. This method works, but it requires active attention for the entire baking duration and is the least consistent option.
Whichever method you choose, invest in a good thermometer. The difference between 125 and 145 degrees F is the difference between a successful bake and a damaged tape. Do not trust the dial on your appliance.
How to Bake a Reel-to-Reel Tape: Step by Step
Now that you understand the temperature, time, and equipment requirements, here is the complete step-by-step process for how to bake a reel to reel tape safely.
Step 1: Remove the tape from its box, any plastic bag, and paper inserts. You want bare tape on a hub or reel. Remove any adhesive labels that could release fumes or leave residue at baking temperatures.
Step 2: Check whether your tape is on a plastic reel or metal NAB hub. If it is on a plastic reel, seriously consider transferring the tape to a metal hub before baking. Plastic reels can warp, outgas, and even melt at baking temperatures. If you must bake on a plastic reel, keep the temperature at the low end of the range and monitor closely. This is one of the most overlooked dangers in tape baking.
Step 3: Rewind the tape to ensure an even, smooth pack. This prevents uneven heating and protects the tape edges during the process.
Step 4: Preheat your dehydrator or oven to 130 degrees F. Verify the temperature with a thermometer placed near where the tape will sit. Wait until the temperature has stabilized before introducing the tape.
Step 5: Place the tape reel in the center of the heating chamber, positioned so air can circulate around it evenly. Do not let the tape touch the walls or heating elements.
Step 6: Maintain 130 to 140 degrees F for the duration appropriate to your tape width. Check the temperature periodically, especially if you are using a DIY method. Do not open the chamber unnecessarily, as this causes temperature drops.
Step 7: After the baking time is complete, turn off the heat and let the tape cool slowly inside the chamber. Do not remove it while hot. Rapid cooling can cause the stickiness to return immediately. Allow at least 2 to 4 hours of cooling time.
Step 8: Once the tape is completely cool to the touch, remove it and do a short test playback. Play just 30 seconds to a minute and check for squealing or residue. If it plays clean, proceed to your full transfer immediately.
Step 9: If the tape still shows symptoms after cooling, return it to the oven for an additional 2 to 4 hours. Some tapes need extended treatment, and re-baking is safe as long as you stay within the correct temperature range.
Cooling, Post-Bake Testing, and Storage
The cooling phase is just as important as the baking phase. If you pull a hot tape out of the oven and expose it to room temperature air, moisture can condense right back onto the warm binder. That undoes hours of work instantly.
Always let the tape cool inside the heating chamber with the heat off. Give it at least 2 hours for smaller tapes and 4 hours for 2 inch reels. The tape should feel completely cool to the touch before you handle it.
To test whether baking was successful, thread the tape on your deck and play a short section, maybe 30 to 60 seconds. Listen for squealing and check your heads for residue after the test. If the tape plays clean and your heads stay clean, the bake worked. If you still get symptoms, the tape needs more time.
Once successfully baked, you have approximately a 30-day window to transfer the tape. The binder will gradually reabsorb moisture from the air, and symptoms will return. This timeline varies with humidity levels in your storage environment, but plan to complete your transfer within a month.
Store baked tapes in a cool, dry place with stable humidity. Use silica gel packets in the tape box to slow moisture reabsorption. If the tape becomes sticky again months or years later, you can re-bake it following the same process. Multiple bakes are generally safe as long as temperatures stay within the recommended range.
Make your transfer immediately after confirming a successful bake. Do not wait. Play the tape once, capture it to digital, and archive the recording. The first play after baking is your best chance for a clean transfer, before any re-contamination can occur.
Important Warnings and Common Mistakes
Before you start baking, understand these critical warnings that can save your tapes from permanent damage.
Never bake tapes on plastic reels. Plastic reels can warp, crack, and outgas at baking temperatures, potentially ruining both the reel and the tape. Transfer your tape to metal NAB hubs whenever possible. If you absolutely must bake on a plastic reel, keep the temperature at 130 degrees F exactly and monitor the reel for any signs of softening or distortion.
Do not exceed 140 degrees F. Higher temperatures do not speed up the process effectively, and they introduce real risks including print-through, base film warping, and distortion of the magnetic signal. The 130 to 140 degree F range exists for a reason.
Beware of uneven wind. If your tape pack has ridges, cinches, or loose sections, heat will distribute unevenly. Always rewind to a smooth, even pack before baking. Uneven heating can cause edge damage and inconsistent treatment across the tape.
Expect fumes and ventilate your space. As the binder releases moisture, it also releases volatile compounds that have a noticeable smell. This is normal and expected. However, you should bake in a ventilated area and avoid breathing the exhaust directly. The fumes are not acutely dangerous at these temperatures, but common sense says do not hover over the oven.
Clean your tape path thoroughly after playing a baked tape. Even a successfully baked tape may leave some residual oxide on heads and guides during the transfer pass. Clean your tape path with isopropyl alcohol and lint-free wipes before playing any other tapes on the same machine. Residue left from a sticky tape can transfer contamination to healthy tapes.
Consider professional transfer for irreplaceable masters. If you have a one-of-a-kind master tape, consider sending it to a professional transfer service. They have controlled-environment baking ovens, calibrated equipment, and the experience to handle difficult cases. The cost is worth it for recordings that cannot be replaced.
Frequently Asked Questions
What temperature do you bake tapes?
The ideal temperature to bake reel-to-reel tape is 130 to 140 degrees Fahrenheit, with 130 degrees F being the most commonly recommended target. This range drives moisture out of the polyurethane binder without risking damage to the magnetic particles or polyester base. Going below 125 degrees F is ineffective, and exceeding 145 degrees F can cause print-through and warping.
How to bake a reel-to-reel tape?
Remove the tape from its box and packaging, transfer to metal NAB hubs if possible, rewind to an even pack, preheat your oven or dehydrator to 130 degrees F, place the tape inside, maintain temperature for 3 to 16 hours depending on tape width, then let it cool slowly in place for at least 2 hours before testing playback.
Can you bake tape in the oven?
Yes, you can bake tape in a convection oven set to 130 to 140 degrees F. Verify the temperature with a separate thermometer because oven thermostats are often inaccurate at low settings. Avoid ovens with magnetic door latches or solenoids. A food dehydrator is generally preferred because it offers better temperature stability and has no magnetic components.
How to fix sticky shed syndrome?
Sticky shed syndrome is fixed by baking the affected tape at 130 degrees F for 3 to 16 hours depending on tape width. The heat drives absorbed moisture out of the polyurethane binder, temporarily restoring the tape to a playable state. After baking, you have approximately 30 days to transfer the recording before moisture re-accumulates.
How long does a baked tape stay playable?
A baked tape typically remains playable for about 30 days after treatment. The exact duration depends on storage humidity levels. Store baked tapes in a cool, dry place with silica gel packets to slow moisture reabsorption. If symptoms return, you can safely re-bake the tape following the same process.
Conclusion
Baking a reel-to-reel tape is a straightforward process once you understand the fundamentals: hold the tape at 130 to 140 degrees F for the right duration based on tape width, let it cool slowly, and transfer the recording within 30 days. The key to success is temperature consistency, a smooth tape pack, and patience during both the baking and cooling phases.
If your tapes are showing signs of sticky shed syndrome, do not wait. Every playback attempt on an untreated tape causes permanent oxide loss. Bake the tape, make your transfer, and preserve those recordings while you still can. The process works, and it has saved countless irreplaceable analog recordings for archivists and collectors around the world.