
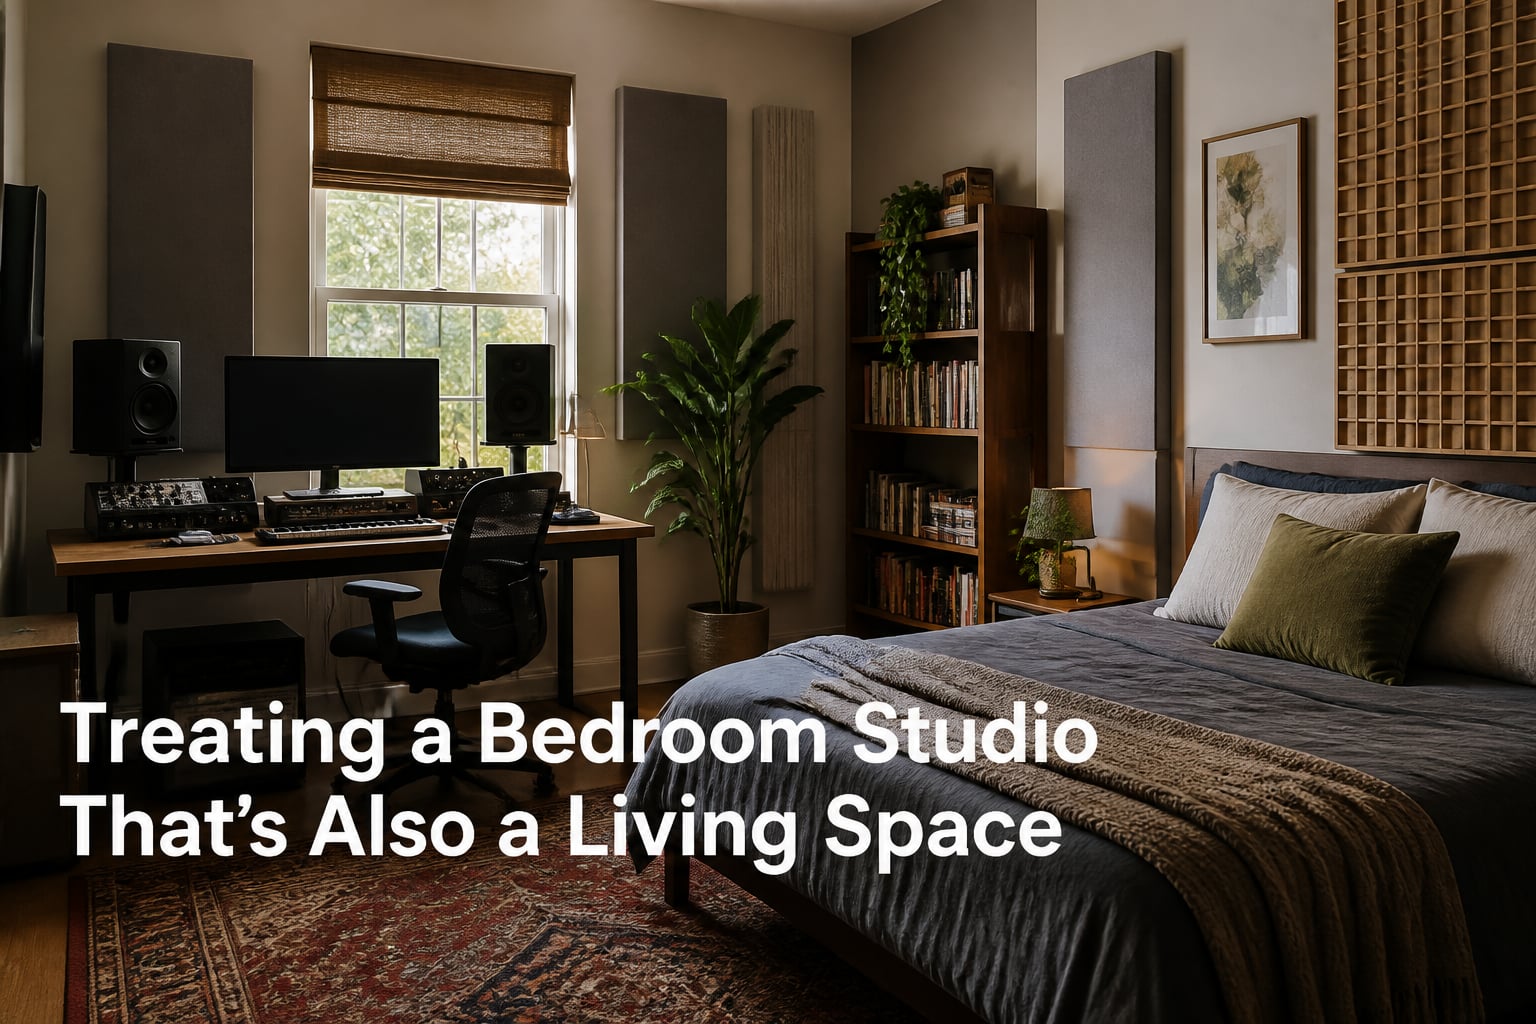
Picture this: you produce a mix that sounds incredible at 2 AM, then play it in your car the next morning and the bass has vanished. Your room lied to you. That is what an untreated bedroom studio does, and when that room also doubles as your living space, the problem gets even trickier.
Treating a bedroom studio that’s also a living space means balancing real acoustic needs with the reality that you sleep, eat, and relax in the same four walls. You cannot just line every surface with foam panels and call it a studio. Your room needs to function as a home first and a mixing environment second.
The good news is that strategic treatment works far better than blanket coverage. Untreated rooms can introduce up to 60 dB of variation in high frequencies and 41 dB in the lows, according to research from AudioSilk. That means your speakers are feeding you a distorted version of your own music. Fix the room, and your mixes start translating everywhere.
In this guide, I will walk you through the entire process of treating a multi-purpose room. We will cover speaker placement, first reflection points, bass traps, furniture-as-treatment strategies, renter-friendly options, and how to keep your living space looking like a place where actual humans live. Everything here is based on what works in real bedrooms and apartments, not theoretical studios with unlimited square footage.
Table of Contents
Why Your Bedroom Studio Needs Acoustic Treatment?
Your room is the final piece of gear in your signal chain. Before any plugin, converter, or monitor tweak takes effect, sound waves from your speakers bounce off your walls, ceiling, floor, and furniture and arrive back at your ears with slight delays. Those delayed reflections combine with the direct sound from your speakers and create peaks and dips in frequency response.
In small rooms like bedrooms, these reflections cause specific problems. Flutter echoes bounce between parallel walls, creating a ringing or metallic sound when you clap your hands. Standing waves build up in corners, making certain bass notes boom while others disappear entirely. Room modes create zones where specific frequencies are either twice as loud or completely cancelled out.
Here is what this means practically: you might hear a bass note at 80 Hz that your room is artificially boosting by 10 dB. You compensate by turning it down in your mix. Then you play the track somewhere else and the bass is gone. This is what engineers call poor mix translation, and it is the number one complaint from bedroom producers.
The multi-purpose room adds another layer of difficulty. A dedicated studio can be built from scratch with non-parallel walls, floating floors, and calculated dimensions. Your bedroom has whatever dimensions the architect decided on, plus a bed, a wardrobe, possibly a window, and maybe carpet or maybe hardwood. Every surface either helps or hurts your sound.
Acoustic Treatment vs Soundproofing: Know the Difference
Before spending a single dollar, understand the distinction between treatment and soundproofing. They solve completely different problems, and confusing them wastes money.
Acoustic treatment improves the quality of sound inside your room. It tames reflections, controls bass buildup, and creates an accurate listening environment. Your neighbors will still hear you play music, but your mixes will sound right.
Soundproofing stops sound from traveling between rooms. It involves mass, decoupling, and sealing gaps. Egg-crate foam on your walls does almost nothing for soundproofing despite what packaging claims. Real soundproofing means adding layers of drywall, sealing every crack, and often building a room within a room.
For a bedroom studio that is also a living space, you almost certainly want treatment, not soundproofing. Soundproofing is invasive, expensive, and usually requires permanent construction. Treatment can be temporary, budget-friendly, and designed to coexist with your furniture and decor.
Treating a Bedroom Studio That’s Also a Living Space: The Core Challenge
A bedroom studio that’s also a living space presents a unique set of trade-offs that dedicated studios never face. You are not just optimizing for sound. You are optimizing for sound, sleep, comfort, aesthetics, and often a landlord’s rules about wall damage.
The first principle is zoning. Most bedroom studios have a mixing area on one side of the room and a living or sleeping area on the other. Treat the mixing zone aggressively and let the living zone contribute naturally. Your bed, for instance, is an enormous bass absorber. Position it well and it becomes part of your treatment plan rather than an obstacle.
Aesthetics matter more than most acoustic guides admit. If your living space looks like a recording booth, you will feel stressed every time you are not working. Panels that double as wall art, fabric-wrapped absorbers in matching colors, and ceiling clouds that blend with existing lighting all help maintain a room that feels like a home.
The second principle is compromise with intent. You will not achieve the same results as a purpose-built studio, and that is fine. Budget treatment with smart placement gets you 70 to 80 percent of the way there, according to community experiences from Reddit’s audioengineering forum. That last 20 percent costs exponentially more and matters far less if you are not mixing for commercial release.
Finally, think about flexibility. Your treatment should allow the room to adapt. Freestanding panels that can be repositioned, furniture that pulls double duty, and removable bass traps let you reconfigure when you have guests over or when you move to a new place.
Step-by-Step Treatment Process
Step 1: Optimize Your Speaker and Listening Position
Before buying any treatment, fix your monitoring position. No amount of panels will fix a room where your speakers are in the wrong spot. The 38% rule, popularized by studio designer Wes Lachot, suggests placing your listening position about 38 percent into the room’s length from the front wall. This minimizes the impact of the dominant room mode.
Position your speakers in an equilateral triangle with your head, meaning the distance between the two speakers equals the distance from each speaker to your ears. Keep them at ear height with the tweeters pointing directly at you. Aim for symmetry: your left and right walls should be the same distance from the mixing position.
Move your desk away from the exact center of the room, which is where room modes create the worst cancellations. Pulling your setup forward or back even a foot can dramatically change what you hear in the low end.
Step 2: Identify and Treat First Reflection Points
First reflection points are the spots on your walls, ceiling, and desk where sound from your speakers bounces once before reaching your ears. These reflections cause the most damage to your stereo image and frequency accuracy.
Find them using the mirror trick. Sit in your mixing position and have a friend slide a small mirror along each side wall at speaker height. When you can see your speaker’s tweeter in the mirror, that is your first reflection point. Mark it and repeat for the other wall, the ceiling, and the desk surface between you and the speakers.
Place absorption panels at these points. A 2-inch thick panel of mineral wool or rockwool covered in breathable fabric handles mid and high frequency reflections effectively. For the ceiling, a cloud panel suspended above the mixing position works. For the desk, a monitor isolation pad or a small piece of absorptive material reduces reflections off the work surface.
This single step makes the biggest audible improvement for the least effort. Community members on Gearslutz and Reddit consistently rank first reflection treatment as the change that opened up their stereo image and clarified their midrange.
Step 3: Add Corner Bass Traps
Low frequency energy builds up in room corners, and in small rooms the problem is severe. Corner bass traps address the standing waves and room modes that make bass notes unpredictable.
Fill your vertical corners floor-to-ceiling with broadband absorbers if at all possible. These are typically 4 to 6 inches of dense mineral wool or rockwool, packed tightly. A trap that is only 2 inches thick will not absorb bass frequencies effectively. You need depth for low frequency absorption.
If full-height corner traps are not feasible, cover as much of each corner as you can. Even traps in the upper corners help. Prioritize the corners behind your speakers first, then the corners behind your listening position. You can also use the trihedral corners where wall meets wall and ceiling or floor, which are especially effective.
Step 4: Address the Rear Wall
Sound from your speakers travels past you and hits the wall behind your head. In small rooms, that reflection arrives quickly enough to interfere with the direct sound. The treatment approach depends on your distance from the rear wall.
If you sit close to the back wall, within about 3 feet, use absorption. A thick panel directly behind your listening position reduces slap-back reflections. If you have more distance, diffusion can scatter the reflections without removing energy from the room, which keeps the space from sounding dead.
For multi-purpose rooms, a bookshelf full of books against the rear wall acts as a natural diffuser. This is one of those instances where living space furniture genuinely helps your studio sound.
Using Furniture and Everyday Items as Acoustic Treatment
One of the most under-discussed strategies for treating a bedroom studio that’s also a living space is leveraging the furniture you already own. Real-world items absorb, diffuse, and scatter sound in ways that complement purpose-built treatment.
Your bed is a massive bass absorber. A queen or king mattress and box spring absorb low frequencies significantly. Position your bed along a wall where bass tends to build up and you get free treatment that also happens to be where you sleep. Multiple Reddit users in the audioengineering community report that adding a mattress to a bedroom studio noticeably tamed low end issues.
Bookshelves work as diffusion. A shelf packed with books of varying sizes scatters sound waves in multiple directions, which is exactly what a commercial diffuser does. Place a loaded bookshelf against your rear wall or a problematic reflection point. The irregular surface depth prevents coherent reflections from bouncing straight back to your listening position.
Upholstered furniture absorbs mid and high frequencies. A sofa, armchair, or even floor cushions reduce reverberation in the room. If your bedroom studio shares space with a sitting area, that furniture is already doing acoustic work.
Heavy curtains absorb more than thin ones. Floor-to-ceiling blackout curtains over windows reduce both high frequency reflections and some bass buildup near glass surfaces. They also block light, which helps with those late-night sessions.
A thick area rug over hardwood or tile flooring prevents floor reflections from reaching your ears. The bigger the rug, the better. Layer a dense rug pad underneath for additional absorption. This is especially important if your speakers sit on stands rather than on a desk, since floor reflections between the speakers and your ears are strong.
Wardrobes and dressers against walls add mass and break up large flat surfaces. A wardrobe full of clothing is essentially a thick, irregular absorber. Use these pieces on walls that would otherwise be bare and reflective.
Renter-Friendly Treatment Options
If you rent, drilling holes and mounting permanent panels is probably not an option. Forum discussions across Reddit and Gearspace reveal this as one of the top frustrations for apartment-based producers. Fortunately, several effective approaches require zero wall damage.
Command strips and heavy-duty adhesive hooks can hold lighter panels. A fabric-wrapped panel weighing under 5 pounds can mount with several large Command strips rated for frames. Test the weight capacity first and distribute the load across multiple strips. When you move out, the strips pull off cleanly without leaving marks.
Freestanding acoustic panels are the most renter-friendly option. Build or buy panels mounted in wooden frames with stands, similar to studio gobos. Position them at your first reflection points during sessions, then fold them flat and slide them behind furniture when the room returns to living mode. GIK Acoustics and similar brands offer freestanding options designed for this purpose.
Removable bass traps can lean into corners. A broadband corner trap built into a rigid frame stands on its own when wedged into a corner. No mounting hardware needed. Gravity holds it in place, and you can pull it out and reposition as needed.
Tension rods support lightweight panels between two walls or between floor and ceiling. Stretch fabric over a frame, attach it to tension rods, and you have a removable panel that stays put through friction alone. This works well for ceiling clouds in spaces where you cannot drill into the ceiling.
Removable adhesive putty holds acoustic foam tiles temporarily. While foam is not ideal for broadband absorption, it does tame flutter echoes and high frequency ringing. You can stick it up for a session and remove it without a trace.
Absorption vs Diffusion: What to Use Where
Absorption and diffusion are the two primary tools in acoustic treatment, and understanding when to use each is the difference between a great-sounding room and a dead-sounding one.
Absorption removes acoustic energy from the room. Sound hits the absorber and gets converted to heat rather than reflecting back. Porous absorbers like mineral wool, rockwool, and acoustic foam handle mid and high frequencies. Thick, dense absorbers also capture low frequencies, which is why bass traps are larger and deeper than standard wall panels.
Diffusion scatters sound waves in multiple directions instead of removing them. A diffuser takes a coherent reflection and breaks it into scattered energy that arrives at your ears from many angles over a slightly longer time period. This preserves the sense of air and spaciousness in a room while preventing discrete reflections.
As a general rule for small rooms, absorption should dominate. Bedrooms and small home studios do not have enough volume to benefit from large diffusion arrays. Too much diffusion in a small room just sounds weird, like listening through a slightly blurred window.
Use absorption at first reflection points, in corners for bass control, and on the ceiling above your listening position. Consider diffusion only on the rear wall if you have at least 6 feet between your ears and that wall. If space is tight, stick with absorption everywhere.
The risk of over-absorption is a room that sounds unnaturally dead. Aim for 40 to 60 percent wall coverage with absorptive material, not 100 percent. Leave some reflective surfaces to maintain natural room ambience.
Budget Treatment Tiers
You do not need to spend thousands to hear a real improvement. Here is how to approach treatment at three budget levels, with each tier building on the previous one.
Tier 1: Zero Dollars (Free Treatment)
Start with what costs nothing. Reposition your speakers using the equilateral triangle method and the 38% rule. Move your bed to a bass-prone wall. Load a bookshelf with books and place it against your rear wall. Lay down the thickest rug you already own between your speakers and your listening position. Hang heavy blankets over windows during sessions.
These steps alone can reduce flutter echo and tame the worst bass peaks. You will hear a clearer stereo image immediately. Do this before buying anything.
Tier 2: Under $200 (DIY Panels and Bass Control)
Build your own absorption panels using 2×4 foot frames of 1×4 lumber filled with 2-inch rockwool or Owens Corning 703, wrapped in breathable fabric. Each panel costs roughly $20 to $30 in materials. Make four panels for your first reflection points and two for your rear wall.
For bass traps, build corner traps using the same approach but with 4-inch rockwool stacked floor-to-ceiling. Total cost for materials across four wall panels and two corner traps: approximately $150 to $200.
The DIY route is highly recommended by the audioengineering community. The performance of a homemade rockwool panel rivals commercial panels costing three to five times as much. The trade-off is your time and the need for basic tools.
Tier 3: Under $500 (Commercial Panels and Broadband Traps)
At this level, invest in commercial broadband absorbers from brands like GIK Acoustics, Vicoustic, or Primacoustic. These panels are tested for absorption coefficients, look professional, and come with mounting hardware. A typical setup includes four wall panels for first reflections, two corner bass traps, and a ceiling cloud.
Commercial broadband traps absorb effectively down to lower frequencies than thin DIY panels. If low end accuracy matters for your genre, particularly electronic or hip-hop production, commercial broadband traps are worth the investment.
The biggest bang for your buck at any tier is always bass traps in corners. Low frequency problems are the hardest to solve and the most damaging to your mixes. If you can only buy one thing, buy corner traps.
Aesthetic Integration: Making Treatment Look Good
In a room that is also your living space, treatment should not look like an afterthought bolted onto your walls. With some planning, acoustic panels can enhance your room’s appearance while doing their job.
Fabric-wrapped panels are the easiest to customize. Choose fabric that matches your wall color for a subtle look, or select a bold pattern and treat the panel as wall art. Gallery-style frames around acoustic panels make them indistinguishable from decorative wall pieces to anyone who does not know what a bass trap is.
Paint wooden frames to match your trim or furniture. A white frame on a white wall nearly disappears visually, while a dark frame against a light wall creates a deliberate design accent. Either approach looks intentional rather than functional.
Ceiling clouds can hang from thin cables that are barely visible. Position them flush with existing ceiling fixtures so they read as part of the lighting design rather than an acoustic addition. Use lightweight fabric that matches the ceiling color.
Corner bass traps are the hardest to hide but can be styled. Build or buy traps with decorative end caps, paint the frames to match your furniture, or position tall plants in front of the lower sections. Some manufacturers offer bass traps with printed fabric finishes that resemble modern art panels.
The key is consistency. Mix and match different panel styles and the room looks cluttered. Use the same fabric and frame style across all panels, and the treatment reads as a unified design choice.
Common Mistakes to Avoid
Even with good intentions, certain mistakes undermine treatment efforts and waste money. Here are the errors that bedroom studio owners make most frequently.
Using only acoustic foam is the most common mistake. Egg-crate foam absorbs high frequencies but does almost nothing below about 500 Hz. A room lined with foam sounds dull and muddy because the highs are controlled while the bass runs wild. Foam has a role for taming specific flutter echoes, but it should never be your only treatment.
Ignoring bass control is the second most common error. Bass traps are less glamorous than wall panels, harder to install, and more expensive. But low frequency problems are the most damaging to your mixes. If your bass is wrong, nothing else matters.
Treating asymmetrically throws off your stereo image. If you treat the left wall but not the right, the reflections arrive at different times and your imaging collapses. Always treat left and right walls identically, with the same type of panel at the same position.
Covering every surface creates a dead room that sounds unnatural and fatiguing. You want to control reflections, not eliminate all room sound. Aim for 40 to 60 percent coverage and leave reflective surfaces where they will not cause problems.
Finally, treating the wrong spots first wastes money. Before buying panels, identify your first reflection points with the mirror trick and measure where bass builds up. Random panel placement based on where they look good on the wall does not help your sound.
Frequently Asked Questions
How to treat a home studio room?
Start by positioning your speakers using the 38% rule and an equilateral triangle setup. Next, place absorption panels at first reflection points on side walls and the ceiling. Add broadband bass traps in vertical corners from floor to ceiling. Treat the rear wall with absorption or diffusion depending on distance. Aim for 40-60% wall coverage and prioritize bass control.
How to improve acoustics in a bedroom?
Use existing furniture strategically: place your bed against a bass-prone wall, fill bookshelves with books for diffusion, hang heavy curtains over windows, and lay down thick rugs on hard floors. Position your desk and speakers for symmetry. Then add absorption panels at first reflection points and corner bass traps for low frequency control.
Where to put acoustic treatment in a room?
Priority placement is: 1) First reflection points on side walls (use the mirror trick to find them), 2) Vertical corners for bass traps, 3) Ceiling above the listening position, 4) Rear wall behind the listening position. Treat left and right sides symmetrically to maintain stereo imaging.
What is the 38% rule?
The 38% rule, developed by studio designer Wes Lachot, recommends placing your listening position at 38% of the room length from the front wall. This position minimizes the impact of the strongest room mode and provides the flattest low frequency response in most rectangular rooms.
Can I use my bedroom as a recording studio?
Yes, you can use a bedroom as a recording studio with proper acoustic treatment. Address first reflection points with absorption panels, control bass buildup with corner traps, and use furniture like beds and bookshelves to your acoustic advantage. The room will not match a purpose-built studio, but strategic treatment achieves 70-80% of professional results.
Is acoustic foam enough for a bedroom studio?
No, acoustic foam alone is not enough for a bedroom studio. Foam absorbs high frequencies but does little below 500 Hz, leaving bass problems unaddressed. Use foam to tame specific flutter echoes if needed, but prioritize broadband absorption panels with mineral wool or rockwool and corner bass traps for full frequency control.
Conclusion
Treating a bedroom studio that’s also a living space comes down to working with your room rather than fighting it. Optimize your speaker position first, because free improvements always beat paid ones. Then address first reflection points, add corner bass traps, and let your existing furniture handle whatever it can.
The strategies that set multi-purpose rooms apart from dedicated studios are exactly what make this guide different from the standard advice. Your bed absorbs bass, your bookshelf diffuses reflections, and your curtains tame highs. Use them. Add renter-friendly panels if you cannot drill, choose finishes that match your decor, and aim for a room that sounds honest rather than perfect.
Start with the zero-dollar tier today. Reposition your speakers, rearrange your furniture, and listen to how the room changes. Then build or buy panels for your first reflection points and corners. Your mixes will start translating to car speakers, earbuds, and club systems, and that is what treatment is really about.