
If one channel of your turntable sounds harsh, bright, or distorted while the other sounds fine, the culprit is almost always azimuth misalignment. I have helped hundreds of vinyl listeners track down this exact problem, and the good news is that fixing it takes about 20 minutes once you understand what is happening inside the groove. This guide walks through how to adjust azimuth when one channel sounds harsh, from diagnosing the issue to making a precise correction and verifying the result.
You do not need expensive lab equipment. A small mirror, a test record, and a little patience are enough for most setups. I will also cover what to do if your tonearm has no built-in azimuth adjustment, since that is one of the most common frustrations I hear on forums.
By the end of this article you will know exactly why one channel sounds harsh, how to confirm azimuth is the cause, and how to fix it for good.
Table of Contents
What Is Azimuth on a Turntable?
Azimuth is the horizontal tilt of your stylus as it sits in the record groove. Think of it as whether the cantilever leans left, leans right, or stands perfectly vertical when viewed from the front. When azimuth is correct, the stylus makes equal contact with both walls of the V-shaped groove.
Each groove wall carries a separate audio channel. The left wall carries the left channel signal and the right wall carries the right channel signal. If the stylus tilts toward one wall, it reads that channel more strongly and the opposite channel more weakly.
That imbalance is what produces the harsh, edgy, or distorted sound in one speaker. The over-favored wall pushes too much signal, creating a brighter and more fatiguing tone, while the neglected wall loses detail and body.
This is also where crosstalk enters the picture. Crosstalk is when signal from one channel bleeds into the other. A small amount is normal and unavoidable, but excessive crosstalk from bad azimuth collapses your stereo image and makes everything sound flat and congested.
Channel separation is the opposite of crosstalk. Good azimuth maximizes channel separation, which gives you a wide, three-dimensional soundstage with each instrument placed precisely where the recording engineer intended.
Signs Your Azimuth Needs Adjustment
The most obvious sign is exactly what brought you here: one channel sounds harsh while the other sounds normal or even dull. But there are several other symptoms that point to an azimuth problem.
One channel is brighter or harsher than the other. This is the classic symptom. The harsh channel is the one being over-read because the stylus is leaning toward its groove wall.
One channel is consistently louder. If you notice the vocal or instruments leaning to one side even on well-balanced recordings, azimuth tilt is a likely cause.
The soundstage feels narrow or collapsed. When crosstalk increases from misalignment, the stereo image shrinks and instruments pile on top of each other instead of spreading across the room.
Vocals sound off-center. A lead vocal that should sit in the middle of the mix drifts to one side when azimuth is tilted.
Uneven record or stylus wear. Over time, a tilted stylus wears one groove wall faster than the other. If you notice your records wearing unevenly, azimuth could be contributing.
One important distinction: if one channel is completely dead or extremely quiet compared to the other, that is more likely a wiring issue, a bad interconnect, or a problem with your phono preamp. Azimuth causes a subtle to moderate imbalance, not a total channel failure.
How to Diagnose an Azimuth Problem?
Before you touch any screws, confirm that azimuth is actually the issue. I recommend running through these three diagnostic methods in order.
1. The Mirror Test
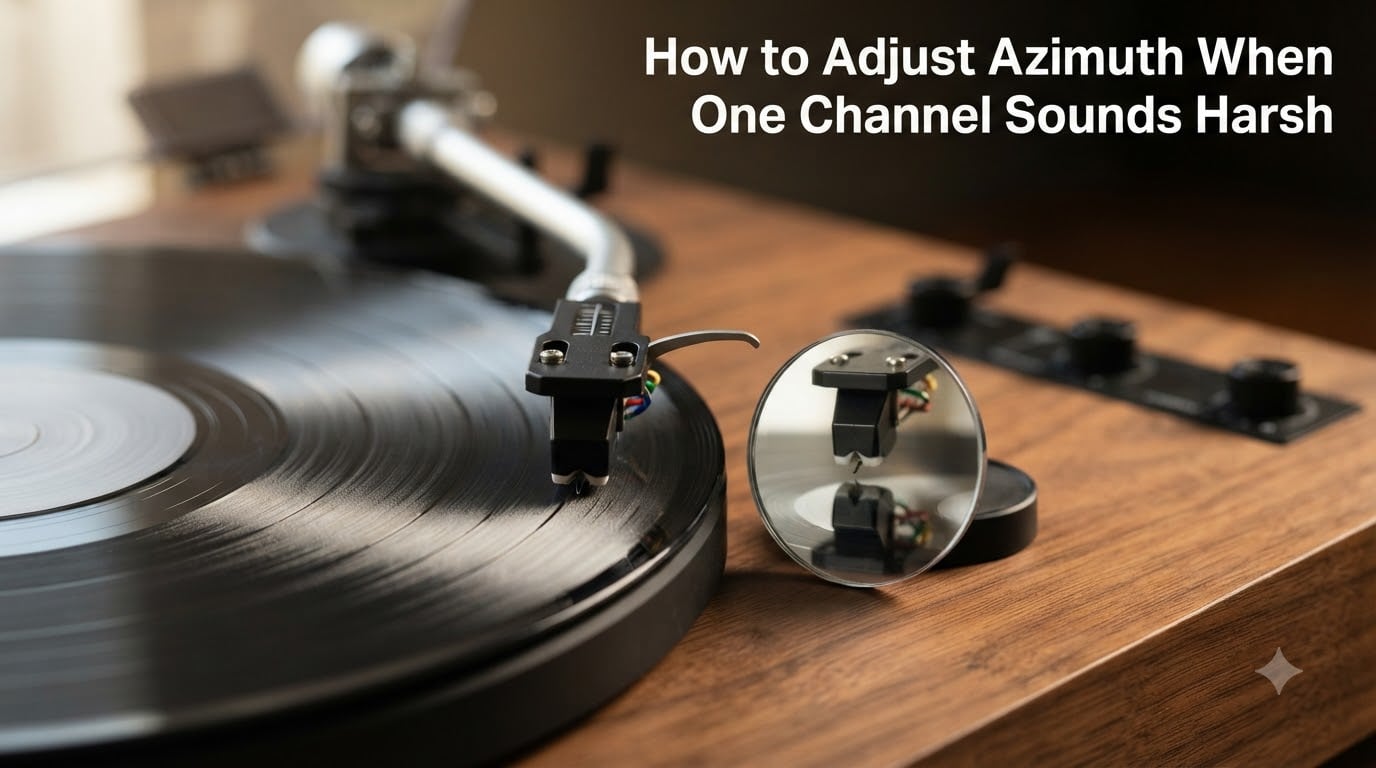
Place a small flat mirror on your platter, lower the stylus onto it gently, and look at the reflection of the cantilever. The mirror doubles any tilt, making even small angular errors visible. If the cantilever and its reflection form a perfectly straight line, your azimuth is close. If they form a V or a bent shape, the stylus is tilted.
This method is fast, free, and works on any turntable. I keep a small makeup mirror in my record room for exactly this purpose. The limitation is that it shows mechanical tilt of the cantilever, not the actual electrical channel balance, which is what your ears care about.
2. The Listening Test
Play a record you know intimately, preferably something with strong stereo separation and a centered vocal. Sit in your normal listening position and pay attention to three things: tonal balance between left and right, the position of the lead vocal, and the width of the soundstage.
If the vocal drifts off-center, if one side sounds harsher, and if the image feels narrow, you have strong evidence of an azimuth issue. Try this with a mono record too. On a mono pressing, both channels carry the same signal, so any left-right tonal difference points directly at azimuth.
3. The Test Record Method
This is the most accurate diagnostic method available to home users. A test record with separate left-only and right-only channel tracks lets you measure exactly how much signal bleeds between channels.
Play the left-channel-only track and measure the output from the right speaker. Then play the right-channel-only track and measure the left speaker output. The amount of signal in the opposite channel is your crosstalk level. Higher crosstalk on one side tells you which direction the azimuth is tilted.
You can measure this with a decibel meter app on your phone, or just by ear if you do not have measurement gear. The Acoustic Sounds and HiFi News test records both include channel separation tracks designed for exactly this purpose.
Tools You Need to Adjust Azimuth
The tools you need depend on which method you use and how precise you want to be. Here is the full checklist with budget alternatives.
Small flat mirror for the visual test. A makeup mirror or even a phone screen turned off works fine.
Test record with channel separation tracks. The HiFi News and Acoustic Sounds test records are the standard choices. They cost around $30 to $40.
Smartphone decibel meter app. Free options like Sound Meter work well enough for relative measurements. A dedicated SPL meter is better but not required.
Small hex key or screwdriver that matches your tonearm’s azimuth adjustment set screw. Check your tonearm manual for the exact size.
Business cards or thin shim stock if your tonearm has no adjustment mechanism. I will cover this method in detail below.
A flashlight to see the cantilever clearly against the groove. Good lighting makes the mirror test far more accurate.
How to Adjust Azimuth When One Channel Sounds Harsh: Step by Step
This is the core process. Follow these steps in order and you will resolve the harsh channel issue in most cases.
Step 1: Set everything else first. Before adjusting azimuth, make sure your tracking force, anti-skate, and cartridge alignment are all correct. Azimuth is the last adjustment you should make because errors in the other settings can mask or mimic azimuth problems.
Step 2: Identify the harsh channel. Play a familiar stereo record and determine which channel sounds bright, harsh, or distorted. The harsh channel is the one being over-read. Your stylus is leaning toward that side’s groove wall.
Step 3: Loosen the azimuth set screw. Locate the azimuth adjustment on your tonearm. This is usually a small set screw on the headshell collar or at the base of the tonearm where it pivots. Loosen it just enough to allow rotation with light resistance, not so loose that the arm flops.
Step 4: Rotate the tonearm tube slightly away from the harsh channel. If the left channel sounds harsh, the stylus is leaning left, so rotate the arm tube slightly clockwise as viewed from the front. If the right channel is harsh, rotate slightly counterclockwise. Make tiny adjustments, no more than a degree or two at a time.
Step 5: Tighten the set screw gently. Hold the arm in position and re-tighten the set screw. Be careful not to let the arm rotate as you tighten, since the friction can shift it. A common forum complaint is that the adjustment moves while tightening, so keep a firm grip.
Step 6: Listen again. Play the same passage and compare the two channels. The harshness should be reduced. If the previously harsh channel now sounds dull or muted, you overcorrected. Go back and make a smaller adjustment in the opposite direction.
Step 7: Fine-tune with a test record. Once the channels sound balanced by ear, use a test record’s channel separation tracks to confirm. Adjust until crosstalk is as low and equal as possible on both sides. This is where you dial in the last few fractions of a degree.
Step 8: Lock it down and re-check. Tighten the set screw fully and play several different records to confirm the fix holds across different pressings and genres. Check again after a few days of play, since some tonearms drift slightly as they settle.
What to Do If Your Tonearm Has No Azimuth Adjustment
Many turntables, especially entry-level models, have no azimuth adjustment screw at all. The tonearm tube is fixed. If you are in this situation, do not worry. There is a well-established workaround that the vinyl community has used for decades.
The Shim Method
You can change the effective azimuth by placing a thin shim between the cartridge body and the headshell. This tilts the entire cartridge, which tilts the stylus in the groove.
The classic shim material is a business card. Cut a thin strip from a business card and place it under one side of the cartridge between the cartridge body and the headshell mounting surface. If the left channel is harsh, shim the right side of the cartridge to tilt the stylus away from the left groove wall.
Start with a single layer of card, about the thickness of standard business card stock. Recheck the sound. Add or remove layers in small increments until both channels sound balanced. Most corrections need only one to three layers.
For a more precise and durable shim, thin brass or plastic shim stock from a hardware store works well. Cut it to the size of the cartridge base so it sits cleanly between the cartridge and headshell without interfering with the mounting screws.
Important Shim Precautions
Make sure the shim does not interfere with the mounting screws or electrical contacts. Trim it carefully so it sits flat. Recheck your tracking force after shimming, since changing the cartridge angle can subtly alter the effective vertical tracking force.
A shim also changes VTA slightly, so you may need to readjust tonearm height afterward. This is a tradeoff of the shim method, but in practice the azimuth correction matters far more than the small VTA change.
Common Azimuth Mistakes to Avoid
After years of helping people troubleshoot harsh-channel issues, I see the same mistakes repeatedly. Avoid these and your adjustment will go smoothly.
Adjusting azimuth before other setup parameters. If your tracking force is wrong, your cartridge is misaligned, or your anti-skate is off, you will chase phantom problems. Always set tracking force, overhang, and anti-skate first.
Making adjustments that are too large. Azimuth corrections are measured in fractions of a degree. If you rotate the arm five degrees, you have gone way too far. Make tiny movements and recheck after each one.
Assuming the cartridge is perfectly built. Some cartridges have cantilevers that are slightly off-center from the factory. The mirror test tells you the mechanical alignment, but the electrical alignment is what your ears hear. Trust the test record method over the visual method when they disagree.
Tightening the set screw without holding the arm. This is the most common frustration I see on forums. The arm rotates as you tighten and you lose your careful adjustment. Hold the arm tube firmly with your other hand while tightening.
Forgetting to recheck after settling. Some tonearms drift slightly after adjustment as the mechanism settles into its new position. Recheck after a few listening sessions and readjust if needed.
Mistaking other problems for azimuth. A dirty stylus, a worn cartridge, a bad interconnect, or a faulty phono preamp can all cause channel imbalance. Clean your stylus and swap your cables left and right before assuming azimuth is the issue.
Testing and Verifying Your Adjustment
Once you have made your adjustment, verify it thoroughly before considering the job done.
Play a mono record first. On a mono pressing, both channels should sound identical. If you still hear a tonal difference between left and right, your azimuth is not yet correct. This is the single most revealing test I know of.
Next, play a well-recorded stereo album with a centered vocal and check that the vocal sits dead center between your speakers. Then listen for soundstage width. A proper azimuth adjustment opens up the stereo image noticeably.
Finally, run the test record method one more time to confirm that crosstalk is minimized and roughly equal on both channels. If the numbers look good and your ears agree, you are done.
Frequently Asked Questions
What is azimuth on a turntable?
Azimuth is the horizontal tilt of the stylus as it sits in the record groove. When correct, the stylus contacts both groove walls equally. When tilted, it favors one wall, causing channel imbalance and crosstalk.
How do I know if my azimuth is off?
Common signs include one channel sounding brighter or harsher than the other, a collapsed or narrow soundstage, off-center vocals on stereo recordings, and uneven channel balance on mono records. The mirror test and a test record confirm the issue.
What does bad azimuth sound like?
Bad azimuth makes one channel sound harsh, bright, or distorted while the other sounds dull or muted. The stereo image narrows, crosstalk increases, and vocals can drift off-center. On mono records, the two channels will sound noticeably different in tone.
Can you adjust azimuth without a tool?
Yes. If your tonearm has an adjustment screw you only need a small hex key or screwdriver. If it has no adjustment, you can use the business card shim method by placing thin card stock between the cartridge and headshell to tilt the stylus in the desired direction.
How do I fix one channel louder than the other on my turntable?
First rule out other causes: clean the stylus, swap your interconnects left and right to see if the problem follows the cable, and check your phono preamp. If the imbalance persists, check azimuth with a mirror and adjust the tonearm tilt or shim the cartridge until both channels are balanced.
What causes one channel to sound harsh on a turntable?
The most common cause is azimuth misalignment, where the stylus tilts toward one groove wall and over-reads that channel. Other causes include a dirty or damaged stylus, uneven stylus wear, a faulty interconnect, or a failing phono preamp channel.
Wrapping Up Your Azimuth Adjustment
Fixing a harsh channel comes down to understanding that azimuth controls how evenly your stylus reads both groove walls. Once you tilt the stylus back to vertical, the harshness disappears, the soundstage opens up, and your records sound the way they were meant to. Learning how to adjust azimuth when one channel sounds harsh is one of the highest-impact tweaks you can make to your turntable, and it costs nothing but a few minutes of careful listening.
Start with the mirror test to get close, then use a mono record or test pressing to fine-tune by ear. If your tonearm has no adjustment, the shim method works just as well. Take your time, make small changes, and trust what you hear.