
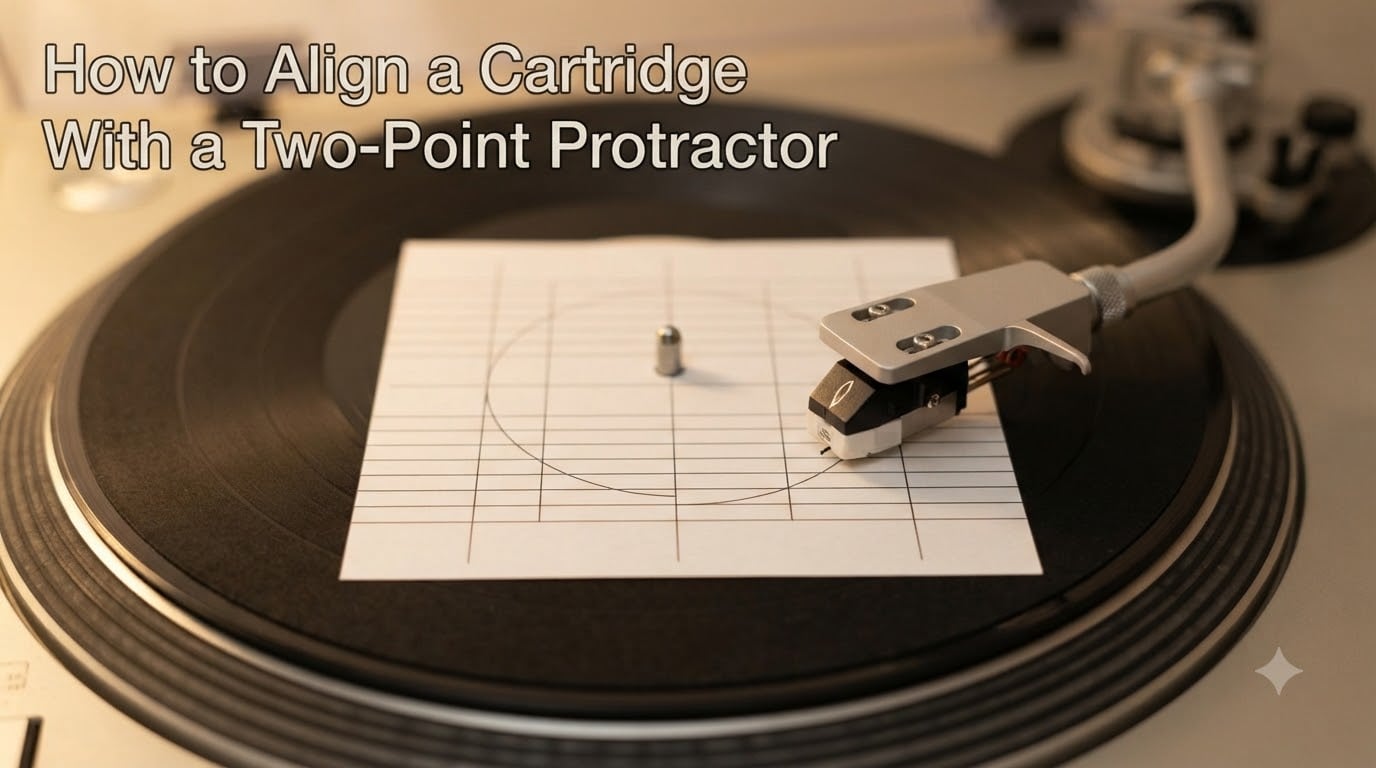
Learning how to align a cartridge with a two-point protractor is the single most impactful setup step you can do for your turntable. I spent two frustrating weekends fighting muddy soundstage and sibilant highs on my own deck before a vinyl engineer friend handed me a printed protractor and a magnifying loupe. Within an hour my stereo image snapped into focus and the inner-groove distortion that had plagued my favorite jazz reissues vanished. This guide walks you through the exact process I now use every time I mount a new cartridge.
Two-point protractors are the cheapest, fastest, and most universal alignment tool in the vinyl hobby. Whether you run a Rega, a Technics SL-1200, an SME-laden vintage deck, or a budget Audio-Technica, the procedure below will get your stylus tracing the groove the way the mastering engineer intended.
Table of Contents
What Is a Two-Point Cartridge Alignment Protractor?
A two-point cartridge alignment protractor is a small printed card or acrylic overlay that sits on your turntable platter over the spindle. It marks two specific points called null points, plus a grid of parallel lines that you use as a reference for cartridge body angle. When your stylus tip lands on each null point, the cartridge body should sit parallel to the grid lines on the protractor.
The two null points correspond to inner and outer grooves on a record. Mathematically, they are the two locations on the record where a pivoting tonearm with the correct offset angle produces zero tracking error. Align at both points and you get near-zero error everywhere in between. That is the core idea behind every two-point protractor from Audio-Technica, Ortofon, HiFi News, and the free printable versions online.
Two-point protractors work with almost any pivoting tonearm because the null points are calculated to minimize the average tracking error across the playable groove area. They do not require you to know your exact pivot-to-spindle distance, which is why beginners love them.
Why Cartridge Alignment Matters for Sound Quality
When a phono cartridge sits at the wrong angle, the stylus cannot trace the groove walls the way the cutting lathe originally carved them. The result is tracking error, which manifests as audible distortion in three ways.
First, stereo imaging collapses. Records are cut with a two-channel groove wall, and a misaligned stylus reads the left and right channels unequally. You hear this as vocals shifting left or right, or as a thin, crowded soundstage instead of a wide, layered one.
Second, sibilance and inner-groove distortion increase. The last 30 minutes of any LP has tighter groove spacing and smaller recorded wavelengths. Misalignment here produces the harsh “ssss” and a gritty edge that drives listeners to blame the pressing when the real culprit is geometry.
Third, your records wear faster. A misaligned stylus rides too hard against one groove wall, shaving off vinyl that no cleaning fluid can restore. After 20 plays of a poorly aligned setup, an audiophile-grade pressing can sound like a dollar-bin thrift store find.
A correctly aligned cartridge also helps your anti-skate setting work the way it should. Anti-skate only compensates correctly when the geometry is right to begin with, so alignment is the foundation of every other adjustment.
Tools You Need Before You Start
Gather these items before you mount the cartridge. You will save yourself the frustration of stopping mid-procedure to hunt for a missing tool.
A two-point cartridge alignment protractor (printed on matte paper, never glossy photo paper, which reflects and distorts your view)
A small magnifying loupe or 10x jewelry loupe (alignment errors of 0.5 mm are audible)
A tracking force gauge (digital is best, mechanical acceptable)
A stylus force gauge if your tracking force gauge does not read low enough for moving coils
A set of non-magnetic tweezers or a small Allen key for cartridge mounting bolts
A flat, well-lit workspace with the turntable level
A piece of 0.5 mm pencil lead, sharpener, and a steady hand (for the pencil lead trick later)
I keep all of this in a single shoebox on my workbench. Setup takes about 20 minutes the first time and under 10 minutes once you have done it a few times.
Understanding Alignment Geometry: Baerwald, Löfgren B, and Stevenson
Before you place the protractor on the platter, it helps to understand what geometry you are aligning to. A two-point protractor is just a physical representation of a mathematical curve, and there are three curves worth knowing.
Baerwald alignment minimizes total tracking error across the entire playable record. It is the most common choice and is what the original Baerwald papers and the HiFi News protractor use. If you only learn one geometry, learn Baerwald.
Löfgren B alignment also minimizes total error but weights the inner groove slightly more heavily. Many vinyl enthusiasts prefer Löfgren B because inner-groove distortion is more audible than outer-groove distortion on most LPs. It is what the Ortofon and Audio-Technica protractors use.
Stevenson alignment minimizes error specifically at the inner groove. It produces excellent inner-groove tracking but slightly worse outer-groove performance. Stevenson geometry is favored by some Japanese and British engineers for its inner-groove smoothness.
For most listeners, Baerwald and Löfgren B are interchangeable within audible thresholds. Pick one and stick with it. Switching between geometries on the same cartridge without re-aligning can muddy the results.
How to Align a Cartridge With a Two-Point Protractor: Step-by-Step
This is the procedure I use and recommend. Follow each step in order. Do not skip the overhang adjustment before touching the angle, or you will chase your tail for an hour.
Step 1: Mount the cartridge loosely. Slide the cartridge into the headshell and finger-tighten the mounting bolts just enough to hold it. You should be able to push the cartridge body back and forth and rotate it with two fingers.
Step 2: Set the overhang roughly. Place the protractor on the platter and visually align the cartridge body so the stylus tip lands roughly on the inner null point. Tighten the bolts only when the overhang is close, not perfect. Approximate is fine for this step.
Step 3: Set tracking force and anti-skate to zero. Zero out the counterweight and the anti-skate dial. This removes spring tension from the tonearm so you can position the cartridge freely.
Step 4: Lower the stylus onto the outer null point. Carefully lift the tonearm and place the stylus tip on the outer null point marked on the protractor. Look straight down from above the cartridge body. The sides of the cartridge body should appear parallel to the grid lines printed on the protractor.
Step 5: Rotate the cartridge body to square it. If the cartridge front is not parallel to the grid lines, gently rotate the cartridge in the headshell until it is. Hold the cartridge body with two fingers and pivot it slowly. Do not move the overhang position yet.
Step 6: Check the inner null point. Lift the tonearm and lower it onto the inner null point. Look down again. If the cartridge body is now angled relative to the grid, you need to slide the cartridge forward or backward in the headshell to adjust overhang. Moving the cartridge forward reduces overhang; moving it backward increases it.
Step 7: Iterate between both null points. Adjust overhang at the inner point, then re-check the angle at the outer point. Adjust angle at the outer point, then re-check overhang at the inner point. Repeat until both points show perfect parallel alignment with no overhang error. This usually takes three to five iterations.
Step 8: Tighten the mounting bolts and re-verify. Once both null points align perfectly, hold the cartridge firmly against the headshell and tighten the two mounting bolts evenly. Tightening often shifts the cartridge slightly, so always re-check both null points after tightening. A final check at both points with the bolts fully torqued is non-negotiable.
That is the entire procedure. The first time you do it, expect 30 to 45 minutes. By your third cartridge, you will be done in 10.
The Pencil Lead Trick for Spotting Alignment Errors
Even with a loupe, judging parallel alignment by eye is tricky. A sharper trick comes from vinyl engineer forums and has saved me countless hours.
Take a 0.5 mm mechanical pencil lead and hold it vertically right behind the cantilever, between the cantilever and the cartridge body. With the stylus on a null point, look down from directly above. If the cantilever and the pencil lead form a single straight line, your alignment is perfect. If the cantilever appears to angle away from the pencil lead, even slightly, you have an alignment error.
The pencil acts as a sightline reference. Your eye reads the angle between the cantilever and the pencil more accurately than the angle between the cartridge body and a printed grid, because the cantilever is the actual point of contact with the groove.
For moving coil cartridges where the cantilever is hidden inside the body, the pencil lead trick still works. Position the lead next to the stylus tip itself and sight along the cantilever axis. This technique is especially useful on Rega tonearms where the headshell is integrated and rotation is limited.
Two-Point vs Arc Protractor: Which Should You Use
Two-point protractors are universal and forgiving. Arc protractors require you to know your exact pivot-to-spindle distance and effective length, but reward you with continuous confirmation of alignment across the entire groove area.
Use a two-point protractor if you are new to cartridge setup, if you change cartridges often, or if your tonearm manufacturer does not publish pivot-to-spindle specifications. Use an arc protractor if you have an SME, Rega, Linn, or other precision tonearm where the geometry is fixed and documented, and if you want to confirm alignment at every groove radius, not just two points.
Rega tonearms are a special case. Because the headshell is integrated into the arm tube, you cannot rotate the cartridge independently of the arm. You must adjust overhang by sliding the cartridge in its saddle and angle by rotating the entire arm tube. A two-point protractor is often easier to use here than an arc protractor.
SME tonearms are the opposite. Their fixed geometry and precision-machined headshells work beautifully with arc protractors because every dimension is known and consistent. Most SME owners keep both protractors on hand and cross-check.
Common Mistakes and Troubleshooting Alignment Problems
If you have done everything above and the sound still seems off, run through this checklist before suspecting your cartridge or phono stage.
Curved cartridge fronts. Some cartridges, like many Ortofon 2M models, have a slightly rounded front edge that makes parallel alignment ambiguous. In this case, sight along the cantilever itself rather than the cartridge body. The pencil lead trick works especially well here.
Tightening shifts alignment. Always re-check both null points after the final bolt tightening. Even finger-tight can move the cartridge by a fraction of a millimeter, which is enough to cause audible inner-groove distortion.
Protractor printed at the wrong scale. Most printable protractor PDFs assume 100 percent printer scale. If you print in “fit to page” mode, the null points shift and your alignment will be off by 1 to 2 mm. Always print at 100 percent and verify the printed dimensions against the file’s reference scale bar.
Anti-skate was not reset. Anti-skate pulls the tonearm toward the spindle. If you forget to zero it during alignment, the cartridge appears misaligned even when it is not. Reset anti-skate to zero every time you align.
Lighting and parallax. Always sight the cartridge from directly above, not at an angle. Parallax distortion makes a perfectly aligned cartridge look off. Get your eye level with the cantilever, not the protractor.
If the problem persists after all of this, your tonearm bearings or bearings lubrication may be the issue, not your alignment. But in 90 percent of cases I have seen, careful alignment with a two-point protractor fixes the problem completely.
Frequently Asked Questions
How do I align a cartridge with a protractor?
Mount the cartridge loosely in the headshell, place the two-point protractor on the platter, and lower the stylus onto the outer null point. Rotate the cartridge body until it is parallel with the grid lines, then check the inner null point and slide the cartridge forward or backward to adjust overhang. Iterate between both points until both align perfectly, then tighten the mounting bolts and re-verify.
What is a two-point cartridge alignment protractor?
A two-point cartridge alignment protractor is a printed or acrylic overlay that sits on your turntable platter. It marks two specific null points and a grid of parallel reference lines. When the stylus tip lands on each null point, the cartridge body should appear parallel to the grid, ensuring near-zero tracking error across the record.
Do I need a cartridge alignment protractor?
Yes. Cartridge alignment protractors are essential for any vinyl listener who cares about sound quality. Without proper alignment, every other setup adjustment including tracking force, anti-skate, and VTA is compromised. A $5 printed protractor will improve your sound more than most upgrades short of a new cartridge.
Are cartridge alignment protractors universal?
Two-point protractors are universal and work with almost every pivoting tonearm regardless of brand or effective length. Arc protractors are not universal because they require you to know your exact pivot-to-spindle distance and effective tonearm length. For most listeners, a two-point protractor is the better choice.
Final Thoughts on Cartridge Alignment With a Two-Point Protractor
Knowing how to align a cartridge with a two-point protractor puts you ahead of most casual vinyl listeners and on par with experienced vinyl engineers. The procedure is fast, the tool is cheap, and the sonic improvement is dramatic. Spend an afternoon dialing in your setup and your record collection will reward you every time you drop the needle.