
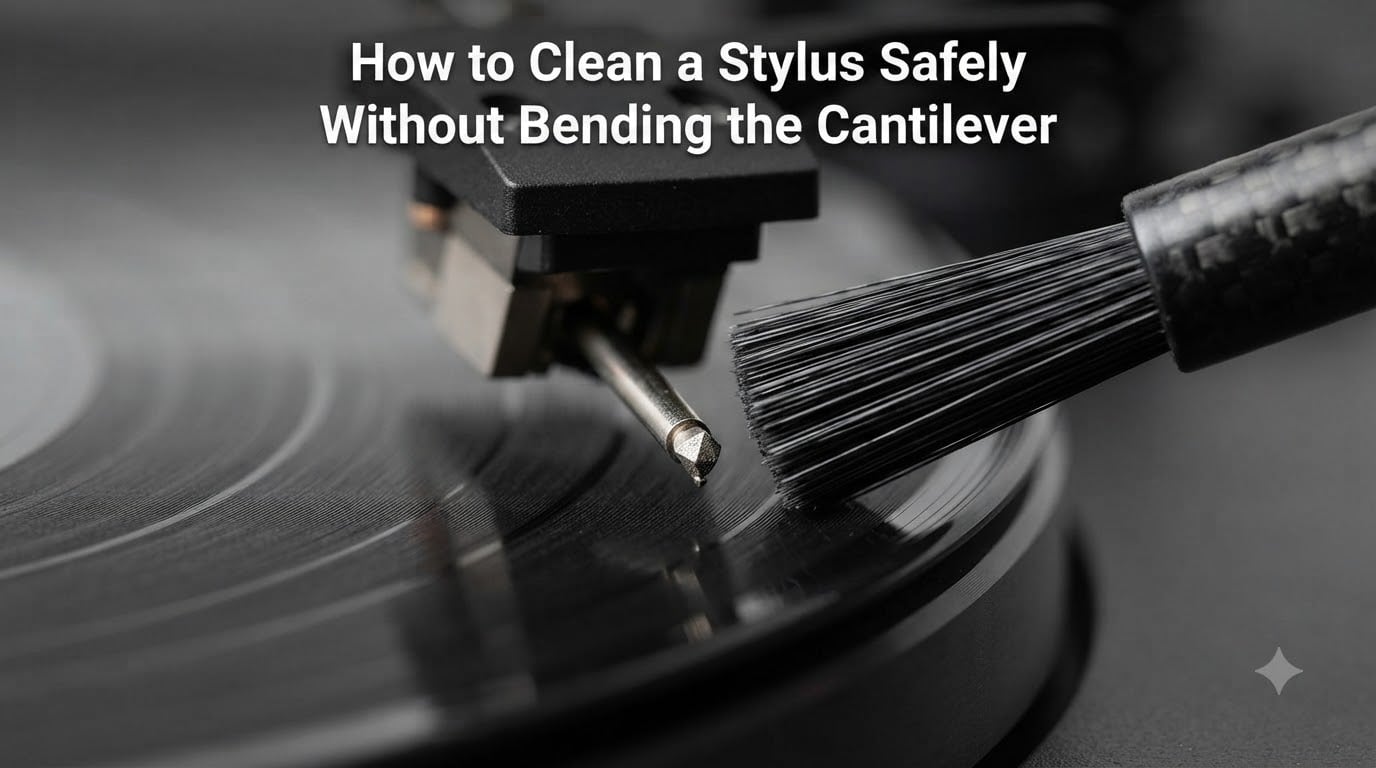
Learning how to clean a stylus safely without bending the cantilever is the single most important skill for protecting your vinyl collection. I learned this the hard way years ago when a careless sideways swipe permanently damaged the cantilever on my first cartridge, and I have since rebuilt my entire routine around one simple rule. In this guide I will walk you through the exact steps I use, the tools I trust, and the warning signs that tell you when to stop cleaning and call a professional.
Table of Contents
Why the Cantilever Is So Vulnerable?
The cantilever is the thin metal arm that holds the diamond stylus tip inside your phono cartridge. It is typically made of aluminum, boron, or carbon fiber, and on most moving-magnet and moving-coil cartridges it is no thicker than a human hair.
That tiny arm does all the heavy lifting. It transmits every vibration from the groove walls into the coils or magnets that generate your music signal. When it bends even a few thousandths of an inch, the stylus sits at the wrong angle in the groove, causing distortion, mistracking, and channel imbalance.
A bent cantilever is also one of the most expensive mistakes you can make with a turntable. Replacing the entire cartridge often costs more than a careful cleaning routine for years of records. This is why every cleaning decision you make should be filtered through one question first: will this stress the cantilever?
The Golden Rule: Always Brush Back to Front
Always brush from the back of the cartridge toward the front, never side to side. This single direction does almost all of the work in protecting the cantilever.
Think about the geometry of the stylus. The cantilever points forward and slightly downward, and the diamond tip rides the groove from the rear edge to the front edge as the record spins. Dust and fluff accumulate on top of the cantilever and around the tip. If you brush from back to front, you are moving debris in the same direction the groove already carries it. If you brush side to side, you are pushing the cantilever sideways, and the cantilever does not forgive lateral force.
One forum user on audiokarma.org described it perfectly: the cantilever is like a diving board that only bends along its length. Push it along the long axis and nothing happens. Push it sideways and the whole tip walks out of alignment.
Tools You Need Before You Start
Before you bring a brush anywhere near your stylus, gather these items. Skipping a tool is how most accidents happen.
A carbon fiber stylus brush with soft, dense fibers
A stylus cleaning gel pad such as Onzow Zerodust or equivalent
A stylus cleaning fluid designed for phono cartridges (alcohol-free is safest)
A stylus magnifier or loupe with at least 10x magnification
A small dust cover for your turntable
Bright, focused lighting, ideally a desk lamp angled at the cartridge
Keep these tools together in a small kit near your turntable. Hunting for a brush at the moment you need it is when most people improvise with the wrong thing.
Method 1: Dry Brushing for Routine Maintenance
Dry brushing is the safest, fastest cleaning method and should be your default. I use it before every listening session and again whenever I change records.
Follow these steps carefully:
Lower the tonearm rest and lock the cueing lever.
Position the carbon fiber brush so the fibers point toward the front of the cartridge.
Touch the brush gently to the stylus tip, allowing the cantilever to rest between two rows of fibers.
Move the brush slowly from back to front in a single smooth stroke.
Lift the brush straight down and away. Never drag it backward.
Repeat three to four times, rotating the brush slightly so fresh fibers contact the tip each time.
Apply almost no pressure. The weight of the brush is enough. If you feel resistance, you are pressing too hard.
For routine play, dry brush every one to two records, or roughly every 45 minutes of listening. This prevents dust from bonding to the stylus tip and stops the gritty buildup that causes surface noise on your records.
Method 2: Gel Cleaning for Stubborn Dust
When dry brushing leaves visible fuzz or a faint gray film on the tip, a gel cleaner like Onzow Zerodust works better than repeated brushing. The gel pulls dust off the stylus without any mechanical force at all.
Here is the safest way to use a stylus gel pad:
Place the gel pad on a flat, stable surface near your turntable.
Unlock the tonearm and cue the stylus over the gel pad using the cueing lever. Never lower it by hand.
Let the stylus touch the gel surface under its own tracking force for two to three seconds.
Lift the stylus straight up using the cueing lever.
Rotate the gel pad slightly to expose a fresh surface.
Repeat the dip two to three times until inspection with a magnifier shows a clean tip.
One tip from the vinyl subreddit that I always follow: keep the gel pad clean. Once it looks visibly gray or dusty, replace it. A dirty gel pad is just a dirt transfer station.
Use the gel method once every 10 to 20 playing hours, or whenever a magnifier reveals residue the brush cannot shift.
Method 3: Liquid Cleaning for Heavy Buildup
Liquid cleaning is the highest risk method and should only be used when the stylus tip is visibly caked with residue that brushing and gel cannot remove. Cigarette smoke, cooking residue, and old stylus gunk fall into this category.
To clean with liquid safely:
Use only a dedicated stylus cleaning fluid. Avoid isopropyl alcohol above 70 percent concentration, and never use household solvents.
Apply a tiny drop to a dedicated stylus cleaning brush, never directly to the stylus.
Touch the damp brush to the stylus from back to front in a single stroke.
Allow at least 60 seconds of drying time before lowering the stylus onto a record.
Follow up with a dry brush pass once the tip is fully dry.
I keep liquid cleaning to a maximum of once every three months. Over-wetting risks wicking fluid into the cantilever suspension, where it can corrode the rubber damping inside the cartridge.
How to Tell If Your Cantilever Is Already Bent?
This is the section I wish I had read before my own mistake. Most cleaning guides skip how to inspect a cantilever after a bump or before each deep clean.
Perform a visual inspection using a magnifier with the stylus tip at eye level and good side lighting. A healthy cantilever points straight forward, parallel to the record surface, with the diamond tip sitting centered and pointing straight down.
Warning signs to look for include the following:
The cantilever tip sits visibly off-center when viewed from above
The arm appears tilted when viewed from the side
The diamond tip looks skewed rather than vertical
You can see a kink or visible bend along the cantilever length
Sound symptoms that suggest a bent cantilever include channel imbalance, where vocals seem to lean hard to one speaker, sudden sibilance, and increased distortion on loud passages. I have also noticed that a bent cantilever often causes the stylus to skip on quieter passages, which is sometimes blamed on a dirty record.
If you see any visible bend or hear consistent mistracking after a thorough cleaning, stop using the cartridge and contact the manufacturer or a qualified turntable technician. A bent cantilever usually means cartridge replacement, not repair.
Cleaning Mistakes That Bend Cantilevers
After years of reading turntable forums, I have seen the same handful of mistakes ruin stylus after stylus. Avoid each one carefully.
Brushing side to side. This is the number one cause of bent cantilevers. Even a gentle lateral swipe transfers force directly into the arm.
Using a toothbrush. Toothbrush bristles are far too stiff and irregular for a stylus. They can snap a cantilever or scratch the diamond tip, ruining the contact patch.
Using the wrong end of a Magic Eraser. The blue side contains cleaning agents that can leave residue on the cantilever. If you use a Magic Eraser at all, use only the plain white side, and only as a last resort.
Pressing too hard. More pressure does not mean a cleaner stylus. The cantilever is a precision mechanical component, and every gram of force beyond the brush weight adds stress.
Lowering the stylus onto a gel pad by hand. Always use the cueing lever. Hand-lowering introduces uneven force and is how many users bend cantilevers on the first gel dip.
Cleaning while the platter is spinning. Always stop the record first. A spinning stylus plus a brush is a recipe for a snapped cantilever.
Emergency Cleaning When You Are Traveling
Travel is when most bending accidents happen, because the right tools are rarely nearby. If you find yourself with a dirty stylus and no brush, here is how to avoid trouble.
First, do not improvise with your finger. Fingerprint oils attract more dust and can damage the cantilever suspension.
Second, do not use tissues, paper towels, or cotton swabs. Their fibers snag on the cantilever and pull it sideways the instant you remove them.
Third, if you must improvise, a clean, soft, natural-bristle artist paintbrush (size 000 or finer) used back to front is the safest substitute. It will not win any audiophile awards, but it will get you through the weekend.
The best long-term solution is a small travel kit. I keep a folding magnifier, a mini carbon fiber brush, and a gel pad the size of a coin in a hard case. It takes up less space than a pack of cigarettes and has saved me more than once on the road.
Frequently Asked Questions
How to safely clean a stylus?
Use a carbon fiber brush and stroke gently from back to front only. Never side to side, never with a toothbrush, and never with household solvents.
Can a dirty stylus damage records?
Yes. A buildup of dust and grime on the stylus tip grinds into the groove walls with every play, causing permanent groove wear and audible surface noise over time.
How often should a stylus be cleaned?
Dry brush every one to two records during normal use. Use a gel cleaner every 10 to 20 playing hours. Reserve liquid cleaning for heavy buildup, no more than once every three months.
Can I clean my stylus with a toothbrush?
No. Toothbrush bristles are far too stiff and can bend the cantilever or damage the diamond tip. Use only a dedicated stylus brush or gel cleaner instead.
Is it safe to use isopropyl alcohol on a stylus?
Only in low concentration, applied to a brush rather than the stylus directly, and only when other methods have failed. Routine alcohol use risks wicking fluid into the cantilever suspension.
Keep Your Stylus Safe and Your Records Sounding Great
Cleaning a stylus does not have to be stressful. Once you build the back to front rule into muscle memory, the rest of the process becomes a quick, almost automatic habit. Dry brush often, gel clean occasionally, reserve liquids for real emergencies, and inspect the cantilever under a magnifier whenever you are unsure.
That is the entire philosophy behind how to clean a stylus safely without bending the cantilever: respect the geometry, use the lightest tool that does the job, and never force anything. Your records will sound better, your stylus will last longer, and your wallet will thank you for skipping the replacement cartridge you would otherwise have needed.
For more turntable care tips and record storage advice, browse the rest of our vinyl guides at SK Records.