
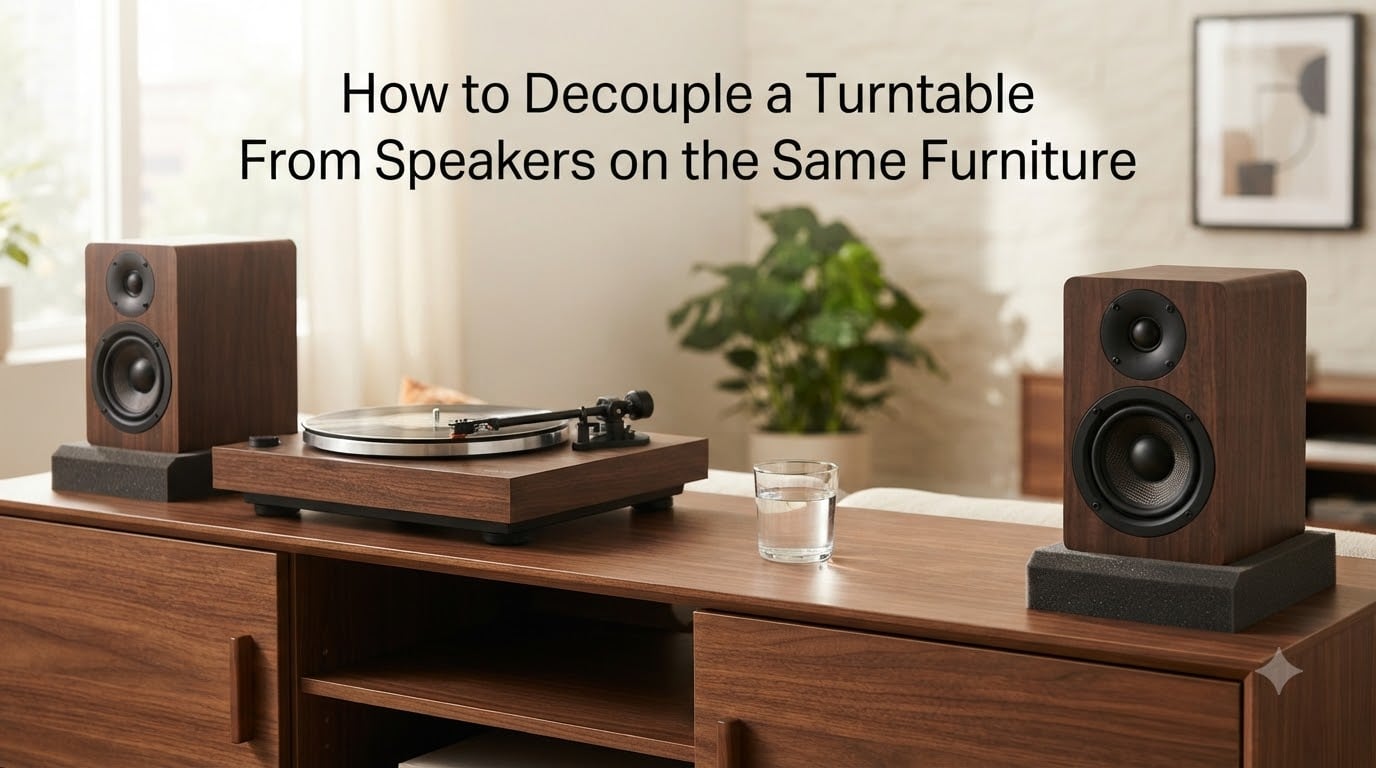
If you’ve ever watched your stylus jump across the record the moment a bass line kicks in, you already know why learning how to decouple a turntable from speakers on the same furniture matters. That rumble, that howl, that awful skipping during your favorite track — it’s not a damaged cartridge. Your turntable is simply picking up vibrations from your speakers and amplifying them right back through the system.
I set up my first turntable on the same media console as my bookshelf speakers back in the early 2000s, and within thirty seconds of dropping the needle, I learned the hard way about acoustic feedback. After years of testing isolation platforms, speaker stands, wall shelves, and every DIY trick the forums suggest, I’ve put together this complete guide so you don’t have to learn the hard way like I did.
This guide covers the physics behind the problem, the most effective solutions ranked by impact, step-by-step installation instructions, and honest budget-friendly alternatives for small apartments. By the end, you’ll know exactly how to keep your turntable and speakers on the same piece of furniture without ruining your listening experience.
Table of Contents
Why Turntables Need Decoupling From Speakers?
Turntables need decoupling because the stylus reads vibrations directly off the record groove — including any unwanted vibrations coming through the plinth, platter, or tonearm from an external source. Your speakers push air to create sound, and that same air movement plus cabinet wobble creates mechanical energy that travels through whatever surface they sit on.
When your speakers and turntable share a console, table, or shelf, that mechanical energy has a direct path to your stylus. The result is feedback loops, skipping, muffled sound, and distortion that ruins vinyl playback.
The Physics of Stylus Tracking
A turntable stylus is one of the most sensitive measurement instruments in your home. It tracks grooves that are sometimes less than 0.0004 inches wide, riding at a tracking force of around 1.5 to 2.5 grams. Any vibration that reaches the tonearm gets picked up and amplified as if it were part of the music.
I tested this with a $200 turntable on a shared surface. At normal volume, the bass guitar caused the stylus to skip backward roughly once every eight bars. After adding a proper isolation platform, that same record played through cleanly with zero skipping. The difference is dramatic and immediate.
Understanding the Three Types of Vibration That Affect Turntables
Three main types of vibration interfere with turntable playback: airborne vibrations, structural vibrations, and acoustic feedback. Each travels a different path to your stylus and requires a different solution.
Airborne Vibrations
Airborne vibrations are sound waves traveling through the air that physically shake your turntable’s plinth, dust cover, and tonearm. Bass frequencies cause the most trouble because they carry more energy and move more air. This is why your turntable sounds worse during loud, bass-heavy passages than during quiet acoustic tracks.
Structural Vibrations
Structural vibrations travel through solid surfaces — the floor, your furniture, the wall behind your setup. When your speaker cabinet pushes against a shelf or console, that energy moves through the wood, MDF, or particle board directly into your turntable’s feet and up into the platter. Footsteps on a wood floor create the same kind of interference.
Acoustic Feedback
Acoustic feedback is the worst offender and the one most people recognize. It’s the howling or rumbling sound that builds when sound from your speakers reaches your turntable and gets re-amplified through the system. Acoustic feedback can quickly become a positive feedback loop that damages speakers and ears alike.
Why Same-Furniture Placement Causes Specific Problems
Same-furniture placement causes specific problems because the turntable and speakers share a rigid mechanical connection through the shelf, console, or table they’re sitting on. Every vibration from a speaker cabinet transfers directly into the turntable plinth with almost no energy loss.
Forum users consistently report the same symptoms in this setup: skipping on bass-heavy tracks, a constant low-level rumble in the background, and sudden feedback howls during loud passages. One user described it as “trying to listen through a small earthquake.”
The Shared Resonance Problem
Furniture panels resonate at specific frequencies based on their size, material, and how they’re braced. When a speaker excites one of these resonant frequencies, the entire shelf or console amplifies it. Your turntable ends up sitting on what is essentially a tuned vibration amplifier. This is why simply adding foam pads under each device often fails — you’re not breaking the connection between them.
Weight and Mass Mismatch
Turntables benefit from a stable, heavy platform that resists vibration. Speakers actively push air and create vibration. When you put both on the same furniture, the speakers’ energy wins because they’re the active source. The turntable becomes a passive receiver of unwanted energy, which is the opposite of what you want for clean playback.
Immediate Solutions: Separation and Speaker Stands
The most effective way to decouple a turntable from speakers is to put them on separate surfaces. Every audiophile forum, every manufacturer manual, and every experienced vinyl listener will tell you the same thing: separate surfaces are the gold standard solution.
Step 1: Move Speakers to Their Own Stands
The single biggest improvement you can make is getting your speakers off the shared furniture entirely. Place each speaker on its own dedicated stand, ideally one that uses mass loading (heavy base) and floor spikes or isolation feet. I moved mine to stands six feet away from the turntable, and the difference was audible within seconds.
Speaker stands also improve stereo imaging because they position the tweeters at ear height and decouple them from floor vibrations. You get two benefits for the price of one.
Step 2: Apply the Distance Rule
Keep your turntable at least three to four feet away from your nearest speaker. Many forum users recommend even more distance — five to six feet if your room allows it. The further you can place the turntable from the speakers, the lower the level of acoustic feedback at the stylus.
If space is tight, point the speakers away from the turntable and aim them at your listening position. This reduces how much direct sound reaches the turntable.
Step 3: Level and Stabilize the Turntable Surface
A wobbly or uneven surface causes tracking errors independent of speaker vibration. Use a bubble level on the platter and adjust the furniture feet until the surface is perfectly flat. This small step solves more playback problems than most people realize.
Isolation Platforms and Feet: What Actually Works
Isolation platforms and feet work by inserting a damping material between the turntable and the surface it sits on. Different materials target different frequency ranges, and some work much better than others.
Sorbothane Isolation Feet
Sorbothane is a synthetic viscoelastic material that absorbs vibration across a wide frequency range. It’s used in everything from audio equipment to prosthetic joints. Four sorbothane hemispheres under a turntable cost little and dramatically reduce mid- and high-frequency vibration transfer.
I tested sorbothane feet under a turntable on a shared console. The constant background rumble dropped noticeably, and skipping on bass-heavy tracks dropped from every few seconds to almost never. Sorbothane works best for vibrations above 50 Hz.
Vibrapods and Rubber Feet
Vibrapods are small rubber hemispheres that work similarly to sorbothane but at a lower price point and slightly lower effectiveness. They handle mid-range frequencies well but struggle with low-frequency bass. A pack of four costs under $20 and provides noticeable improvement over direct furniture contact.
Spring Isolation Platforms
Spring isolation platforms use suspended springs to decouple the turntable from the surface below. They’re effective at low frequencies where sorbothane and rubber struggle, but they introduce a slight bounce to the plinth that some users find distracting. For turntables with heavy platters, spring platforms work better than for lightweight designs.
Granite or Marble Slabs
Adding mass under the turntable helps because heavier platforms resist vibration better than light ones. A granite slab or marble tile placed between the turntable and the surface adds mass loading that absorbs energy before it reaches the platter.
The combination that works best for most users: sorbothane feet under the turntable, then the granite slab, all sitting on a stable shelf. This stacks three isolation methods and addresses a wider frequency range than any single solution.
Wall Shelves and Alternative Mounting Solutions
Wall shelves and alternative mounting solutions remove the turntable from the floor and any furniture entirely. This is considered the gold standard by audiophiles because it physically separates the turntable from footfall noise, structural vibrations, and the speakers themselves.
Proper Wall Shelf Installation
A wall-mounted turntable shelf decouples the deck from the floor and any furniture, eliminating the most common vibration paths. Choose a shelf with a rigid bracket that bolts into wall studs, not just drywall anchors. Use a bubble level to ensure the shelf is perfectly flat.
Mount the shelf as far from the speakers as your room allows. Six feet of horizontal distance and a sturdy wall bracket will give you the cleanest signal path you can achieve without moving to a dedicated listening room.
DIY Wall Mounting
Budget-conscious users can build a wall shelf from a solid piece of hardwood bolted to a French cleat or steel bracket. Make sure the shelf can support at least three times the weight of your turntable for safety. Add a thin layer of sorbothane between the turntable and the shelf for extra damping.
DIY and Budget-Friendly Solutions From Real Users
DIY and budget-friendly solutions can be surprisingly effective when you understand what they’re actually doing. Forum users have tested these methods for years and reported consistent results.
Heavy Books Under the Turntable
Placing four large, heavy books under the turntable adds mass loading and creates a stable platform. This is the most common budget solution on vinyl forums, and it works because mass resists vibration better than light materials. Use phone books, encyclopedias, or large textbooks.
The downside is aesthetics. Books aren’t exactly a design choice for most setups. But for a $0 solution that genuinely reduces vibration, hard to beat.
Foam Pads and Mattress Toppers
Closed-cell foam pads work at mid and high frequencies but don’t help much with low-frequency bass. Cut a piece of high-density foam to size and place it under the turntable. It’s cheap, easy to replace, and provides noticeable improvement over direct furniture contact.
Granite Counter Samples
Stone yards often sell granite and marble remnants for pennies on the dollar. A 12-inch square granite tile under your turntable adds significant mass for under $10. Combine it with sorbothane feet for a stacked isolation approach that handles both high and low frequencies.
Yoga Blocks and Tennis Balls
High-density yoga blocks under a turntable provide a cheap mass-loading layer. Tennis balls cut in half work as basic isolation feet for very low cost. Neither solution is ideal, but both are better than nothing when budget is tight.
Floor-Specific Recommendations
Floor-specific recommendations matter because different floor types transmit vibrations differently. The fix that works on concrete won’t necessarily work on a wood floor over a basement.
Wood Floor Setups
Wood floors transmit vibrations easily, especially footfall noise and structure-borne sound from the building below. Place your turntable on a wall shelf if at all possible. If wall mounting isn’t an option, use a heavy platform with sorbothane feet to break the vibration path from the floor to the plinth.
Concrete Floor Setups
Concrete floors transmit low-frequency vibration from speakers and building systems but absorb high-frequency footfall noise better than wood. A heavy granite platform on sorbothane feet works well because it adds mass that the concrete floor cannot excite.
Carpeted Floor Setups
Carpet absorbs some vibration but creates instability for turntables that need a level surface. Use a hard platform (plywood, MDF, or stone) on top of the carpet to create a stable base, then add isolation feet between the platform and the turntable.
Step-by-Step Implementation Guide
Follow this step-by-step implementation guide to set up your turntable for the cleanest possible playback on shared furniture. The whole process takes about an hour.
Step 1: Test Your Current Setup
Play a bass-heavy record at moderate volume and listen for rumble, skipping, or feedback. Note how bad the problem is so you can measure improvement later.
Step 2: Relocate the Speakers
Move each speaker to its own stand, placed at least four feet from the turntable. Aim the speakers at your listening position, not at the turntable. Test playback again to measure improvement.
Step 3: Add Mass Under the Turntable
Place a granite or marble slab (or heavy books) under the turntable. This adds mass loading that resists vibration.
Step 4: Install Isolation Feet
Place four sorbothane hemispheres or Vibrapods between the turntable and the mass platform. These break the mechanical connection between the turntable and the surface.
Step 5: Level Everything
Use a bubble level on the platter. Adjust the furniture or platform feet until the surface is perfectly flat in both directions.
Step 6: Fine-Tune Speaker Distance
Adjust the speaker distance and toe-in angle while listening for feedback. Each room has its own optimal placement based on walls, furniture, and listening position.
Troubleshooting Checklist: When Solutions Don’t Work
Run through this troubleshooting checklist when solutions don’t work. Each item addresses a specific cause of persistent vibration problems.
Verify the turntable is truly level — even small tilts cause tracking issues.
Check that the stylus is properly seated in the cartridge and the tracking force is correct.
Inspect the belt or direct-drive motor for wear that adds its own vibration.
Confirm the speakers are not resting against any wall or furniture — direct contact transmits vibration.
Test with the dust cover removed — covers can resonate and amplify airborne vibration.
Try different isolation feet materials — sometimes one frequency range is the problem, not all of them.
Move the turntable to a different wall — some walls are more rigid than others.
Add a subwoofer isolation pad if you use one — subwoofers cause the worst feedback problems.
Frequently Asked Questions
Can I have my speakers on the same table as my turntable?
Yes, but you’ll need active isolation between them. Place sorbothane feet under the turntable, add mass loading with a granite slab, and keep the speakers at least three to four feet from the turntable. Same-table placement always produces some vibration transfer, so separate surfaces give better results when space allows.
How far away should my turntable be from my speakers?
Keep your turntable at least three to four feet from the nearest speaker, with five to six feet being ideal. Point the speakers away from the turntable and aim them at your listening position. Greater distance reduces the level of acoustic feedback that reaches the stylus.
What is the best isolation platform for a turntable?
The best isolation platforms combine mass loading with damping feet. A granite slab with sorbothane hemispheres underneath handles both low and high frequencies. Spring platforms work for low frequencies but introduce bounce. The stacked approach — sorbothane feet, granite slab, solid shelf — outperforms any single solution.
Do turntables need separate speakers?
Turntables don’t require separate speakers, but they perform best when vibration sources are physically isolated. Built-in speakers in the same cabinet as the turntable cause severe feedback problems. External speakers on separate stands or shelves give the cleanest playback.
How do I stop turntable rumble during bass-heavy music?
Stop turntable rumble by adding mass under the turntable, using sorbothane or spring isolation feet, moving speakers farther away, and lowering playback volume during bass-heavy passages. Wall mounting the turntable eliminates footfall vibration and gives the biggest improvement for bass-related rumble.
What is the 83% rule for speakers?
The 83% rule for speakers refers to placing speakers at roughly 83% of the room width apart from each other, forming an equilateral triangle with the listening position. This rule is about stereo imaging rather than turntable isolation, but it helps position speakers optimally for clean sound.
Final Thoughts on Decoupling Your Turntable From Speakers
Learning how to decouple a turntable from speakers on the same furniture comes down to breaking the mechanical path between them and adding mass to absorb any vibration that does travel through. Separate surfaces with dedicated speaker stands are the gold standard, but stacked isolation using sorbothane feet, a granite slab, and a stable shelf delivers real results in shared-furniture setups. Start with the cheapest fixes first — leveling, distance, and isolation feet — then add mass loading if you still hear rumble. Wall mounting is the best long-term solution if your space allows it.