
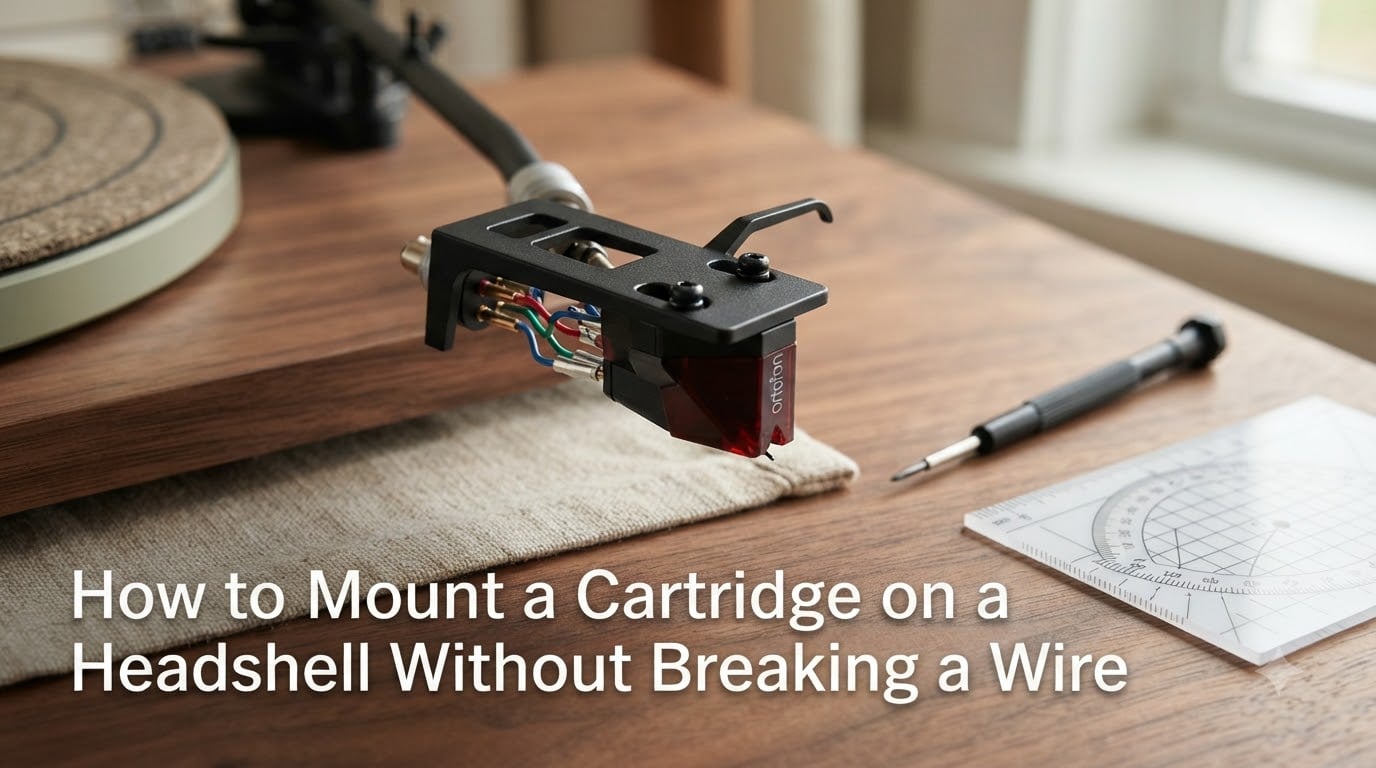
Mounting a phono cartridge on a headshell without breaking a wire is the most nerve-wracking part of any turntable upgrade. The good news is that with the right tools, the right order of operations, and a little patience, anyone can do it. I have swapped dozens of cartridges over the years and broken exactly two wires, both because I rushed.
This guide walks you through every step of the process, from prepping your workspace to dialing in the final tracking force. You will learn the color code, the toothpick trick that fixes loose sleeves, and how to avoid the most common mistake that causes wires to snap. Whether you are installing your first cartridge or troubleshooting a stubborn connection, this is the complete walkthrough.
Table of Contents
What a Headshell and Cartridge Actually Do?
The headshell is the removable, finger-sized connector at the end of your tonearm. It holds the cartridge, carries the four tonearm leads, and gives you a convenient handle to lift the arm on and off the record. The cartridge is the small box-shaped component that bolts to the headshell and houses the stylus and cantilever.
Inside the cartridge, a tiny stylus traces the grooves of your vinyl. Vibrations travel up the cantilever, through coils or a generator, and out through four colored pins on the back. Those pins are the part you will be connecting wires to, and the part that breaks most often when handled roughly.
When people talk about a “broken wire,” they usually mean one of two things. Either the thin copper conductor inside the silicone insulation snapped from being yanked, or the plastic connector sleeve broke off at its base. Both problems usually require re-soldering if you let them happen. The whole point of this guide is to make sure you do not.
Tools and Preparation Before You Touch a Wire
Good preparation is the difference between a 20-minute job and a soldering-iron afternoon. Gather everything before you touch the headshell, then work in good light at a comfortable table.
Workspace setup checklist
A clean, flat table with good overhead lighting
A soft towel or mousepad to rest the headshell on without scratching it
A small cup or tray for screws so they do not roll away
Magnification (a clip-on loupe or reading glasses help)
About 30 uninterrupted minutes, especially on your first attempt
Recommended tools
Needle-nose pliers (smooth jaws, no teeth)
A non-magnetic Phillips or hex screwdriver sized to your mounting screws
An alignment protractor (Baerwald or Stevenson type)
A small awl or wooden toothpick
A stylus guard or the original plastic clip from your new cartridge
Tracking force gauge (unless your tonearm has a built-in dial)
I keep a dedicated jeweler’s screwdriver set in a small box just for cartridge work. The screws on most headshells are tiny, and the wrong size driver will chew up the head instantly. If your screwdriver does not fit cleanly, stop and find the correct size.
Removing the Old Cartridge Without Snapping Wires
The removal step is where most wire breakage happens. People grab the cartridge body and pull, the connector sleeves stretch, and the thin wire tears inside its insulation. Slow down here, even if you have done it before.
Step 1: Loosen the mounting screws
Put the stylus guard on if your cartridge has one. Flip the headshell over so you can see the two mounting screws that pass through the cartridge slots. Turn each screw counterclockwise about three full rotations, just enough that the cartridge can slide freely. Do not remove the screws.
Step 2: Free the headshell safely
Lock the tonearm in its rest, then unlock the headshell collar by turning the locking collar on the tonearm end. Slide the headshell straight off the arm. Place it face down on your soft towel so the stylus does not take any weight.
Step 3: Pull each connector with needle-nose pliers
This is the critical move. Grip the connector sleeve itself, not the wire, with your needle-nose pliers. Pull straight off the pin, with steady pressure in line with the pin, not at an angle. Wiggle the sleeve very slightly side to side while you pull if it resists.
A forum regular on AudioKarma put it best. Quote: “Remove the connectors with long nosed pliers. You risk breaking the head shell lead. Remove wire off the cartridge pin, rather than pulling the pin out.” That single sentence has saved me probably six broken wires over the years.
If a connector sleeve feels stuck, do not pull harder. Stop, take a breath, and rotate the sleeve back and forth on the pin as you apply gentle outward pressure. Almost every stuck sleeve will slide free with this technique.
How to Mount a Cartridge on a Headshell Without Breaking a Wire?
Now we get to the heart of the task. With the old cartridge off and the headshell wires free, you are ready to mount the new one. The keyword here is patience. Each connection gets about five seconds of attention, and that is plenty.
Understanding cartridge wire color codes
Almost every headshell wire follows the same color standard, even across brands. Knowing the code by heart removes most of the guesswork.
Red – Right channel, positive (+)
Green – Right channel, negative (-)
White – Left channel, positive (+)
Blue – Left channel, negative (-)
The pins on the back of the cartridge are usually labeled, though the lettering can be tiny. You will often see L+, L-, R+, and R- or just a small diagram. Match red to R+, green to R-, white to L+, blue to L-. Take a photo of the cartridge back with your phone before you start so you can zoom in if needed.
Matching the pin diameter: the toothpick trick
Here is where the problem most often shows up. Headshell pins are typically 1.0mm in diameter. Cartridge pins are usually 1.2mm. That 0.2mm gap is just enough to make the connector sleeves fit loosely, which leads to bad contact and intermittent sound.
The fix is the toothpick trick, and it is wonderfully simple. Take a wooden toothpick and gently nudge the inside of each connector sleeve to slightly tighten it. Press the toothpick tip against the inside wall of the sleeve and rotate once. This compresses the metal contact just enough to grip a 1.2mm pin firmly.
You can also use a tiny awl or even a matchstick if a toothpick is too thick. The goal is a snug slip-fit, not a force-fit. Test by pushing the sleeve onto a spare pin or a 1.2mm drill bit if you have one. It should slide on with light pressure and resist being pulled off.
Connecting each wire without stressing the tabs
Push each connector sleeve straight onto its matching cartridge pin. Apply pressure to the sleeve, not to the wire. If the sleeve does not slide on smoothly, stop and check the pin diameter or re-tighten the sleeve. Forcing a tight sleeve onto a pin can crack the plastic base.
Work in this order to avoid mixing channels up:
Red onto the right positive pin
Green onto the right negative pin
White onto the left positive pin
Blue onto the left negative pin
Once all four are connected, give each one a gentle tug to confirm it is seated. A properly seated sleeve should resist a light pull and feel firm against the pin. If any wire wiggles on its pin, repeat the toothpick step on that sleeve.
Securing the cartridge to the headshell
Slide the new cartridge into the headshell slots so the stylus end faces the front of the headshell. Insert the two mounting screws through the slots and tighten them just enough to hold the cartridge in place. Do not fully tighten yet. You will need movement for alignment.
Make sure the cartridge sits flat against the headshell surface. Any gap or tilt will skew the alignment and can cause channel imbalance. If the cartridge rocks slightly, double-check that nothing is under it, including a stray bit of wire insulation.
Cartridge Alignment for Proper Tracking
A perfectly mounted cartridge that is misaligned will sound worse than a sloppy mount that is aligned. Take your time here, because alignment determines how the stylus sits in the groove, which affects everything from channel balance to record wear.
Setting overhang and null points
Place an alignment protractor over your turntable spindle. Two popular choices are the Baerwald and Stevenson geometries, and either will work for most arms. Move the cartridge until the stylus tip lines up with the outer reference point on the protractor.
Tighten one mounting screw just slightly to hold the position. Then check the inner null points on the protractor. Adjust the cartridge forward or backward in the slots until both null points line up with the stylus at the same time. Once aligned, tighten both screws fully but gently.
Confirming alignment visually
With the screws tight, slide the cartridge once more and double-check the null points. Tiny shifts can happen as you tighten. If everything still lines up, you are ready to balance the tonearm.
Final Tonearm Setup: Tracking Force, Anti-Skate, and VTA
Reattach the headshell to the tonearm and lock the collar. Set the anti-skate to zero and the tracking force to zero. Float the arm and adjust the counterweight until the tonearm balances perfectly level. Then dial in the tracking force recommended by your cartridge manufacturer, typically between 1.5 and 2.5 grams.
Set the anti-skate to match the tracking force. Start at the same number and adjust by ear later if needed. VTA, the vertical angle of the arm relative to the record, is a fine-tuning step that most beginners can skip on the first install. Make a small note of where the arm height sits, then come back to it after a few hours of listening.
Common Mistakes and How to Avoid Them
I learned most of these by watching other people make them, including myself. Each one is easy to prevent once you know what to watch for.
Yanking wires instead of the connector sleeve. Always grip the sleeve, never the wire.
Skipping the stylus guard. A dropped headshell can snap the cantilever in an instant.
Over-tightening mounting screws. Most cartridges use plastic bodies and will crack if you gorilla them down.
Mixing up the color code. Photograph the cartridge back before you disconnect the old one.
Forcing a tight connector sleeve. Re-tighten with the toothpick trick rather than push harder.
If a wire does break, do not panic. A competent soldering technician can usually repair a broken tab in about 15 minutes, and replacement headshell leads cost less than a new record. Prevention is the goal, but mistakes are fixable.
Frequently Asked Questions
How do I attach a cartridge to a headshell?
Slide the cartridge into the headshell slots with the stylus facing forward, then thread the two mounting screws through the slots. Leave the screws loose until you have aligned the cartridge using a protractor, then tighten them gently.
Do headshell wires make a difference?
Yes. Headshell wires carry the low-level signal from each channel of your cartridge, and damaged or loose wires cause hum, dropouts, or channel imbalance. Clean, snug connections matter more than exotic cable brands for most listeners.
How do I attach a cartridge to a tonearm?
Mount the cartridge to the headshell first, then slide the headshell into the tonearm end and lock the collar. Match the colored leads to the pins on the cartridge back before installing the headshell on the arm.
How do I align a cartridge on a headshell?
Place an alignment protractor over the spindle, then slide the cartridge until the stylus lines up with both the outer reference point and the inner null points on the protractor. Tighten the mounting screws once both points are aligned.
What is the difference between a headshell and a cartridge?
A headshell is the removable plastic or metal piece at the end of the tonearm that holds the cartridge and carries the four tonearm leads. A cartridge is the small component that bolts to the headshell and contains the stylus and signal-generating coils.
Final Thoughts
Knowing how to mount a cartridge on a headshell without breaking a wire is a skill every vinyl listener will use eventually. The process is mostly about patience, the right tools, and respect for those tiny connector sleeves. Take your time, follow the color code, use the toothpick trick when a sleeve feels loose, and check your alignment before you tighten anything down.
Set aside a quiet half hour, lay out your tools, and treat the first install as practice. By your second cartridge swap, the whole process will feel routine. Your records, your stylus, and your nerves will all thank you.