
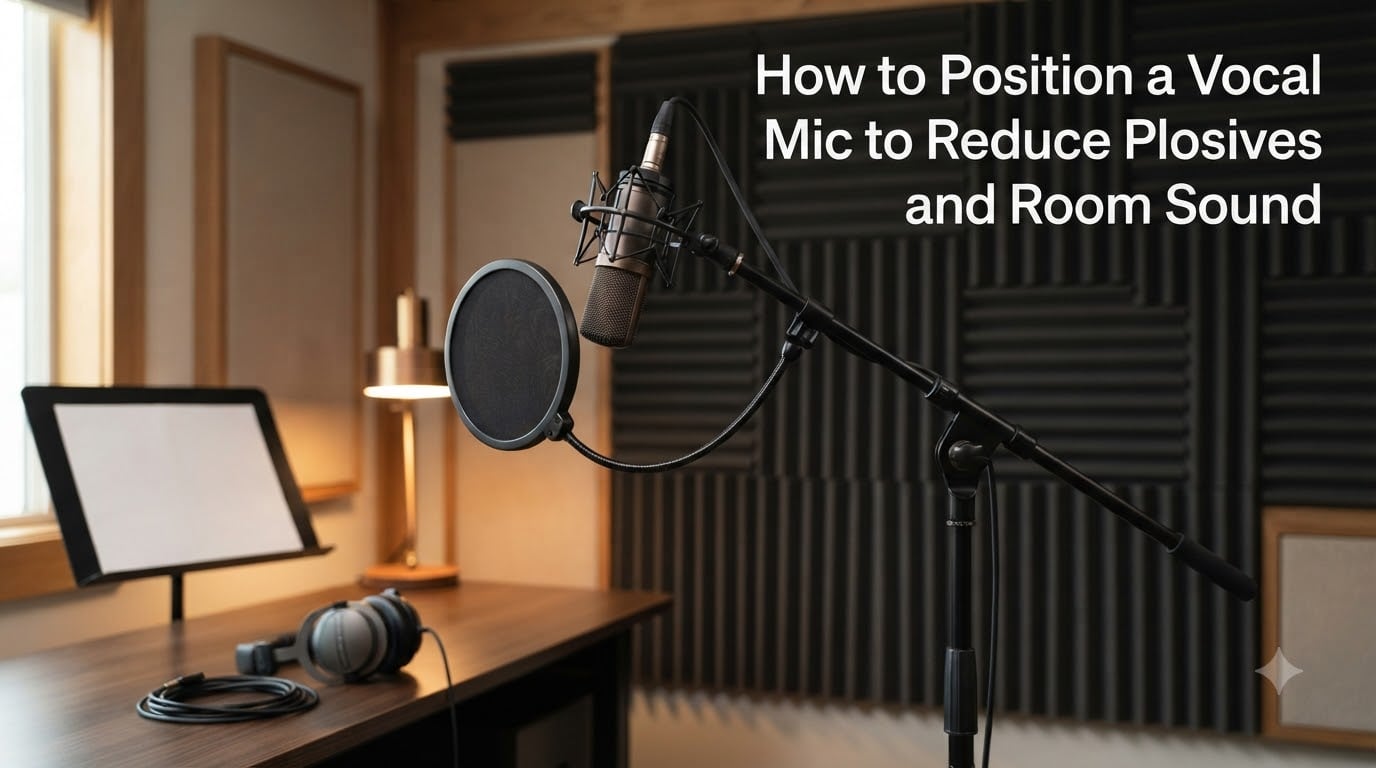
Nothing kills a vocal take faster than a massive plosive thump on every “P” and “B” sound, or a room that makes your voice sound like it was recorded in a tile bathroom. I have spent years recording vocals in everything from treated studios to tiny closets, and the single biggest improvement always comes down to one thing: how you position the microphone.
Learning how to position a vocal mic to reduce plosives and room sound is the most cost-effective upgrade you can make. No plugin, no expensive microphone, and no post-production trick will fix bad positioning as well as getting it right at the source.
In this guide, I will walk you through the exact techniques our team uses to get clean, professional vocal recordings. We will cover why plosives happen, how the proximity effect changes your tone, the specific angles and distances that work, and how to tame room reflections even in an untreated bedroom.
Table of Contents
Why Plosives Happen: The P, B, and T Problem?
Plosives are those sharp, low-frequency thumps that hit your microphone when you pronounce certain consonants. The worst offenders are P, B, T, D, K, and G sounds. Here is the mechanics of why they cause problems.
When you say a plosive consonant, your lips or tongue release a small burst of air. This directional puff of air travels outward and hits the microphone capsule with concentrated force. The diaphragm gets pushed hard, creating a sudden spike of low-frequency energy that overwhelms the signal.
P and B sounds are the most destructive because they come from both lips pushing air forward in a focused stream. T and D sounds are less severe because the air exits the mouth in a slightly more dispersed pattern, but they can still cause noticeable popping on sensitive condenser mics.
The key insight is that plosives are an air pressure problem, not a volume problem. Turning down the gain will not fix them. You need to physically redirect or diffuse that burst of air before it reaches the microphone capsule.
This is why positioning matters more than any other single factor. If the air blast never hits the diaphragm head-on, the plosive never gets recorded in the first place. Everything you do with filters, angle adjustments, and distance works toward this same goal.
Understanding the Proximity Effect
The proximity effect is a phenomenon where directional microphones, particularly cardioid and figure-8 patterns, produce more bass response as the sound source gets closer. Move a vocal mic from 12 inches away to 2 inches away, and you will hear a dramatic increase in low-frequency warmth.
This can be a creative tool. Some vocalists deliberately get close to the mic to add richness and intimacy to their tone. Radio DJs and voice-over artists use this trick constantly to get that deep, authoritative sound.
But the proximity effect works against you when you are trying to reduce plosives. A singer who gets too close is simultaneously boosting bass frequencies and increasing the impact of air blasts. The result is a plosive that is not only louder but also reinforced by the proximity-boosted low end.
Here is a practical guideline for how distance changes your sound. At 1 to 2 inches, you get maximum proximity effect with heavy bass boost and maximum plosive risk. At 4 to 6 inches, you get noticeable warmth with moderate plosive risk. At 6 to 12 inches, you get natural, balanced tone with manageable plosive risk. Beyond 12 inches, you get minimal proximity effect but increased room sound pickup.
The sweet spot for most vocals is between 6 and 12 inches. This distance gives you enough bass to sound full without turning every plosive into a bass-heavy explosion. It also gives the air burst room to dissipate before it reaches the capsule.
How to Position a Vocal Mic to Reduce Plosives and Room Sound?
Here are seven proven techniques for positioning your vocal mic to minimize both plosives and room reflections. Stack as many of these as you can for the cleanest possible recordings.
1. Place the microphone slightly above mouth level. Position the capsule at nose-to-eye height, roughly 2 to 4 inches above your mouth. Angle it downward toward your mouth at about 10 to 15 degrees. This lets the air blast from plosives pass below the capsule rather than hitting it directly.
2. Use the off-axis technique. Instead of singing straight into the front of the mic, position your mouth slightly to the side. A 15 to 45 degree off-axis angle lets the air burst travel past the capsule while you still capture clear vocal tone. Many engineers on Reddit’s audio engineering forums swear by the 45-degree approach.
3. Maintain 6 to 12 inches of working distance. This distance balances proximity effect, plosive reduction, and room sound. Closer than 6 inches increases plosive impact. Farther than 12 inches lets the room reflections creep in and dominate your signal.
4. Always use a pop filter. Place a nylon or metal mesh pop filter 2 to 3 inches in front of the microphone capsule. This diffuses the air blast from plosives before it reaches the diaphragm. A pop filter alone solves about 70 percent of plosive problems when combined with proper distance.
5. Angle the mic downward toward the singer. When the mic is mounted above mouth level and tilted down, gravity works in your favor. The air from plosives naturally travels slightly downward and forward, passing beneath the angled capsule instead of slamming into it.
6. Use the finger test to find dead zones. Hold your hand in front of your mouth while saying “P” and “B” sounds repeatedly. Move your hand in a downward and sideways arc until you find a position where you no longer feel the air puff. That is where you point your microphone.
7. Consider a secondary pop filter for difficult voices. Some vocalists produce plosives so strong that one pop filter is not enough. Placing two pop filters with a small gap between them can catch what the first one misses. This is a trusted technique from voice-over professionals.
Mic Height and Angle: Positioning Above Mouth Level
Raising the microphone above mouth level is one of the simplest and most effective positioning changes you can make. It costs nothing and immediately reduces plosive severity.
When the mic sits at mouth level or below, every burst of air from plosives travels in a straight line into the capsule. The diaphragm takes the full force, and you get that familiar thump on your recordings.
By mounting the mic 2 to 4 inches above the mouth and tilting it downward at a slight angle, you redirect the problem. The singer performs at a natural angle, looking slightly upward. The air burst from plosives passes below the capsule because the mic is positioned above the direct air stream.
This technique has a secondary benefit. It encourages singers to tilt their chin slightly upward, which opens the throat and can improve vocal projection. Some vocal coaches actually recommend this posture for better breath support.
Be careful not to go too high. If the mic is positioned above eye level, the singer will strain their neck backward. This creates tension in the throat and can negatively affect vocal performance. Keep the capsule between nose and eye height for the best balance.
Working Distance Guidelines for Vocal Recording
Getting the distance between the singer’s mouth and the microphone right is critical. Too close and you battle plosives and proximity effect. Too far and the room takes over your recording.
For lead vocals, 6 to 12 inches is the universally accepted working distance. This range gives you a larger sweet spot where small movements do not dramatically change the tone. At this distance, the microphone captures plenty of direct vocal sound while picking up minimal room reflections.
For intimate, whispered, or soft vocals, you might move closer to the 4 to 6 inch range. This adds warmth from the proximity effect and creates a sense of closeness. Just be extra vigilant about pop filter placement and off-axis angle at this distance.
For loud, powerful singers, pushing them back to 10 to 14 inches can help. This prevents overload and gives their voice room to develop before hitting the capsule. The added distance also reduces plosive impact since the air burst dissipates over a longer travel path.
Podcasters and voice-over artists often work at 4 to 8 inches. This is close enough for that warm, present broadcast sound while still leaving enough room for a pop filter to function effectively.
Off-Axis Recording Techniques
Off-axis recording means positioning the microphone so that it is not pointing directly at the sound source. Instead of singing straight into the front of the capsule, the vocalist performs at an angle to the mic.
The most common off-axis technique is the 45-degree approach. The microphone points across the singer’s mouth rather than directly at it. The vocal sound reaches the capsule, but the directional air blast from plosives travels past the side of the mic.
This technique is especially effective with cardioid microphones. A cardioid pattern is most sensitive at the front and rejects sound from the sides and rear. Off-axis positioning takes advantage of this rejection pattern to minimize the plosive air blast while still capturing the vocal performance clearly.
The trade-off is a slight reduction in high-frequency detail. Off-axis positioning can soften the top end slightly because high frequencies are more directional than low frequencies. For most vocal recordings, this is barely noticeable. For bright voices or sibilant singers, it can actually be a benefit.
Experiment with angles between 15 and 45 degrees. Start at 15 degrees for minimal tone change and increase the angle until plosives are controlled. The right angle depends on the specific microphone, the singer’s technique, and the room.
Room Acoustics: How Your Room Affects Every Recording?
Your room is part of your signal chain whether you like it or not. Every surface reflects sound back toward the microphone, and those reflections color your recording in ways that are difficult to remove later.
Sound travels from the singer to the microphone directly, but it also bounces off the floor, ceiling, walls, and any nearby furniture. The microphone captures both the direct sound and the reflected sound. The reflected sound arrives slightly later, creating a smeared, echoey quality.
The concept of critical distance is important here. Critical distance is the point where the direct sound from the source equals the reflected sound from the room. If your microphone is placed beyond the critical distance, you are recording more room than voice.
In a small untreated room, the critical distance might be as short as 1 to 2 feet. This means that by the time your singer is 12 inches from the mic, room reflections are already a significant part of the signal. This is why untreated bedrooms often sound boxy and distant.
Standing waves are another problem in small rooms. These are low-frequency resonances that build up between parallel walls. They create uneven bass response where certain notes boom and others disappear. Standing waves are why your mixes might sound great in your room but terrible everywhere else.
Where you place the mic in the room matters too. Avoid corners, where low-frequency buildup is worst. Stay away from the exact center of the room, where standing waves are most intense. Positioning about one-third of the way into the room from the front wall is generally a good starting point.
DIY Acoustic Treatment Without Spending a Fortune
You do not need to spend thousands on acoustic panels to improve your recordings. The forum communities on Reddit consistently recommend budget solutions that genuinely work.
The blanket fort method is the most popular DIY approach. Hang heavy moving blankets or acoustic blankets on mic stands around the singer to create a temporary vocal booth. This absorbs reflections before they bounce back to the microphone. It is ugly but effective, and many professional voice-over artists still use this method.
The closet method works well for some home recordists. Recording inside a walk-in closet surrounded by hanging clothes provides natural absorption. The fabric diffuses and absorbs reflections, creating a dry, intimate sound. The trade-off is a slightly smaller, more confined tonal quality.
For a more permanent solution, start with the reflection points. These are the spots on your walls, ceiling, and floor where sound from the microphone first bounces. Placing absorption at these points, even just thick rugs on the floor and foam panels at ear level on the walls, makes a noticeable difference.
Bass traps in the corners handle the low-frequency buildup from standing waves. You can build DIY bass traps from rigid fiberglass insulation wrapped in fabric, or use stacked rolls of fluffy insulation in the corners as a budget alternative.
The most cost-effective single upgrade is a thick rug on a hard floor. If you have tile, hardwood, or laminate flooring, the floor is your biggest reflection surface. A dense area rug between the singer and the mic immediately reduces slap-back echo.
Remember that the goal is not to make the room completely dead. You want to control reflections, not eliminate all natural ambience. A room that is too dead can sound claustrophobic and lifeless.
Dynamic vs Condenser Microphones for Home Studios
Your microphone choice affects how much room sound and how many plosives you capture. Dynamic and condenser microphones behave very differently in untreated spaces.
Large-diaphragm condenser microphones are sensitive and detailed. They capture a wide frequency range with excellent transient response. But that sensitivity means they also pick up more room reflections, background noise, and plosive energy. In an untreated bedroom, a condenser mic might capture more room than you want.
Dynamic microphones are less sensitive and have a narrower pickup pattern. They reject off-axis sound better, which means they capture less room sound. They also handle high sound pressure levels without distortion, making them naturally more resistant to plosives.
This is why dynamic mics like the Shure SM7B and SM58 are so popular for podcasting and home recording. They forgive imperfect rooms in ways that condenser mics cannot.
If you have a well-treated room, a condenser microphone gives you the detail and openness that dynamics cannot match. If your room is untreated, a dynamic mic will give you cleaner results with less effort.
The 3:1 Rule for Microphone Placement
The 3:1 rule is a guideline for using multiple microphones on a single source. It states that the distance between two microphones should be at least three times the distance from each microphone to the sound source.
For example, if your main vocal mic is 6 inches from the singer’s mouth, any second microphone should be at least 18 inches away from the first mic. This prevents phase cancellation, a problem where sound arrives at the two mics at slightly different times and creates destructive interference.
Phase cancellation causes certain frequencies to drop out, creating a hollow, thin, or comb-filtered sound. It is one of the most common problems in multi-mic setups and is difficult to fix after recording.
Even if you are using a single microphone, the 3:1 rule has relevance. If there are reflective surfaces near your mic, like a music stand or a nearby wall, the reflected sound arriving at the mic can create phase issues with the direct sound. Keeping reflective surfaces at least three times the distance of your mic-to-source distance minimizes this.
The 3:1 rule is not a law of physics. It is a practical guideline that works well in most situations. For critical applications, you can test by moving the second mic while monitoring in mono and listening for phase cancellation.
Additional Tools: Pop Filters, De-Essers, and High-Pass Filters
Physical positioning is your first line of defense, but a few additional tools can clean up whatever plosives and sibilance slip through.
A pop filter is non-negotiable for vocal recording. Nylon mesh filters are the most common and are inexpensive. Metal mesh filters are more durable and slightly more transparent because they do not attenuate high frequencies. Either type should sit 2 to 3 inches in front of the capsule.
A high-pass filter, also called a low-cut filter, removes frequencies below a set point, usually 80 or 100 Hz. Most plosive energy lives below 100 Hz. Engaging the high-pass filter on your microphone or audio interface immediately reduces plosive thumps. It also cleans up rumble from HVAC systems, traffic, and floor vibrations.
Apply the high-pass filter before compression. Compression amplifies low-frequency plosive energy, making it worse. If you cut the lows first, the compressor has less destructive material to amplify.
A de-esser is a tool for controlling sibilance, those harsh “S” and “Sh” sounds. While not directly related to plosives, sibilance is the high-frequency cousin of the same problem. A de-esser dynamically reduces specific high-frequency ranges when sibilant sounds occur.
For plosives specifically, a dynamic equalizer or multiband compressor can target the 20 to 150 Hz range and duck only the plosive energy. This is more surgical than a static high-pass filter and preserves low-end warmth in the rest of the performance.
Frequently Asked Questions
How to make a mic sound less roomy?
Move the microphone closer to the source, ideally 6 to 12 inches for vocals. Add absorption around the singer using blankets or acoustic panels at reflection points. Switch to a dynamic microphone, which rejects more off-axis room sound than a condenser. Avoid corners and the center of the room where reflections and standing waves are strongest.
How to reduce plosives on a mic?
Position the microphone slightly above mouth level and angle it downward toward the mouth. Maintain 6 to 12 inches of distance. Sing slightly off-axis at 15 to 45 degrees. Always use a pop filter placed 2 to 3 inches in front of the capsule. Engage a high-pass filter at 80 to 100 Hz before compression to cut plosive low-frequency energy.
Where should the mic be placed in the room for vocals?
Place the microphone about one-third of the way into the room from the front wall. Avoid corners where low-frequency buildup is worst and the exact center where standing waves peak. Surround the singer with absorption at the first reflection points. Keep the mic away from hard parallel surfaces like bare walls and uncovered windows.
What is the 3:1 rule for mics?
The 3:1 rule states that the distance between two microphones should be at least three times the distance from each microphone to the sound source. If your vocal mic is 6 inches from the singer, a second mic should be at least 18 inches away from the first. This prevents phase cancellation and comb filtering from destructive interference.
How to reduce room echo on microphone?
Reduce room echo by moving closer to the microphone to increase the direct-to-reflected sound ratio. Add acoustic absorption at reflection points using thick rugs, blankets, or foam panels. Use a microphone with a tighter polar pattern like cardioid or supercardioid. Record in a room with soft furnishings rather than empty hard-surface spaces.
How to make a room sound less echoey?
Cover hard floors with thick area rugs. Hang heavy curtains over windows. Place bookshelves filled with books along bare walls to break up flat reflective surfaces. Add acoustic panels or foam at ear-level reflection points. Use bass traps in corners to control low-frequency standing waves. Record inside a closet surrounded by hanging clothes for natural absorption.
Putting It All Together
Getting clean vocal recordings is not about having the most expensive gear. It is about understanding how to position a vocal mic to reduce plosives and room sound at the source. Every positioning decision compounds, and small adjustments create dramatic improvements.
Start with the fundamentals: mount the mic above mouth level, angle it downward, maintain 6 to 12 inches of distance, and always use a pop filter. Add off-axis positioning if plosives persist. Treat your room with whatever budget solutions you have available, even if that means blankets on mic stands.
Your next step is to test these techniques in your own space. Record the same vocal passage with different positions and distances, then compare them critically. Your ears will tell you exactly what works for your voice, your microphone, and your room.